Soldering Skills for Reattaching Loose Laptop Components
Soldering skills are essential for effectively reattaching loose laptop components. Whether you’re a DIY enthusiast or a professional technician, learning the art of soldering can save you money and enhance your repair skills. In this article, we will explore the necessary techniques and tools required for successful laptop component soldering. We will also discuss common issues with laptop motherboards and how to fix them.
If you’re new to soldering, it’s important to start with the right equipment. A soldering iron, flux, solder, and a desoldering pump are the basic tools you’ll need for laptop component soldering. You can find affordable soldering kits online or at local electronics stores. Additionally, you can practice your soldering skills by creating simple circuits or repairing broken electronics. Remember to take safety precautions, such as wearing goggles and using a fan for ventilation.
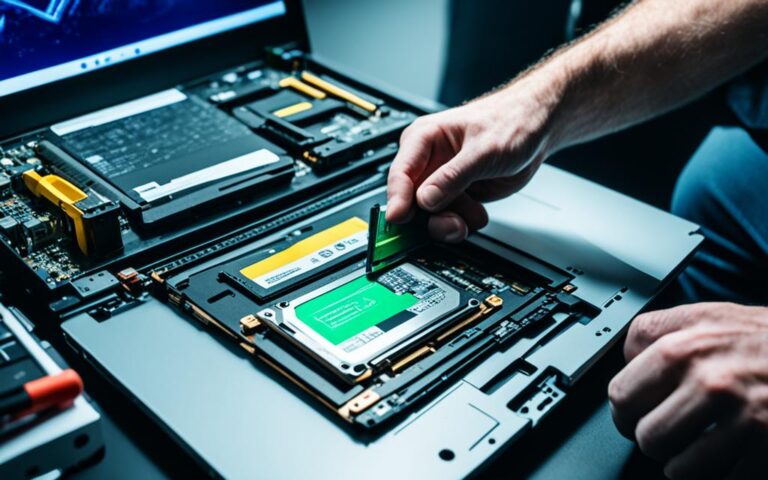
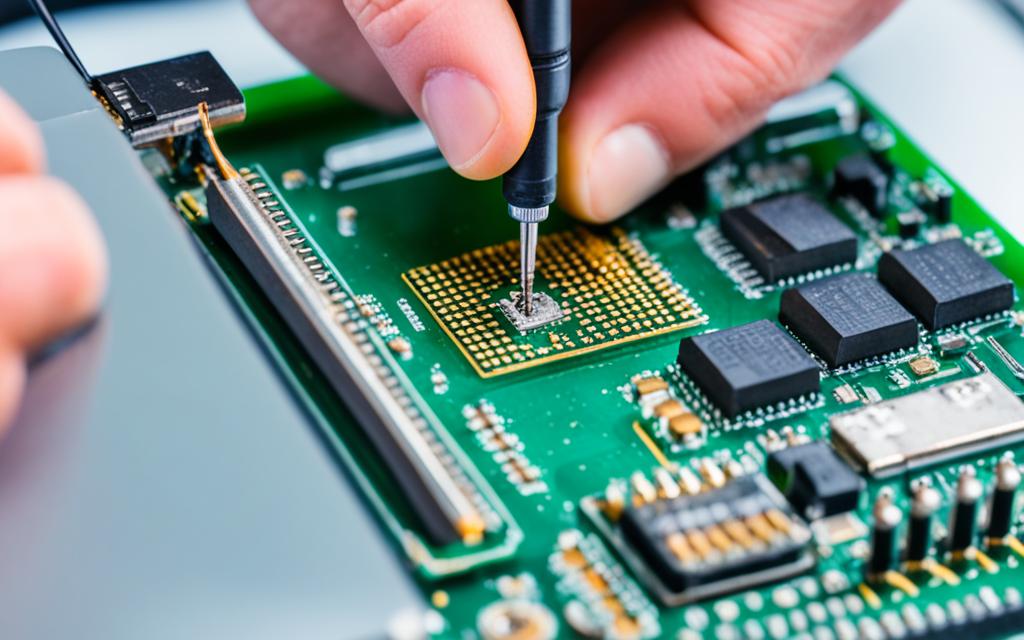
When repairing a laptop motherboard, it’s crucial to identify the specific issue before beginning any repair work. Common problems include faulty components, damaged traces, and loose connections. Use a multimeter to test for continuity and short circuits. If you identify a faulty component, carefully remove it with a soldering iron and desoldering tools, then replace it with a compatible replacement. In the case of damaged traces, scrape away the protective coating and reconnect them with solder or a thin wire.
When soldering laptop components, it’s important to follow best practices to avoid causing further damage. Avoid overheating components by applying the soldering iron for short periods and using the correct temperature. When reseating components, such as RAM modules or CPUs, handle them with care and ensure they are properly aligned. After making repairs, test the motherboard by powering on the laptop and checking if the issue is resolved. If you’re unsure about your soldering skills, consider seeking help from a professional technician to avoid voiding the warranty.
Laptop component soldering is a valuable skill for DIY enthusiasts and professional technicians. With the right equipment and techniques, you can effectively reattach loose laptop components and save money on repairs. However, it’s important to exercise caution to avoid causing further damage or voiding warranties. If you’re unsure about your soldering skills or the complexity of the repair, it’s advisable to seek help from a professional technician or service center. Happy soldering!
Getting Started with Laptop Component Soldering
If you’re new to soldering, it’s important to start with the right equipment. Learning soldering requires a few essential tools to ensure successful laptop component soldering. The following equipment will help you get started:
Related:


- Soldering iron: This is the key tool for soldering. Choose a soldering iron with adjustable temperature settings to suit different types of components.
- Flux: Flux helps remove oxidation from the surface, ensuring a clean and secure solder joint.
- Solder: High-quality solder with a blend of tin and lead is recommended for reliable connections.
- Desoldering pump: This tool is essential for removing excess solder or correcting mistakes during the soldering process.
You can easily find affordable soldering kits online or at local electronics stores. These kits usually include the basic tools mentioned above. It’s advisable to invest in a kit that provides a soldering iron with interchangeable tips for versatility.
Once you have the necessary equipment, it’s time to practice soldering. As a beginner, you can start by creating simple circuits or repairing broken electronics. These hands-on exercises will help you develop your skills and familiarize yourself with the soldering process.
Remember to take proper safety precautions while soldering. Wear goggles to protect your eyes from any potential splashes, and work in a well-ventilated area or use a fan to avoid inhaling fumes.
To give you a better understanding of the equipment needed for laptop component soldering, take a look at the table below:
| Soldering Equipment | Description |
|---|---|
| Soldering Iron | The main tool used for soldering components onto a circuit board. |
| Flux | A substance that helps prepare the surface for soldering by removing oxidation. |
| Solder | A metal alloy that melts to form a strong bond between components. |
| Desoldering Pump | A tool used to remove excess solder or correct mistakes during soldering. |
Now that you have a better understanding of the equipment required, you’re ready to dive into the world of laptop component soldering. Practice regularly and gradually challenge yourself with more complex soldering tasks. With time and experience, you’ll become proficient in this valuable skill.
https://www.youtube.com/watch?v=HuFavAop0Vw
Soldering Techniques for Laptop Motherboard Repair
When repairing a laptop motherboard, it’s crucial to identify the specific issue before beginning any repair work. Common problems include faulty components, damaged traces, and loose connections. To diagnose these issues, you can use a multimeter to test for continuity and short circuits.
“Identifying the root cause of the problem is the first step towards effective laptop motherboard repair.”
If you identify a faulty component during testing, it’s important to handle it with care. Using a soldering iron and desoldering tools, delicately remove the faulty component from the motherboard. Take note of the component’s identification and specifications to ensure you find a compatible replacement.
Replacement of Faulty Components
When replacing a faulty component:
- Step 1: Heat the solder joint with the soldering iron to melt the solder.
- Step 2: Use desoldering tools, such as a desoldering pump or desoldering braid, to remove the molten solder.
- Step 3: Gently lift the component away from the motherboard using a pair of tweezers or a chip extractor.
- Step 4: Carefully insert the replacement component into the correct position, aligning the pins or leads with their corresponding holes or pads.
- Step 5: Apply heat to each solder joint using the soldering iron, allowing the solder to melt and create a secure connection.
- Step 6: Once all solder joints are secure, allow the solder to cool and solidify before testing the motherboard.
In addition to faulty components, damaged traces can also cause issues with laptop motherboards. If you discover damaged traces, you can repair them by:
- Step 1: Scrape away the protective coating on the damaged trace using a small knife or fiberglass brush.
- Step 2: Clean the exposed trace and surrounding area with isopropyl alcohol and a cotton swab.
- Step 3: If the gap in the trace is small, apply solder over it to bridge the connection. Ensure the solder flows smoothly and adheres to the exposed copper.
- Step 4: If the gap is larger, use a thin wire, such as a jumper wire, to bridge the connection. Strip the ends of the wire, solder one end to the trace, and then solder the other end to the appropriate pad or component.
By following these soldering techniques, you can effectively repair laptop motherboards and restore functionality to your device.
| Issue | Solution |
|---|---|
| Faulty Components | Replace the faulty component with a compatible replacement |
| Damage Traces | Scrape away protective coating and reconnect with solder or a thin wire |
| Loose Connections | Inspect and ensure connections are securely soldered |
Tips and Considerations for Laptop Component Soldering
When soldering laptop components, it’s important to follow best practices to avoid causing further damage. Here are some essential tips to keep in mind:
Soldering Tips
- Apply the soldering iron for short periods to prevent overheating the components.
- Use the correct temperature setting on your soldering iron to ensure proper solder flow and avoid damaging delicate components.
- Always tin your soldering iron tip before starting to solder. This helps with heat transfer and ensures better solder joints.
- Trim excess solder and use flux to improve solder flow and adhesion.
Avoiding Damage
- Protect sensitive components with heat sinks or heat-resistant tape during soldering.
- Keep the soldering iron tip clean and free from oxidation or debris for optimal heat transfer.
- Avoid excessive pressure or movement when soldering to prevent damaging the solder joints or nearby components.
- Use a helping hand tool or a third hand to hold the component in place while soldering, ensuring stability and precision.
Reseating Components
When reseating components, such as RAM modules or CPUs, it’s important to handle them with care and follow these guidelines:
- Gently remove the component, ensuring not to bend any pins or contacts.
- Clean the contacts or pins using isopropyl alcohol and a lint-free cloth if necessary.
- Align the component correctly with its socket or slot and apply downward pressure evenly.
- Double-check that the component is securely seated before proceeding with soldering.
Testing Repairs
After making the necessary repairs, it’s crucial to test the motherboard to ensure that the issue has been resolved. Here are some steps to follow:
- Power on the laptop and observe if the previously identified issue still persists.
- Perform functionality tests for the repaired component or circuit to ensure proper operation.
- Check for any new issues or abnormalities that may have arisen during the repair process.
- Consider running diagnostic software or stress tests to further evaluate the repaired laptop.
If you’re unsure about your soldering skills or the complexity of the repair, it’s advisable to seek help from a professional technician to avoid voiding the warranty.
Conclusion
In conclusion, mastering laptop component soldering can be a valuable skill for both DIY enthusiasts and professional technicians. By acquiring the right equipment and techniques, you can effectively reattach loose laptop components and save money on repairs. However, it is crucial to exercise caution during the soldering process to prevent further damage and avoid voiding warranties.
If you are uncertain about your soldering skills or if the repair is complex, it is highly recommended to seek professional assistance from a qualified technician or a reputable service center. They have the expertise and experience to handle intricate repairs while ensuring that your laptop’s warranty remains intact. Investing in professional assistance not only guarantees a reliable repair but also offers peace of mind.
Remember, laptop repairs can be intricate and delicate, warranting the need for professional intervention at times. While it is rewarding to tackle repairs on your own, it is essential to weigh the risks involved. To avoid unnecessary complications and potential warranty issues, entrusting your laptop to a skilled professional is a prudent decision. So, whether you’re dealing with a loose component or a complex motherboard issue, don’t hesitate to seek professional help when needed. Happy soldering and may your laptop be restored to its optimal functioning!