Welcome to our comprehensive guide on laptop charging port soldering. This soldering guide is designed for UK DIY enthusiasts and professionals looking to repair or replace a faulty or loose DC power jack on their laptop. Please note that this repair requires soldering and computer repair experience, so it’s essential to assess your comfort level before proceeding.
If you’re confident in your soldering skills and have the necessary tools, this guide will provide step-by-step instructions on how to replace a laptop charging port. However, if you’re unsure or inexperienced in this area, it’s recommended to seek professional repair services.
A related repair case also appears in fixing loose damaged ports, where the same kind of fault can point to parts wear, diagnosis steps, or replacement choices.
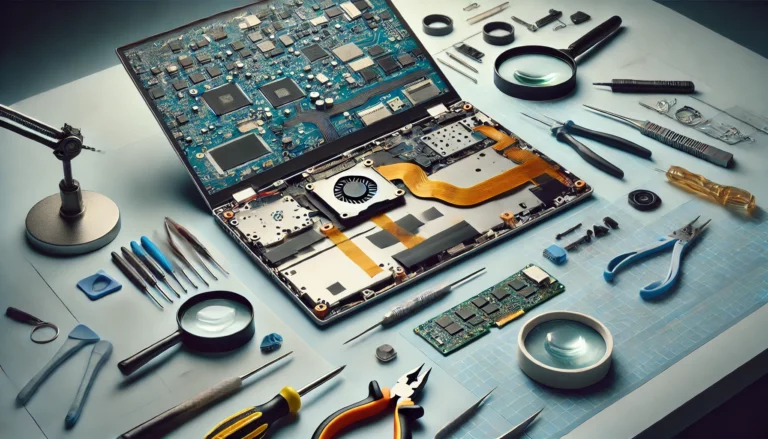
To successfully replace a laptop charging port, you’ll need tools such as a soldering iron, rosin core solder, desoldering pump, isopropyl alcohol, and a new DC power jack. These tools are essential for a smooth and effective repair process.
Throughout this guide, we’ll cover various aspects of laptop charging port soldering, troubleshooting common power issues, and ensuring a successful repair. Our aim is to equip you with the knowledge and understanding needed to tackle this task with confidence.
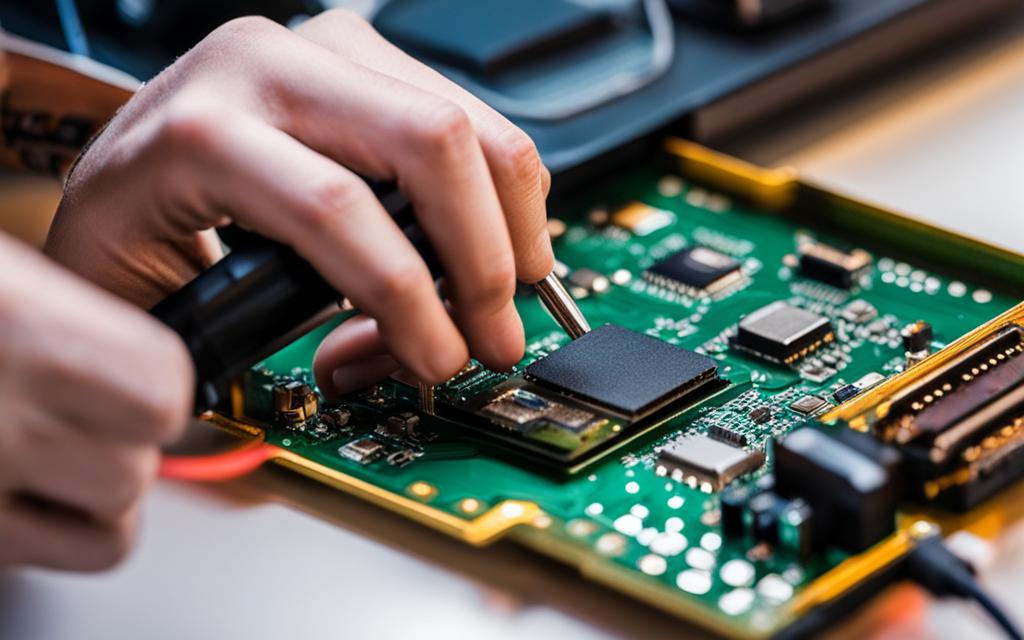
If you’re experiencing issues with your laptop’s power jack, this repair guide will walk you through the process of replacing it. Keep in mind that this repair requires soldering skills and familiarity with working on motherboards, so if you’re not confident in your abilities, it’s best to seek professional assistance. Here’s a step-by-step breakdown of the repair process:
Desolder the power jack: Begin by desoldering the power jack from the motherboard. This will involve adding fresh solder to all three contacts of the power jack to make the old solder easier to remove. Next, use a desoldering pump to carefully remove the solder from each contact and gently detach the power jack from the motherboard.
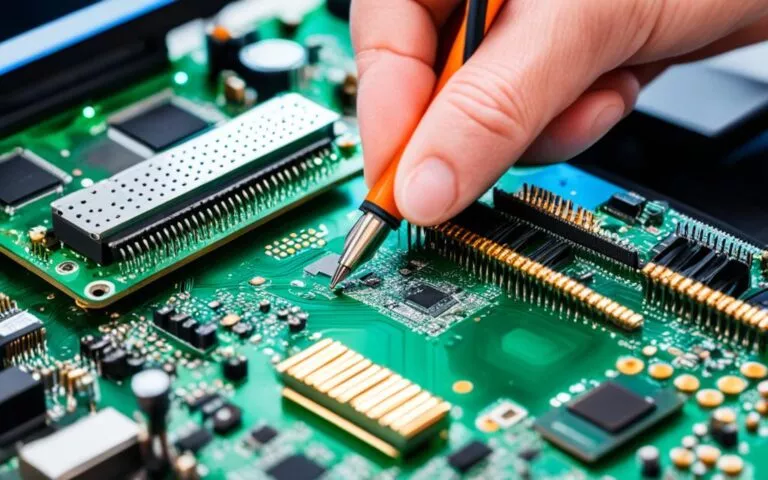
Clean the contacts: After removing the power jack, clean the contacts on both the power jack itself and the motherboard using a knife. This will ensure a clean and solid connection when you reattach the new power jack.
Apply fresh solder: Apply a fresh coat of solder to all the contacts on the power jack. This will ensure a secure connection between the power jack and the motherboard. Make sure to clean off any flux residue using a toothbrush and isopropyl alcohol.
Reinstall and solder: Once the contacts are clean and soldered, carefully reinstall the power jack onto the motherboard. Make sure all the pins are correctly aligned with their respective holes. Then, solder all the pins to secure the power jack firmly in place.
Following these steps will help you replace a faulty power jack on your laptop. Remember to exercise caution when soldering and avoid causing damage to the motherboard or other components.
Modifying Damaged DC Jack Terminal
If you accidentally damage the internal copper coating (sleeve) of the “+” terminal on the power jack, there’s a solution to modify the damaged DC jack terminal using a small resistor or capacitor lead.
Follow these steps to modify the damaged DC jack terminal:
Remove the copper sleeve: Carefully remove the copper sleeve from the “+” terminal of the power jack.
Shape the lead: Shape the resistor or capacitor lead to fit the connector on the power jack.
Solder the lead: Using a soldering iron, solder the lead to the power jack, ensuring a secure connection.
Scrape off the varnish: Carefully scrape off the green varnish around the hole on the “+” terminal of the motherboard, exposing the metal surface.
Widen the hole (if necessary): If the hole on the “+” terminal of the motherboard is too small, you may need to widen it using an awl or a small file.
Apply fresh solder: Apply a fresh coat of solder to the clear area of the trace on the motherboard, ensuring a good electrical connection.
Install the power jack: Install the modified power jack onto the motherboard and align it with the mounting holes.
Solder the pins: Solder all the pins of the power jack onto the motherboard, except for the modified “+” pin.
Shape the lead (again): Shape the resistor or capacitor lead to fit the modified “+” terminal on the motherboard, ensuring a proper connection.
Remove excess flux: After soldering, remove any excess flux residue using a toothbrush and isopropyl alcohol.
By following these steps, you can successfully modify the damaged DC jack terminal, allowing you to restore functionality to your laptop.
Troubleshooting Laptop Power Issues
If your laptop is experiencing a power failure, there are several troubleshooting steps you can take to resolve the issue at home.
Check the power cable: Start by ensuring that the power cable is properly connected to both the laptop and the power outlet. Make sure there are no loose connections or frayed wires.
Inspect for bent pins: Examine the AC adapter and the power port on the laptop for any bent pins. Bent pins can prevent a proper power connection and result in power failure.
Drain electricity: If necessary, drain the remaining electricity from the laptop by disconnecting the power cable and holding down the power button for about 10 seconds. This can help reset any power-related issues.
Battery troubleshooting: Remove the laptop’s battery and reinsert it after a minute. Sometimes, a faulty battery connection can cause power failure. By removing and reinserting the battery, you can determine if the issue lies with the battery or the AC adapter.
By following these troubleshooting steps, you can identify and resolve common power-related issues with your laptop. If the problem persists, it may be advisable to seek professional assistance for a thorough diagnosis and repair.
Expert Insight:
“When troubleshooting laptop power issues, it’s important to start with the basics. Check the power cable connection and inspect for any physical damage or loose connections. Often, simple steps like draining electricity or reseating the battery can resolve the issue. If the problem persists, it’s best to consult a professional for further assistance.” – Jane Wilson, Laptop Repair Specialist
Checking AC Adapter Functionality
To ensure that your AC adapter is functioning properly, follow these steps:
Make sure the AC adapter is securely plugged into the wall outlet.
Check the LED indicator on the adapter. It should be on and green, indicating that power is being supplied.
If the LED is not on or is inconsistent, there may be an issue with the adapter. Consider replacing it.
Test the wall outlet where the adapter is plugged in using a voltmeter. This will verify if the outlet is delivering the appropriate power.
Next, check the connection between the adapter and the laptop. Ensure that all components are properly connected, and there are no loose or damaged cables.
Remember: It is important to address AC adapter issues promptly as faulty adapters can lead to problems with charging and powering your laptop.
Common AC Adapter Issues
AC adapters can encounter several problems, including:
Frayed or damaged cables
Loose connection between the adapter and the laptop
Malfunctioning LED indicator
Insufficient power output
Identifying and resolving these issues promptly can help ensure the proper functioning of your laptop and prevent further damage to its components.
Troubleshooting Laptop Battery Issues
If you suspect a problem with your laptop’s battery, there are a few troubleshooting steps you can take to identify and resolve the issue. Follow the guide below to troubleshoot laptop battery problems:
Step 1: Draining Electricity
To begin, remove the battery from your laptop. Press and hold down the power button for 15 seconds to drain any remaining electricity from the system. This step helps reset the power settings and clears any temporary issues that may be affecting the battery performance.
Step 2: Battery Connection
After draining the electricity, plug in the power cable and try turning on the laptop without the battery. If the laptop powers up successfully, it indicates a potential problem with the battery. Proceed to the next step for further troubleshooting.
Step 3: Battery Reinsertion
Reinsert the battery into the laptop and ensure it is securely connected. Make sure the battery contacts are clean and free from any dirt or debris. Then, reconnect the laptop to the power cable and try turning it on again. If the issue persists, move on to the next step.
Step 4: Seek Professional Help
If your laptop has an in-built battery or if the above troubleshooting steps didn’t resolve the issue, it’s best to seek professional help to avoid causing further damage. A trained technician can diagnose and repair complex battery issues accurately.
By following these troubleshooting steps, you can identify and potentially resolve laptop battery issues. However, if the problem persists or if your laptop has an in-built battery, it’s recommended to consult a professional technician for assistance.
Conclusion
Soldering a laptop charging port can be a complex task that requires experience and the right tools. For DIY enthusiasts with soldering and computer repair skills, the provided guides can be a valuable resource for replacing a faulty or loose DC power jack. However, it’s crucial to proceed with caution and prioritize safety.
If you’re unsure or inexperienced in laptop repair, it’s highly recommended to seek professional repair services. Professional technicians have the expertise and knowledge to handle delicate soldering tasks and ensure a successful repair without causing further damage to your laptop.
Remember, when it comes to laptop charging port soldering and troubleshooting, it’s always better to err on the side of caution. Prioritizing your safety and consulting with experts can save you from potential risks and costly mistakes. Whether you choose to tackle the repair yourself or seek professional help, make informed decisions to ensure the longevity and functionality of your laptop.
FAQ
Can I repair a laptop charging port by soldering it myself?
Yes, if you have experience in soldering and computer repair. However, it is recommended to seek professional help if you are unsure or inexperienced to avoid further damage.
How can I repair a failed or loose DC power jack on a laptop computer?
To repair a failed or loose DC power jack, you will need to desolder the power jack from the motherboard, clean the contacts, apply fresh solder, and reinstall the power jack onto the motherboard by soldering all the pins.
What should I do if I accidentally damage the internal copper coating of the “+” terminal on the power jack?
If you accidentally damage the internal copper coating of the “+” terminal on the power jack, you can modify the damaged terminal with a small resistor or capacitor lead. This involves removing the copper sleeve, shaping the lead to fit the connector, soldering the lead to the power jack, scraping off the green varnish, widening the hole if necessary, applying fresh solder, and installing the power jack on the motherboard.
How can I troubleshoot power issues on my laptop?
To troubleshoot power issues, you can start by checking if the power cable is properly connected, inspecting for any bent pins on the AC adapter or power port, draining the electricity from the laptop, removing and reinserting the battery, and testing the AC adapter’s functionality and the connection between the adapter and the laptop. Seeking professional help is recommended if necessary.
How can I check if my AC adapter is functioning properly?
To check if your AC adapter is functioning properly, ensure it is securely plugged into the wall outlet, check if the LED indicator on the adapter is on and green, and test the wall outlet with a voltmeter to ensure it is delivering power. Additionally, check the connection between the adapter and the laptop to ensure all components are properly connected.
How can I troubleshoot laptop battery issues?
To troubleshoot laptop battery issues, you can remove the battery and drain any remaining electricity, plug in the power cable, and try turning on the laptop without the battery. If it turns on without the battery, the issue may be with the battery itself. Try reinserting the battery and reconnecting the laptop to the power cable to see if it resolves the issue. Seek professional help if your laptop has an in-built battery.
What should I do if I am not comfortable with soldering and computer repair?
If you are not comfortable with soldering and computer repair, it is best to take your laptop to a professional repair shop to ensure the repair is done correctly and to avoid further damage. Prioritize your safety and consult with experts when necessary.
The touchscreen controls on Windows 11 can sometimes feel unresponsive and sluggish. This can be frustrating when trying to navigate and interact with the laptop. But don’t worry, there are ways to improve touchscreen responsiveness and troubleshoot any issues you may be experiencing. By following a few simple steps, you can optimize your laptop’s touchscreen…
Welcome to our comprehensive guide on advanced soldering techniques for laptop component upgrades. If you’re looking to enhance your hardware skills and maximize your laptop’s performance, this article is for you. We’ll delve into the intricacies of upgrading soldered components like RAM and CPUs, overcoming limitations, and the key considerations you need to keep in…
If you’ve accidentally spilled liquid on your laptop keyboard, you may be wondering how to fix the keys that are not working. The good news is that in most cases, a water damaged keyboard can be repaired. This article will provide you with expert tips and steps to restore functionality to your laptop keys after…
After long-term use, the laptop display ribbon cable is prone to damage, such as wire core breakage, bending, loose interface and other problems, which will cause the laptop to not work properly. In addition, the material of the cable will age and harden, and the interface elasticity will decrease, which will also lead to poor…
Having trouble with your laptop keyboard is really annoying. This keyboard repair guide will show you how to tackle laptop keyboard issues. You’ll learn about common problems and how to fix keys that don’t work. We’ll discuss simple cleaning methods and software checks. This guide has all the details for fixing your laptop keyboard. Understanding…
Is your Acer laptop screen showing a black screen? This guide will help you fix it. We’ll show you how to repair your Acer laptop screen. You’ll learn how to reset the power and use specific function keys. Fixing a black screen on your Acer laptop can be tough. But, with the right steps, you…