Laptops have become essential tools in our daily lives, but they can experience various issues, including motherboard short circuits. In this article, we will explore the process of troubleshooting and repairing laptop motherboard short circuits. We will discuss the symptoms of a short circuit, steps to repair it, safety precautions to take, and when to seek professional assistance. By following these guidelines, you can safely and efficiently restore functionality to your laptop.
In today’s digital age, laptops play a vital role in both personal and professional domains. However, these devices are susceptible to various technical problems, and one common issue is a motherboard short circuit. When a short circuit occurs, it can disrupt the normal flow of electricity within the motherboard, leading to malfunctioning or non-functional laptop components.
Identifying the symptoms of a motherboard short circuit is crucial for effective troubleshooting. Some telltale signs include failure to power on, overheating, random shutdowns, no display, and a burnt smell. These symptoms may indicate that there is a short circuit compromising the motherboard’s integrity. It is essential to address these issues promptly to prevent further damage and restore your laptop’s functionality.
Repairing a laptop motherboard short circuit requires a systematic approach. By following a series of steps, you can diagnose and rectify the problem. It is crucial to take appropriate safety precautions, such as wearing an anti-static wrist strap and working in an electrostatic discharge (ESD) safe environment, to prevent any additional damage.
Using specialized tools like a multimeter can help detect and troubleshoot the short circuits in the motherboard. By checking the continuity of inductors, you can identify areas affected by the short circuit. Similarly, inspecting components such as capacitors, MOSFETs, and graphics cards can help pinpoint the root cause of the short circuit.
Once the failed component causing the short circuit is identified, repairs can be made. Depending on the nature of the damage, techniques such as replacing capacitors, MOSFETs, or the graphics card may be necessary. Attention to detail during soldering and thorough testing after repairs are vital to ensure success and prevent further damage.
In conclusion, troubleshooting and repairing laptop motherboard short circuits is a complex process that requires knowledge, patience, and attention to detail. By following the steps outlined in this article, you can enhance your understanding of these issues and acquire the skills needed to resolve them. However, it’s important to acknowledge that some motherboard issues may require professional assistance. If you are unsure about any aspect of the repair process or lack the necessary expertise, it is advisable to seek help from a qualified technician. By prioritizing safety and taking appropriate repair measures, you can save on costly repairs or replacements and prolong the life of your laptop.
A motherboard short circuit occurs when two or more electrical components on the motherboard come into contact, creating an unintended path for electricity. This can be caused by physical damage, liquid spills, or manufacturing defects.
Common symptoms of a motherboard short circuit include:
Failure to power on
Overheating
Random shutdowns
No display
A burnt smell
Identifying these symptoms is crucial to properly diagnose the issue and proceed with the repair process. If you experience any of these issues, it’s important to take immediate action to prevent further damage to your laptop.
Remember, a laptop motherboard short circuit can lead to extensive damage if not addressed promptly and correctly.
Causes of a Laptop Motherboard Short Circuit
There are several causes of a laptop motherboard short circuit:
Cause
Description
Physical damage
Accidental drops, bumps, or mishandling of the laptop can result in component misalignment or damage, leading to a short circuit.
Liquid spills
Spilling liquid onto the laptop can cause corrosion or component damage, leading to short circuits.
Manufacturing defects
In rare cases, manufacturing defects can cause electrical components to come into contact, resulting in a short circuit.
By understanding the causes and symptoms of a laptop motherboard short circuit, you can take the necessary steps to diagnose and address the issue. In the next section, we will delve into the repair process for laptop motherboard short circuits, ensuring that you have the knowledge and confidence to troubleshoot and fix this common problem.
Steps to Repair a Laptop Motherboard Short Circuit
Repairing a laptop motherboard short circuit requires careful attention and precise steps. By following these repair procedures, you can effectively fix the issue and restore functionality to your laptop.
1. Power off the laptop and disconnect all peripherals.
2. Use a multimeter to check for continuity between different components on the motherboard.
3. Look for signs of physical damage, burnt components, or liquid residue that can indicate the area of the short circuit.
Remove the Shorted Component
1. Use a desoldering pump to carefully remove the shorted component from the motherboard, ensuring no excess solder remains.
2. Clean the surrounding area with isopropyl alcohol to remove any flux residue and ensure a clean soldering surface.
Replacement and Soldering
1. Obtain a replacement component that matches the specifications of the original one.
2. Align the replacement component with the correct orientation and solder it onto the motherboard using a soldering iron.
3. Follow proper soldering techniques, ensuring a secure and reliable connection between the component and the motherboard.
4. Remove any excess solder and clean the area again with isopropyl alcohol.
Test and Verify
1. Reassemble the laptop, reconnect all peripherals, and power it on.
2. Test the laptop for any remaining issues, such as abnormal behavior or further short circuits.
3. Verify that the repaired area no longer exhibits signs of overheating or burning smells.
Safety Precautions
1. Always wear appropriate safety equipment, such as heat-resistant gloves and goggles, when working with soldering equipment.
2. Ensure the laptop is powered off and disconnected from any power sources before attempting any repairs.
3. Take necessary precautions to avoid Electrostatic Discharge (ESD) damage to sensitive components.
By following these steps, you can confidently repair a laptop motherboard short circuit and bring your laptop back to full functionality.
Detecting and Troubleshooting Short Circuits in Motherboards
Short circuits can pose significant challenges when it comes to motherboard functionality. To ensure effective repairs, it is crucial to detect and troubleshoot these short circuits using various techniques. By employing the right tools and methods, you can streamline the repair process and restore your motherboard’s optimal performance.
One effective method for detecting short circuits in motherboards is to utilize a multimeter. This versatile tool allows you to check the continuity of inductors, illuminating any potential short circuits. By following the connection path of affected inductors, you can identify the failed components causing the short circuit.
Common culprits behind motherboard short circuits include faulty capacitors, MOSFETs, graphics cards, loose connections, damaged traces, or improper voltage regulation. By familiarizing yourself with these common causes, you can narrow down the potential sources of the short circuit and expedite your troubleshooting process.
“Detecting short circuits is the first step towards successful motherboard repairs. By effectively identifying the components and circuitry affected, you can tackle the issue head-on and bring your motherboard back to life.”
In cases where the origin of the short circuit remains elusive, isolating the source circuit can provide valuable insights. By strategically removing inductors or components, you can narrow down the search and enhance your diagnostic capabilities.
Common Causes of Motherboard Short Circuits:
Faulty capacitors: Capacitors that have deteriorated or experienced leakage can create short circuits.
MOSFETs: Malfunctioning MOSFETs can disrupt the electrical flow on a motherboard, leading to short circuits.
Graphics cards: A damaged or improperly installed graphics card can cause short circuits, impacting overall motherboard performance.
Loose connections: Poorly connected cables or components can lead to unstable and short-circuited motherboard circuits.
Damage traces: Physical damage to the traces on the motherboard can result in short circuits.
Improper voltage regulation: Inadequate power regulation can cause short circuits, adversely affecting the motherboard’s operation.
By understanding these common causes, one can effectively troubleshoot and address motherboard short circuits. The key lies in detecting the short circuits, identifying the problematic components, and employing appropriate repair strategies.
Visually inspecting the motherboard for any physical damage or anomalies can also provide valuable insights during the troubleshooting process. Look for signs of burnt marks, melted circuits, or corrosion, which may indicate potential short circuit areas.
Now that we’ve explored the various methods of detecting and troubleshooting short circuits in motherboards, we can proceed to the next section to delve into the repair process. By deploying these techniques, you can address the underlying issues effectively and restore your motherboard’s functionality.
Once the failed component causing the short circuit is identified, repairs can be made. Depending on the component, various techniques such as replacing capacitors, MOSFETs, or the graphics card may be employed. Proper soldering techniques and thorough testing are essential to ensure successful repairs and prevent further damage to the motherboard. By following these repair strategies and understanding common short circuit issues, technicians can prolong the lifespan and functionality of motherboards.
Repair Techniques for Motherboard Short Circuits
When it comes to repairing motherboard short circuits, there are multiple techniques that can be used. Here are some common repair methods:
Component Replacement: If a specific component is identified as the cause of the short circuit, it may need to be replaced. This can include replacing damaged capacitors, faulty MOSFETs, or a malfunctioning graphics card. When replacing components, it’s important to choose high-quality replacements and ensure they are compatible with your motherboard.
Soldering: Proper soldering techniques are crucial when repairing motherboard short circuits. It’s essential to have the right equipment and skills to carry out precise soldering work. Ensuring clean connections and using the appropriate soldering iron temperature are crucial for successful repairs.
Thorough Testing: After the repair is completed, thorough testing is essential to verify that the short circuit has been successfully resolved. Testing can involve powering on the motherboard, checking for any overheating issues, and verifying that all components are functioning properly.
Proper repair techniques, along with a good understanding of common short circuit issues, can help technicians effectively repair and restore functionality to motherboards.
Example Repair Techniques:
Component
Repair Technique
Capacitors
Desolder and replace with new capacitors of the same specifications.
MOSFETs
Remove and replace the faulty MOSFETs using proper desoldering and soldering techniques.
Graphics Card
Replace the faulty graphics card with a compatible and functional one.
By utilizing these repair techniques and taking appropriate precautions, technicians can effectively repair motherboard short circuits and extend the lifespan of laptops and other devices.
Conclusion
Repairing a laptop motherboard short circuit may feel overwhelming, but armed with the right knowledge and tools, you can troubleshoot and fix the issue. By understanding the symptoms associated with motherboard shorts, taking necessary safety precautions, and following the step-by-step repair process outlined in this article, you can greatly enhance your chances of successfully restoring functionality to your laptop.
However, it’s crucial to keep in mind that certain motherboard issues may be beyond your expertise and require professional assistance. Don’t hesitate to seek help when needed, as attempting complex repairs without proper knowledge can lead to further damage. Investing in professional help can save you from costly repairs or even the need for a complete motherboard replacement.
By prioritizing safety and employing appropriate repair measures, you can not only save money but also prolong the lifespan of your laptop. Regularly maintaining and addressing any short circuit issues promptly can prevent more severe damage and keep your laptop operating smoothly for years to come. Remember to perform routine checks and implement protective measures to mitigate the risk of motherboard short circuits in the future.
FAQ
What is a motherboard short circuit?
A motherboard short circuit occurs when two or more electrical components on the motherboard come into contact, creating an unintended path for electricity.
What are the symptoms of a motherboard short circuit?
Common symptoms of a motherboard short circuit include failure to power on, overheating, random shutdowns, no display, and a burnt smell.
How can I repair a laptop motherboard short circuit?
To repair a laptop motherboard short circuit, you can follow steps such as identifying the failed component causing the short circuit and utilizing proper soldering techniques for repairs.
What are the common causes of short circuits in motherboards?
Common causes of short circuits in motherboards include faulty capacitors, MOSFETs, graphics cards, loose connections, damaged traces, or improper voltage regulation.
How do I detect and troubleshoot short circuits in motherboards?
Detecting and troubleshooting short circuits in motherboards can be done by using techniques such as utilizing a multimeter to check the continuity of inductors and following the connection path of affected inductors to identify the failed component.
How do I repair short circuits in motherboards?
Repairing short circuits in motherboards may involve techniques such as replacing faulty capacitors, MOSFETs, or the graphics card, along with employing proper soldering techniques and thorough testing.
Can I fix a laptop motherboard short circuit myself?
While it is possible to troubleshoot and fix a laptop motherboard short circuit yourself by following the repair steps outlined in this article, some motherboard issues may require professional expertise, so don’t hesitate to seek assistance when needed.
When it comes to laptop motherboard replacement, it is essential to consider a few important factors. The cost of a replacement motherboard may be higher than the overall value of the laptop, making it more cost-effective to replace the entire laptop in some cases. However, for high-spec laptops or desktop computers, replacing the motherboard can…
If you own a PlayStation 4 Slim and want to enhance your gaming experience, calibrating the motion controls can significantly improve the accuracy of your gameplay. By calibrating the motion controls, you can ensure that your controller responds precisely to your every move, providing a more immersive gaming experience. Calibrating the motion controls on your…
If you’ve accidentally spilled liquid on your laptop keyboard, you may be wondering how to fix the keys that are not working. The good news is that in most cases, a water damaged keyboard can be repaired. This article will provide you with expert tips and steps to restore functionality to your laptop keys after…
Welcome to the ultimate guide for laptop motherboard repair. Whether you’re a tech enthusiast or simply facing motherboard issues with your laptop, this comprehensive guide will provide you with expert advice and solutions to get your device up and running again. We understand the frustration that arises from laptop repair, especially when it involves the…
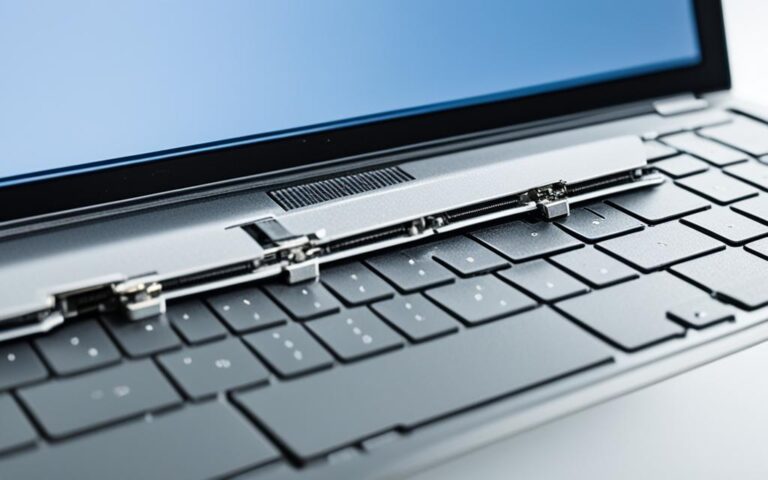
Laptop hinges play a critical role in the functionality of a laptop, allowing the screen to smoothly pivot open and closed. However, with frequent use, laptop hinges can become damaged or broken, rendering the device unusable. In this comprehensive guide, we will provide expert tips and solutions for laptop hinge repair, ensuring the longevity of…
An unresponsive mouse or touchpad can disrupt your workflow and slow productivity. Whether your cursor freezes mid-task or stops moving entirely, this issue often stems from software glitches or hardware malfunctions. Common causes include outdated drivers, system overload, or even dirt interfering with the touchpad. Some users accidentally disable their pointing device, while others face…