Repairing Laptop Case Cracks and Damage
Is your laptop case showing signs of wear and tear? Perhaps you’ve accidentally dropped it, resulting in a cracked or damaged case. Don’t worry – laptop case repairs are possible, and they can save you money on buying a new one. In this article, we will guide you through the process of repairing common laptop case issues, such as cracked laptop cases or damaged laptop cases.
At some point in your laptop’s lifespan, you may encounter problems like cracked laptop cases or damaged laptop cases. These issues can impact both the aesthetics and functionality of your laptop. However, with the right tools and materials, you can easily fix these problems without the need for professional laptop case repair services.
In the following sections, we will provide you with step-by-step instructions on how to repair different types of laptop case damage. Whether you are dealing with a cracked laptop case, frayed AC adapter cord, faulty cooling fan, or stress/fatigue cracks in the laptop case, we have got you covered. You will also find some temporary repair options and valuable DIY tips and recommendations to help you successfully restore your laptop case.
Repairing your laptop case is not only a cost-effective solution but also extends the lifespan of your laptop. So, let’s get started with the necessary repair techniques and bring your laptop back to its former glory.
Repairing a Frayed AC Adapter Cord
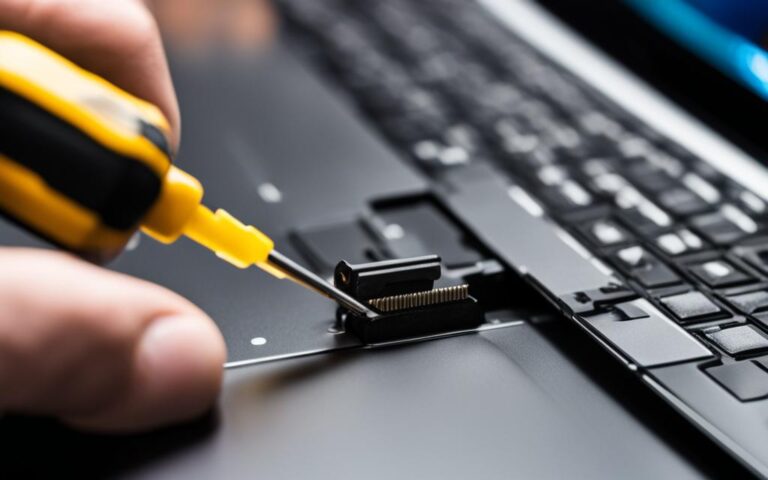
A frayed or damaged AC adapter cord can not only affect the charging of your laptop but also pose a fire hazard. Fortunately, replacing or fixing a frayed cord is relatively simple and inexpensive.
You have two options for resolving this issue. The first option is to purchase a new AC power cord. You can find a compatible power cord online or at electronics stores. Ensure that you select a cord that matches your laptop’s specifications.
Related:


The second option is to repair the frayed cord yourself. This DIY solution can save you money and time. By applying silicone sealant to the frayed areas, you can effectively reinforce and protect the cord from further damage.
To fix the frayed AC adapter cord using silicone sealant, follow these simple steps:
- Make sure the adapter is not plugged into the power source.
- Identify the frayed areas on the cord.
- Clean the frayed areas with a damp cloth to remove any dirt or debris.
- Apply a small amount of silicone sealant to the frayed areas, ensuring that it covers the exposed wires.
- Allow the sealant to dry completely before using the cord.
This repair can ensure that your laptop’s power supply remains intact and safe to use. Always prioritize safety and double-check that the cord is functioning properly before plugging it into any power source.
| Advantages of Repairing a Frayed AC Adapter Cord | Disadvantages of Repairing a Frayed AC Adapter Cord |
|---|---|
|
|
Fixing a Cracked Laptop Case
Cracked laptop cases are a common issue, especially when laptops are dropped or subjected to impact. A cracked case not only compromises the appearance of your laptop but also reduces its structural integrity. Thankfully, repairing a cracked laptop case is relatively straightforward and can be done at home with the right materials and techniques.
To fix a cracked laptop case, you will need laptop case epoxy putty, which is readily available at hardware stores. Epoxy putty is a versatile repair material that can bond and seal cracks effectively. It provides a durable and long-lasting solution, ensuring that your laptop case remains intact and protected from further damage.
Step-by-Step Guide to Repairing a Cracked Laptop Case:
- Start by cleaning the cracked area of your laptop case with a soft cloth and some mild detergent. This will remove any dirt, debris, or grease that may hinder the bonding process.
- Take a small amount of laptop case epoxy putty and knead it until it becomes pliable. Ensure that you follow the manufacturer’s instructions for proper mixing and handling.
- Apply the epoxy putty to the cracked section of the laptop case, using your fingers or a putty knife. Make sure to press it firmly into the crack, filling the entire gap.
- Smooth out the surface of the epoxy putty with a damp cloth or your finger. This will help create a seamless finish and ensure that the repaired area blends in with the rest of the laptop case.
- Allow the epoxy putty to cure and harden according to the manufacturer’s instructions. This usually takes a few hours, but it’s best to leave it overnight to ensure a strong bond.
- Once the epoxy putty has fully cured, gently sand the repaired area with fine-grit sandpaper to achieve a smooth and even surface. Be careful not to sand too aggressively, as this can damage the laptop case.
- If desired, you can paint the repaired area to match the color of your laptop case. Choose a paint that is specifically formulated for plastic surfaces and follow the instructions on the paint can for the best results.
By following this step-by-step guide, you can effectively fix the cracks in your laptop case and restore its structural integrity. Remember to exercise caution and take your time during the repair process to ensure the best possible outcome.
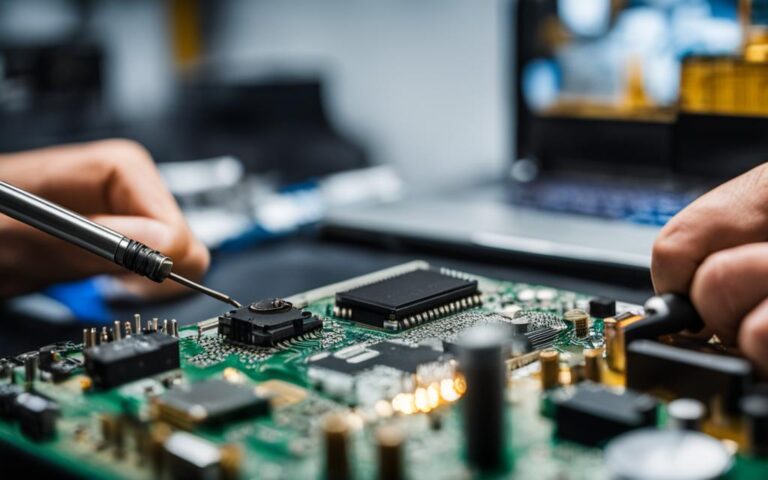
Repairing a Faulty Cooling Fan
A faulty cooling fan can have detrimental effects on the performance and lifespan of your laptop. Overheating issues can lead to system instability, sluggishness, and even complete hardware failure. Therefore, it is crucial to address any problems with your laptop’s cooling fan promptly.
The first step in troubleshooting a faulty cooling fan is to clean it thoroughly and remove any accumulated dust or debris. Dust buildup can impede the fan’s rotation and hinder its ability to dissipate heat effectively. To clean the fan, gently use compressed air or a soft brush to remove the dirt from the blades and surrounding areas.
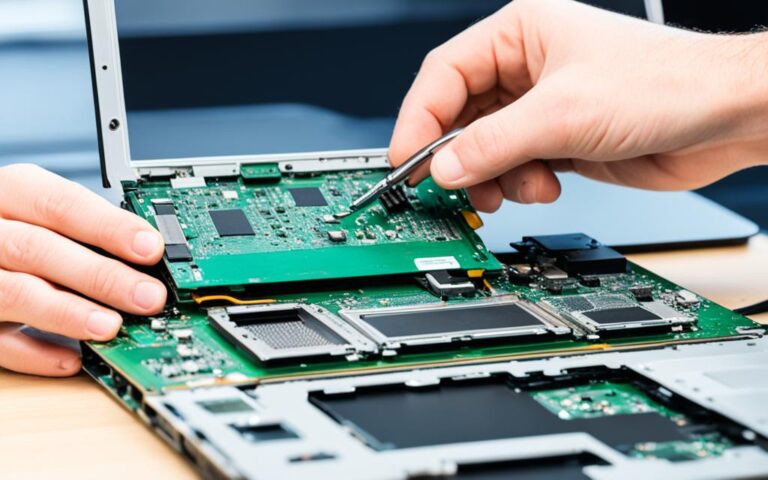
If cleaning the fan does not resolve the issue, it may be necessary to replace the faulty fan. Begin by identifying the model number of your laptop’s cooling fan. This information is typically located on the fan itself or in the laptop’s documentation. Once you have the model number, search online for a suitable replacement fan.
Replacing a laptop cooling fan is a relatively straightforward process that can be done with basic tools and minimal effort. Start by shutting down your laptop and disconnecting the power source. Next, locate and remove the screws or clips that secure the fan in place. Carefully detach the fan’s power connector from the motherboard and gently remove the old fan.
When installing the new fan, ensure that it aligns correctly with the mounting holes and fits securely in place. Reconnect the fan’s power connector to the appropriate port on the motherboard. Finally, reattach any screws or clips that hold the fan in position.
By repairing or replacing a faulty cooling fan, you can prevent further damage to your laptop caused by overheating. Adequate cooling is crucial for maintaining optimal performance and extending the lifespan of your laptop. Take proactive measures to ensure that your laptop remains cool and functional.
Benefits of Repairing a Faulty Cooling Fan:
- Prevents laptop overheating, which can lead to system instability and hardware failure.
- Preserves the performance and lifespan of your laptop by maintaining optimal temperatures.
- Safeguards against potential damage to other internal components.
- Enhances overall system performance by preventing thermal throttling.
A faulty cooling fan can lead to various issues, including laptop overheating and decreased performance. By addressing the problem promptly and either cleaning or replacing the fan, you can restore your laptop’s cooling capabilities and ensure its longevity. Don’t let a faulty cooling fan hinder your productivity or damage your laptop. Take the necessary steps to keep your device running smoothly.
Temporary Repairs for Laptop Case Damage
In some situations, temporary repairs for laptop case damage can provide a short-term solution until a permanent fix can be implemented. When faced with laptop case cracks or damage, there are a few temporary repair options to consider:
1. Chemical Weld or Adhesive
One option is to use a chemical weld or adhesive that can temporarily hold the broken parts of the laptop case together. These adhesives are designed to provide a strong bond and can be easily applied to the damaged areas. However, it’s important to note that these temporary repairs may not offer the same level of strength and durability as a permanent fix.
2. Hot Weld
Another approach to temporarily repair laptop case damage is through hot welding. This method involves melting the plastic components of the laptop case to create a reinforced bond in the affected areas. Hot welding can be effective in providing stability and preventing further damage. It’s important to exercise caution and precision when performing a hot weld to ensure the proper repair of the laptop case.
While these temporary repairs can provide some stability, it’s crucial to remember that they may not have the same strength as the original laptop case. Therefore, it is recommended to use these temporary solutions while awaiting a permanent repair or replacement.
Repairing Laptop Case Stress/Fatigue Cracks
Stress or fatigue cracks in laptop cases can be more challenging to repair. These cracks are often caused by repeated strain or external stress factors. One method to repair stress cracks is to use epoxy welding glue, which provides strength and rigidity to the damaged area. Another option is plastic welding, where a soldering iron is used to melt and reinforce the cracked parts. Both methods require careful application and attention to detail for a successful repair.
| Repair Method | Description |
|---|---|
| Epoxy Welding Glue | This method involves applying epoxy glue to the stress cracks, filling them in and providing structural support. The epoxy glue dries and hardens, creating a durable repair. Sanding and painting the area can further improve the cosmetic appearance of the laptop case. |
| Plastic Welding | Plastic welding utilizes a soldering iron or a heat gun to melt the cracked plastic parts and fuse them back together. This process strengthens the damaged area, restoring the case’s integrity. Care must be taken to avoid overheating and further damaging the surrounding plastic. |
Whether you choose epoxy welding glue or plastic welding, it’s essential to follow the appropriate instructions and safety precautions. These repairs should be done with precision and a focus on detail to ensure a successful outcome. If you’re unsure about performing these repairs yourself, it’s recommended to seek professional assistance to avoid further damage to your laptop case.
Benefits of Repairing Laptop Case Stress/Fatigue Cracks
- Restores the structural integrity of the laptop case
- Prevents further propagation of the cracks
- Enhances the durability and lifespan of the laptop case
- Improves the overall appearance of the laptop
“Repairing stress cracks in a laptop case not only fixes the immediate issue but also ensures the longevity and reliability of the device. By using epoxy welding glue or plastic welding, you can effectively mend the cracks and restore the functionality of the laptop case.”
DIY Laptop Case Repair Tips and Recommendations
When repairing your laptop case, it’s important to follow appropriate guidelines and use proper tools and materials. Taking a DIY approach to laptop case repair can be a cost-effective and rewarding way to restore your laptop’s appearance and functionality. Here are some tips and recommendations to help you successfully repair your laptop case:
- Research laptop repair resources: Before you begin the repair process, it’s helpful to gather information from reliable sources. Websites, YouTube tutorials, and forums dedicated to laptop repair can provide valuable step-by-step instructions and tips specific to your laptop model. By leveraging these resources, you can gain insights into the best repair techniques and avoid common pitfalls.
- Ensure you have the right tools: Having the necessary tools on hand will greatly facilitate the repair process. Common tools for laptop case repair include screwdrivers (both Phillips and flathead), tweezers, needle-nose pliers, and compressed air. These tools will allow you to disassemble the laptop case, remove damaged parts, and reassemble it properly after the repair is complete.
- Choose quality repair materials: Using high-quality materials is essential for a durable and long-lasting repair. Look for laptop case repair kits that include epoxy putty, adhesive tape, or similar materials specifically designed for laptop case repairs. These materials will provide the necessary strength and stability to fix cracked or damaged areas of the laptop case.
- Familiarize yourself with the repair process: Before diving into the repair, take the time to thoroughly read through the repair guide or tutorial. Understand each step and ensure you have a clear understanding of how to disassemble the laptop case, remove damaged components, and properly install the repaired or replacement parts. This will help prevent unnecessary mistakes and ensure a successful repair.
- Exercise caution during the repair: Laptop case repairs often involve delicate components and intricate connections. Take your time and handle each part with care to prevent further damage. Additionally, ensure you are working in a well-lit and clean workspace to avoid losing small screws or damaging sensitive electronics.
By following these DIY laptop case repair tips and recommendations, you can confidently tackle common laptop case issues and restore your device to its full functionality. Remember to consult reliable resources, gather the right tools and materials, and approach the repair process with patience and attention to detail.
Here is a helpful table summarizing the key steps and considerations for successful DIY laptop case repair:
| Steps | Considerations |
|---|---|
| 1. Research laptop repair resources | – Find reliable online tutorials and forums – Consult laptop manufacturer documentation |
| 2. Ensure you have the right tools | – Phillips and flathead screwdrivers – Tweezers and needle-nose pliers – Compressed air for cleaning |
| 3. Choose quality repair materials | – Epoxy putty or adhesive tape – Replacement parts if needed |
| 4. Familiarize yourself with the repair process | – Read through the repair guide or tutorial – Understand each step thoroughly |
| 5. Exercise caution during the repair | – Handle delicate components carefully – Work in a clean and well-lit workspace |
Armed with these tips and a comprehensive understanding of the repair process, you can confidently undertake DIY laptop case repair projects and bring new life to your beloved device.
Conclusion
Repairing laptop case cracks and damage can save you money and extend the lifespan of your laptop. With the right tools, materials, and guidance, many common laptop case issues can be fixed at home. Whether it’s a frayed AC adapter cord, a cracked case, or a faulty cooling fan, taking the time to repair these issues can ensure that your laptop remains functional and aesthetically pleasing.
Remember to exercise caution and consult online resources for specific repair instructions to achieve the best results. By following step-by-step guides and tutorials, you can confidently perform DIY laptop case repairs and restore your device’s appearance and functionality.
By investing time and effort into repairing your laptop case, you can avoid unnecessary expenses and enjoy a longer lifespan for your device. Not only will your laptop continue to function properly, but it will also maintain its visual appeal. So don’t hesitate to tackle those cracks and damages on your laptop case – it’s a cost-effective and rewarding solution for keeping your laptop in top shape.