How to Take Apart an Xbox Series S
Taking apart your Xbox Series S is a journey of empowerment. This guide will give you step-by-step instructions. You’ll learn not just how to fix it, but also to appreciate its design.
For many gamers, opening up their devices is exciting. The Xbox Series S is efficient with its compact, high-tech parts. At $299, it’s powerful yet sleek, much like the PS4 Slim.
Our guide highlights each component you’ll encounter. Whether fixing a problem or just curious, you’ll learn about the power supply and motherboard. This knowledge will boost your gaming expertise.
Start this DIY adventure with confidence. Discover the amazing technology inside the Xbox Series S. For more on upgrading your gaming, visit this guide.
Introduction to the Xbox Series S
The Xbox Series S was released on November 10, 2020. It shows Microsoft’s aim to provide a cheaper, all-digital game experience. It costs $299/£249. This gaming console is for a wide range of players, with its remarkable features of Xbox Series S that go up to 120 FPS. From the start, players had lots of games to choose from. This shows how versatile the console is.
This console is perfect for those who like digital games. Unlike others, the Xbox Series S focuses on fast speed and top performance. It has a custom NVME SSD which cuts down on loading times. This means you can switch games smoothly. With 4 teraflops of computing power, the console gives great graphics at 1440p. It can also stretch to 4K.
The Xbox Series S overview points out its energy-saving and recycling efforts. Microsoft uses recycled plastics, showing they care about the planet. The console doesn’t just have great tech specs. It also offers lots of ways to connect, like with the special Seagate Storage card. This lets players add more storage. Its Smart Delivery tech means you buy a game once and get the best version for your console.
The Xbox Series S works with thousands of games from Xbox’s four generations. It’s great for new and old gamers. With the Xbox Family Settings app, parents can control how the console is used. This keeps gaming safe for kids. All in all, the Xbox Series S changes how we think about affordable gaming. It gives easy access, great performance, and is easy to use.
Gathering the Necessary Tools for Disassembly
Starting the Xbox Series S disassembly needs some prep. Getting the right tools makes the process smoother. It helps avoid mistakes caused by wrong handling. Here are the tools you’ll need and some key safety tips.
Recommended Tools
A Torx 8 screwdriver is a must for opening the Xbox. It fits the console’s screws perfectly. You’ll also need these repair tools:
- Tweezers: Useful for maneuvering small components.
- Plastic prying tools: Ideal for gently separating parts without causing damage.
- Containers or magnetic trays: Essential for organizing screws and small parts during disassembly.
With these tools, you’re ready for a smooth disassembly.
Safety Precautions
Keeping safe is crucial when taking apart your console. Here are important safety tips:
- Work in a static-free environment: Ground yourself to eliminate static electricity that could harm sensitive components.
- Carefully handle electronic parts: Proper handling reduces the risk of breaking delicate components.
- Use proper lighting and workspace: A clear, well-lit area improves focus and minimizes accidents.
Follow these steps to protect yourself and your equipment. It makes disassembling safer and more enjoyable.
Step-by-Step Guide on How to Take Apart Xbox Series S
Taking apart your Xbox Series S is a fun way to learn what’s inside. It can help with upgrades or fixes. Just follow this guide to do it right.
Removing the Outer Shell
Start by peeling off the stickers on the back of the console. Underneath, you’ll find some screws. Use a Torx 8 screwdriver to remove them. This will let you take off the casing easily. Taking off the external shell is the first step in getting to the guts of your Xbox Series S.
Accessing Internal Components
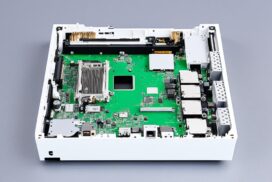
With the shell off, you can now get to the inside parts. The Xbox Series S is built to make this easy. Removing things like the NVMe drive is simple. But be careful with the mainboard and heatsink. They’re delicate and need careful handling to remove.
Know your goal before you start taking things apart. Getting to know the inside layout helps prevent damage. For steps on taking apart specific parts, look at this guide.
| Component | Screw Type | Number of Screws |
|---|---|---|
| Outer Shell | Torx 8 | 5 |
| Bottom Board | Torx 6 | 2 |
| Mainboard | Torx 6 | 1 |
Understanding the Internal Design of the Xbox Series S
The Xbox Series S is known for its stunning internal design. This design is not just for looks but also boosts the console’s performance. Within its compact frame, it holds various high-tech parts. These parts are skillfully placed to make the most out of the small space. Microsoft uses top-notch materials to make the inside functional and effective. This shows their commitment to creating leading-edge console designs.
Component Layout and Features
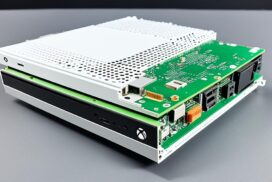
The Xbox Series S houses critical components like the mainboard, cooling system, and power supply. The mainboard efficiently handles the data exchange between the console’s internal parts. This ensures smooth gameplay and operation. The cooling system includes a copper vapor chamber and high-end thermal compounds. It keeps the console cool, preventing heat damage. These smartly placed components showcase the clever engineering behind the Xbox Series S.
Importance of Each Part
Every part inside the console is key to amazing gaming experiences. Its AMD custom 8-core CPU and RDNA 2 GPU tackle heavy gaming sessions while keeping performance up. Understanding the role of these parts helps players appreciate the console’s engineering more. For more details on Xbox issues and fixes, click here.
FAQ
What tools do I need to disassemble the Xbox Series S?
You’ll need a Torx 8 screwdriver for disassembling the Xbox Series S. This tool lets you remove screws easily, without needing anything else. It makes the process simple.
Is it safe to take apart my Xbox Series S?
Taking apart your Xbox Series S is safe if you’re careful. Make sure to work in a place without static. Be gentle with the parts to not harm them. Knowing the risks helps too.
How do I remove the outer shell of the Xbox Series S?
Start by peeling off the plastic stickers on the back. Then, you’ll see the screws. A Torx 8 screwdriver will get those out smoothly.
What should I be cautious about when accessing internal components?
Be extra careful with the mainboard and heatsink. They may need you to be a bit more forceful to remove them. But, avoid damaging these sensitive parts.
What is the layout of the internal components in the Xbox Series S?
The Xbox Series S has a tidy inside. It packs the mainboard, heatsinks, and memory in a way that saves space and boosts performance.
Why is understanding the internal design of the Xbox Series S important?
Knowing the inside design matters a lot. It shows how every part, like the cooling system and power supply, keeps the gaming smooth.
Can I upgrade any components inside the Xbox Series S?
You can upgrade the NVMe drive. Yet, changing other parts isn’t as easy. Know the risks and the console’s design before trying upgrades.


