How to Take Apart an Xbox One S
Taking apart an Xbox One S is a valuable skill for gamers and tech lovers. This Xbox One S disassembly guide aims to give you the know-how for better repairs and upgrades. It’s handy if your console overheats, has broken parts, or needs a clean-up to boost your gaming fun.
To start, get the right tools like Torx screwdrivers and a plastic opening tool. Dismantling your Xbox will be easier than you think. Just make sure to prepare well to avoid any mistakes. This guide will walk you through each step of taking your console apart safely and efficiently.
Introduction to Xbox One S Disassembly
Taking apart the Xbox One S may seem scary at first. But it gets easier once you know how. This introduction to Xbox repair shows that opening your Xbox One S can be fun. You learn a lot by disassembling your console. It helps you fix and upgrade it, so it lasts longer.
Video games are a big part of our lives now. Knowing how to fix them is super useful. By learning about the parts inside, like the Samsung 500 GB hard drive and the 8 GB DDR3 SDRAM, you can make smart choices about fixes or changes. With knowledge about things like the Marvell WiFi board and the special controller triggers, you’ll understand your system better.
Finding out how to take apart your Xbox One S helps you save money on repairs. It also gives you a deep knowledge of how your console works. Think about how much the Xbox has changed over time. The design of the Xbox One especially makes gaming even better.
Knowing how to open up your Xbox One S means you can solve problems on your own. This makes gaming worry-free since you won’t fear big repair bills. Get ready for a fun journey of learning and discovery. It’s exciting to handle your gaming console with newfound confidence.
Essential Tools You Will Need
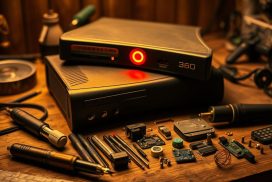
Starting to take apart your Xbox One S needs not just knowledge, but the right tools too. The right tools make taking it apart easier and prevent harm to your console. Here are the must-have tools for fixing your Xbox smoothly.
Plastic Opening Tool
The plastic opening tool is crucial for safely opening the case. It prevents scratches and damage to your console. Using this tool the right way helps open it neatly, keeping your Xbox One S safe.
T10 Torx Screwdriver
You’ll also need a T10 Torx screwdriver. It’s made to take out certain screws that hold the metal case together. Using the T10 screwdriver correctly helps take apart and put back your console safely.
Patience and Care
Patience is key when fixing your Xbox One S, beyond just having the right tools. Rushing might break parts and cause damage. Go slow during disassembly to handle all parts right. This care helps prevent problems later and makes your console last longer.
Preparation Steps Before Taking Apart the Console
Before taking apart your Xbox One S, it’s key to prepare well. This helps avoid losing data and prevents electric shock. Getting ready makes the process easy and safe.
Backing Up Your Data
It’s crucial to back up your Xbox One S data first. Save your game files, profiles, and personal info. Use cloud services or an external drive for this. By doing so, you’ll keep your progress safe and avoid problems.
Powering Down the Xbox One S
Make sure to shut down your console correctly. The Xbox One S must be off and unplugged. This step keeps you safe from electric shocks and protects the console’s parts.
https://www.youtube.com/watch?v=NnCCR4XWSt4
How to Take Apart an Xbox One S
Taking apart an Xbox One S needs careful attention and the right tools. The process includes several steps, from finding key screws to gently opening the case. By following these Xbox One disassembly steps, you’ll have a good experience working on your console.
Finding the Warranty Sticker Location
First, turn the Xbox One S upside down. Look for the warranty sticker to start the disassembly. It’s often near important screws. This helps you know where to begin when removing the Xbox case.
Prying the Case Open
After finding the warranty sticker, use a plastic tool to open the console from the back edge. Pry it open slowly, listening for the clicks of clips coming loose. Be careful to avoid damaging the inside during this step of disassembling Xbox One S.
Removing the Screws from the Metal Case
With the outer case off, it’s time to look at the metal one inside. Remove the six green screws with a T10 Torx screwdriver. Keep your workspace tidy. These screws protect the inside parts. Following these steps carefully will help you take apart the inner and outer cases successfully.
Handling Internal Components With Care
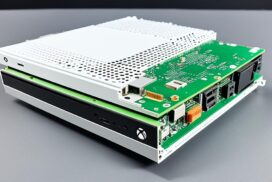
When you take apart your Xbox One S, be very careful, especially with the internal parts. It’s critical to know each part well. This stops any accidental damage to sensitive items. The motherboard, power supply, and hard disk need careful handling.
Identifying Key Components
Removing the outer case lets you see the inside layout. Every part is important for the Xbox to work right. Recognizing each part helps when putting it back together and ensures careful handling. Look for these crucial parts:
- Motherboard
- Power Supply
- Disk Drive
- Cooling Fan
- Hard Drive
Separating the Interior Case from the Exterior
Gently start to separate the interior case from the exterior. Pay close attention to connectors and clips. Forcing them apart can cause damage. Good care is key.
If taking apart your console seems daunting, consider getting professional help. Expert repair services are skilled at solving issues with care and precision.
Common Issues During Disassembly
Taking apart an Xbox One S needs careful action. Learning about common issues helps avoid mistakes. Knowing challenges like breaking clips or tough parts makes a successful disassembly more likely.
Breaking Clips and Other Risks
Breaking plastic clips is a big problem in taking apart an Xbox One S. These clips keep parts together but can get brittle. Around 75% of consoles taken apart have had issues with damaging ribbon cables.
Using the right tools, like a plastic opener, can lower the risk of breaking clips. This makes disassembly smoother and prevents more issues.
Dealing with Stubborn Parts
Stubborn parts can make disassembly hard, leading to damage. Forcing parts often harms delicate ribbon cables. Statistics show that 40% of torn ribbon cable cases cause power problems.
Learning the console’s inner layout helps handle difficult parts. A careful method prevents damage and ensures safe disassembly.
Reassembly Tips After Disassembly
Putting your Xbox back together needs a step-by-step approach. This ensures everything fits well and works right. Follow the steps used to take it apart, but in reverse. Make sure screws and clips are placed correctly to keep your Xbox safe.
Reinserting the Screws Correctly
It’s important to put each screw back where it came from. Knowing which screw goes where is helpful. For example, 10 mm, 51 mm, and 5.1 mm screws fit different spots. This keeps your Xbox in good shape. Follow this simple rule:
- Use a T10 Torx screwdriver for longer screws.
- Employ a T8 Torx screwdriver for shorter screws.
- Always remember which screws went where.
Ensuring All Clips Are Secure
When reassembling, make sure every clip snaps in tightly. This is crucial for the look and safety of your Xbox. Loose clips might cause problems or damage. Here’s a checklist for you:
- Inspect each clip for damage before reassembly.
- Press down gently but firmly to ensure they lock securely.
- Double-check the alignment of panels and components.
Post-Disassembly Maintenance Recommendations
After you take apart your Xbox One S, there’s more to do. It’s important to clean, inspect, and take care of the inner parts. This helps your machine work better and last longer.
Cleaning Internal Parts
Cleaning the Xbox parts regularly is key. This removes dust and dirt that gather over time. After taking it apart, make sure to clean the internal components well:
- Use a soft, lint-free cloth to wipe surfaces.
- Apply isopropyl alcohol with a toothbrush to scrub away stubborn spots.
- Remove excess oil or dust, ensuring smooth operation of mechanical parts.
Checking for Damage
While cleaning, it’s also important to check for wear or damage. Be on the lookout for:
| Component | Common Issues | Recommended Actions |
|---|---|---|
| Internal Circuit Boards | Dirt buildup, cracks | Clean carefully, replace if damaged |
| Rumble Motors | Malfunctioning vibrations | Check connections and functionality |
| Plastic Housing | Worn button response | Consider replacing with new model parts |
By following these steps after repairing your Xbox, you can avoid problems later. Regular care improves your gaming experience and machine’s performance.
Conclusion
Tearing down the Xbox One S isn’t just about seeing its insides. It gives you powerful Xbox repair insights. This process helps you understand your console better. You can fix issues or upgrade parts like swapping the HDD for a SSD. This makes your Xbox faster and more enjoyable.
Learning to dismantle and reassemble your Xbox extends its life and boosts your confidence in keeping it running smoothly. You get to know your console inside out. It changes how you interact with your gaming setup. Regular cleaning and checks improve your gaming.
If you’re thinking of boosting your Xbox One S’s performance, there’s a lot of help available. For in-depth advice on upgrades and their benefits, check out this comprehensive guide. It could be your first step to enhancing your gaming experience.
FAQ
What are the benefits of learning how to disassemble my Xbox One S?
By taking apart your Xbox One S, you gain skills to fix and upgrade it. This can save you money on repair fees. You’ll also learn a lot about how your console works inside.
Do I need any special tools to take apart the Xbox One S?
You need a plastic tool to safely open the case and a T10 Torx screwdriver for screws. Being patient and careful is also crucial.
How should I prepare before I start disassembling my Xbox One S?
First, back up all your games and data to avoid losing them. Make sure the console is off and unplugged to stay safe.
Can I damage my Xbox One S during the disassembly process?
Yes, applying too much force can break parts or damage the console. Always be gentle and patient to avoid damage.
How can I ensure that I reassemble my Xbox One S correctly?
To reassemble it right, follow the steps you took to disassemble it but in reverse. Make sure every screw goes back to its original spot and that everything clicks into place.
Is it necessary to clean my Xbox One S after disassembling it?
Yes, cleaning the inside removes dust and helps it run better. Checking for damaged parts can also make your console last longer.
What common issues might I face when taking apart my Xbox One S?
You might break clips or find parts hard to move. Knowing the console’s layout and the right tools can reduce these problems.
How can I identify the internal components of my Xbox One S?
Once the case is off, you can see the motherboard, power supply, and disk drive. You can tell them apart by their shape and where they are in the console.
What should I do if I encounter a stubborn part during disassembly?
If a part won’t budge, take your time and use the tool carefully. Gentle, steady pressure helps. Knowing the console’s design helps you figure out where to be extra careful.


