How to Take Apart an Xbox Elite Series 2 Controller
The Xbox Elite Series 2 Controller is a top choice for gamers because it blends performance with customization. But to keep it running smoothly, you need to know how to take it apart. This is crucial whether you’re fixing a problem or upgrading parts. This guide gives you easy steps to follow, making sure you can handle any repair confidently.
Before you start taking your controller apart, it’s important to have the right tools and safety measures ready. You’ll begin by gently removing the front faceplate, which is held in place by several clips. Then, you carefully get to the internal parts. Every step needs your full attention. Be sure to follow the directions in this detailed guide, which you can find here. With the right method, you’ll boost your gaming by repairing or upgrading your controller.
Introduction to the Xbox Elite Series 2 Controller
The Xbox Elite Series 2 Controller is top-notch for gaming accessories. It’s perfect for anyone into video games, whether for fun or competition. This device, at about 345g with its parts, feels right in your hands. It’s designed to be comfy and work well for a long time.
This controller stands out because you can change it a lot. With the Xbox Elite Series 2 features, players can fine-tune how it feels to play. They can do this using an app for just that purpose. Plus, it comes with different parts you can swap out to match how you play games.
Its battery life is really something special, lasting up to 40 hours. This means you can play a lot without having to stop and charge. Plus, it connects easily to Xbox or Windows PCs using different ways, including wireless, Bluetooth, or a USB-C cable.
The Xbox Elite Series 2 Controller is great for any gamer. It lets you make it your own and play better. If you love gaming, this controller will take your experience up a notch.
Essential Tools for Disassembly
To take apart the Xbox Elite Series 2 Controller, you need the right tools. Using tools for Xbox disassembly makes the job smoother and prevents damage. Here’s a list of tools you should have and safety steps to follow during the disassembly.
Recommended Tools
- Torx T8 Security Screwdriver: Essential for removing screws securely.
- Torx T6 Screwdriver: Useful for internal screws and components.
- Plastic Prying Tools: These Xbox controller repair tools protect the controller’s surface from scratches or damage.
- Tweezers: Handy for handling small parts during assembly and disassembly.
- Cotton Swabs and Isopropyl Alcohol: Perfect for cleaning sticky components.
Safety Precautions
Putting Xbox disassembly safety first is crucial. Keep in mind these controller repair precautions:
- Work in a clean, organized, and well-lit space to avoid losing small parts.
- Make sure the controller is off before you start to avoid electrical issues.
- Use an anti-static wrist strap to keep electronic parts safe from static damage.
- Handle every component with care to avoid injury or damage.
Steps for Disassembling the Xbox Elite Series 2 Controller
Taking apart your controller can be fulfilling. It opens up possibilities for making it your own and fixing it. Knowing how to properly remove Xbox thumbstick toppers and loosen the Xbox D-pad cover is key.
Removing the Thumbstick Toppers
To start, gently remove the Xbox thumbstick toppers by gripping them with your fingers and pulling towards you. Make sure to apply pressure evenly. This avoids damage to the stick’s base. It’s the first step to getting to the inner parts of the Xbox controller for further disassembly.
Loosening the D-Pad Cover
The Xbox D-pad removal also requires a careful approach. Begin at the D-pad cover’s edges, using fingers or a spudger if necessary. Be cautious to not apply too much force. This could damage the parts beneath and affect how the controller works when put back together.
| Task | Details |
|---|---|
| Remove Thumbstick Toppers | Gentle pull to avoid stress on the base. |
| Loosen D-Pad Cover | Start from edges; avoid damaging components. |
| Plastic Clips | Handle with care to preserve functionality. |
By carefully performing these controller disassembly steps, you enhance the repair process. Plus, you get to know your Xbox Elite Series 2 Controller better.
How to Take Apart an Xbox Elite Series 2 Controller
Taking apart an Xbox Elite Series 2 controller needs careful hands. It’s important to know how to remove the faceplate and handle each part wisely. This guide explains how to take off the faceplate, deal with plastic clips, and manage the sticky adhesive.
Removing the Faceplate
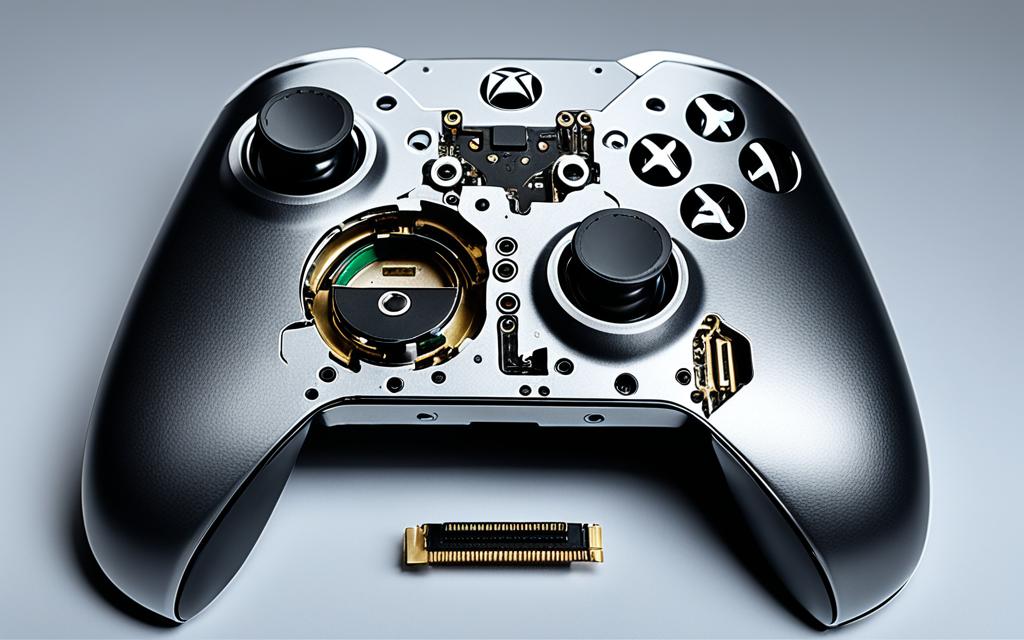
Begin by using a suitable tool at one corner of the controller. The faceplate is held by 13 tight clips and some sticky strips. Pry around the edges gently to free each clip without using too much force. Use a metal spudger to help with the adhesive after clips start to come off. This careful method helps avoid any damage.
Loosening Plastic Clips and Adhesive
Once the faceplate’s clips are loose, check for any leftover adhesive around the middle part. Removing these sticky strips carefully is part of the process. Releasing each clip properly makes putting the controller back together easier. It ensures the front and back parts separate without harm.
Accessing Internal Components
Getting inside your Xbox Elite Series 2 Controller is key for good maintenance. Make sure your workspace is ready and you have the right tools before you start. This will make taking it apart easier.
Unscrewing the Main Frame
First, find the six T-8 screws that keep it together. Then, carefully unscrew each one. Remember, one screw might be under a sticker. Be careful not to miss it. After the screws are out, use a spudger to lift the parts without harm.
Desoldering Wires and Connections
Next, you’ll see parts linked by soldered wires. Removing these wires needs careful hands and attention to detail. Remember how everything connects for when you put it back. Use high heat carefully to avoid board damage.
If you need more help, check out this guide. It has more tips and tricks for fixing your controller.
Reassembling Your Xbox Elite Series 2 Controller
Putting your Xbox Elite Series 2 controller back together means reversing the disassembly steps. It’s crucial to place each component accurately, as even a small mistake can affect the controller’s function. By following each step carefully, you’ll improve your reassembly skills and ensure the controller works seamlessly.
Step-by-Step Reassembly Procedures
First, put the motherboard into its case and fix it with six 9 mm-long screws. Use a Torx T8 Security screwdriver for this. Then, place the midframe assembly back, guided by three plastic clips and two metal rods. After, reattach the top housing, checking that the 13 plastic clips and adhesive strips fit well. Make sure every part connects right to avoid any issues later.
Testing Functionality Post-Assembly
After putting the controller back together, test it thoroughly. Make sure each button, thumbstick, and trigger works as expected. This confirms the disassembly didn’t harm any internal parts. If something’s not right, you may need to open it up again and check more closely. Keeping your controller working well is important for its longevity. For help taking it apart, see this guide.
Tips for Maintaining Your Controller
To keep your Xbox Elite Series 2 Controller in top shape, knowing how to maintain it is key. Giving it regular care boosts its performance and extends its lifespan.
Regular Cleaning Practices
Good cleaning habits are vital for your Xbox controller. Start with a set cleaning routine. Use alcohol wipes or soft microfiber cloths to clean the controller. These tools get rid of grime and dust well. Be careful not to let it get wet, as moisture harms the electronics. Also, store it in a cool, dry place to prevent any accidents.
Battery Replacement and Calibration
Checking your rechargeable battery often is important. Look out for damage or unusual shapes. If there are issues, replace the Xbox battery early to avoid risks. After putting in a new battery, recalibrate the controller as described in the guide. This ensures all buttons and functions are perfect for a great gaming time.
Conclusion
Taking apart an Xbox Elite Series 2 Controller might seem tough at first. Yet, with a positive attitude and the right tools, it turns into an enjoyable project. Learning how to disassemble the Xbox Elite controller is beneficial. It allows gamers to fix their gear and appreciate the complex design work that goes into making these devices.
It’s vital to keep your gaming controllers in good shape to extend their lifespan. You can find replacement parts at affordable prices, helping you keep your controller in top condition without spending much money. Choosing to repair your controller, with parts costing between $21.99 and $59.99, is often more economical than buying a new one.
The Xbox Elite Series 2 controller remains popular among players. Knowing how to repair it enhances your gaming time, ensuring your controller stays in the best shape. Feel proud of your handy work. Look forward to many more gaming sessions.
FAQ
How do I safely disassemble my Xbox Elite Series 2 Controller?
First, make sure you have the right tools. You’ll need a Torx T8 security screwdriver, a plastic spudger, and tweezers. Turn off the controller and find a clean workspace. Using an anti-static wrist strap can prevent damage to the electronics.
What should I do if I encounter difficulty removing the thumbstick toppers?
If taking off the thumbstick toppers is hard, don’t worry. Use gentle pressure with your fingers or a spudger. This method prevents damage. Just go slow and avoid using too much force.
Are there any specific precautions to take when desoldering wires from the motherboard?
Be very careful when desoldering wires. High heat is needed to melt the solder. Remember where each wire goes for putting it back correctly. Also, handle soldering tools with care to avoid burns or damage.
How can I ensure my Xbox controller remains in good condition after disassembly?
For maintaining your controller, clean it regularly with alcohol wipes or microfiber cloths. Keep it dry and away from water. Check the battery often, replace if necessary, and recalibrate following the manufacturer’s instructions.
What should I test after reassembling my controller?
After putting it back together, test every button, thumbstick, and trigger. Make sure they all work well. This step is important to ensure nothing was damaged or misplaced during the disassembly.
