Welcome to our expert guide on smartphone rear glass replacement and panel repair. If you’ve encountered a broken back glass on your smartphone, we’re here to provide you with essential tips to ensure a successful repair. Dealing with broken glass requires caution and precision, so let’s dive into the details of this process to help you navigate it with confidence.
When handling a broken back glass, it’s crucial to prioritize safety. First and foremost, attach a protective cover to prevent injuries from broken glass shards. Next, gather the necessary tools and follow the recommended steps for panel replacement. These expert tips will help you achieve the desired results without compromising your device’s integrity. A related console issue also shows up in playstation 5 power supply unit, especially when compatibility, settings, or controller behaviour affect play.
To begin, apply heat to the phone’s rear surface using a heating bag. This will loosen the adhesive that holds the glass panel in place.
To replace the rear glass panel of your smartphone, you’ll need to carefully disassemble the phone. By following these step-by-step instructions, you can safely navigate through the process:
Removing the Back Plate: Start by gently removing the back plate of the phone. This may require using a small screwdriver or a pry tool to loosen the edges and lift it off.
Removing the Screws: Once the back plate is removed, locate the screws that secure the internal components of the phone. Use a suitable screwdriver to carefully remove them. Be sure to keep the screws in a safe place to avoid losing them.
Using a Plastic Flap: To separate the front and back of the phone, use a plastic flap or opening tool. Insert the tool into the small holes on the sides of the phone and gently pry open the device. Take your time and apply even pressure to avoid damaging any internal components.
Removing the Battery: Once the phone is opened, locate the battery connection and disconnect it by gently lifting the battery connector off the motherboard. Be cautious when handling the battery to avoid any accidental damage.
Removing the Touch Screen Cable: Locate the touch screen cable connection on the motherboard and disconnect it by carefully lifting the connector. Take extra care when handling the touch screen cable, as it is delicate and can be easily damaged.
Note: When disassembling a phone with an LED display, exercise extra caution as LED displays are more sensitive to force. Avoid applying excessive pressure or bending the screen during the disassembly process.
By following these steps, you can safely disassemble your phone and prepare it for the next stage of replacing the rear glass panel. Remember to take your time, be patient, and exercise caution throughout the disassembly process to avoid any damage to the internal components.
Removing the Broken Glass
The most challenging part of smartphone rear glass replacement is removing the broken glass safely and effectively. The glass is typically attached to the phone using adhesive tape. To begin the removal process, follow these expert tips:
Step 1: Remove the Side Tape
Start by carefully removing the side tape that attaches the broken glass to the phone. Take your time to avoid causing further damage to the phone or injuring yourself. If necessary, use a pair of tweezers or small pliers to grip and peel off the tape gently.
Step 2: Separate the Glass from the Phone
Once the tape is removed, it’s time to separate the broken glass from the phone. This can be done using a plastic playing card or a similar thin, flexible tool. Start from the lower corner of the glass and carefully insert the playing card between the glass and the phone’s frame. Slowly work your way up, applying gentle pressure to create a gap and gradually separate the glass from the phone.
Step 3: Ensure the Tape is Fully Cut
During the separation process, make sure to fully cut through any remaining tape that might still be holding the glass in place. This will help prevent any accidental reattachment or damage to the new glass during installation.
Remember to proceed with caution, taking your time and paying attention to detail when removing the broken glass. This will help minimize the risk of further damage and ensure a smooth replacement process.
Inserting the New Glass
After carefully removing the broken glass, it’s time to prepare the phone for the new glass replacement. Follow these steps to ensure a successful and seamless insertion:
Remove any remaining tape from the sides of the phone. This will help ensure a proper fit for the new glass.
Next, remove the inner protection film from the new glass. Take care not to touch the adhesive side of the glass to avoid leaving fingerprints or smudges.
Insert the touch screen cable through the phone. Make sure it is properly aligned and secured.
Gently place the new glass on the phone, ensuring it aligns correctly with the frame and the camera cutouts.
Apply even pressure to the glass to ensure proper adhesion.
Testing the Phone
Now that the new glass is successfully inserted, it’s crucial to test the phone to ensure that everything is working properly. Follow these steps:
Power on the phone and check if the touch screen is responsive.
Test the camera functionality to ensure that the lenses are not obstructed by the new glass.
Attempt various touch and swipe gestures to verify that the touch screen cable is securely connected and functioning correctly.
If any issues arise during the testing process, double-check the alignment of the new glass and the connection of the touch screen cable. If problems persist, it may be necessary to revisit the installation steps or consult a professional for further assistance.
Common Testing Issues
Possible Solutions
The touch screen is unresponsive or erratic.
Disconnect and reconnect the touch screen cable to ensure a secure connection.
Check for any damage or debris on the touch screen cable and connectors.
If the problem persists, consider replacing the touch screen cable.
The camera does not work or captures blurry images.
Verify that the camera lenses are not obstructed by the new glass.
Ensure the camera module is properly aligned and seated.
If necessary, carefully remove and reattach the camera module, ensuring it is secure and aligned correctly.
The touch screen cable disconnects or becomes loose.
Inspect the touch screen cable for any signs of damage or wear.
If necessary, replace the touch screen cable with a new one.
Ensure the touch screen cable is securely connected to both the display and the motherboard.
When your iPhone back glass is cracked, you have a few options to consider. It’s important to weigh the pros and cons of each choice before making a decision. Here are three common options:
1. Covering with a Case
If you want to prevent further damage and protect your iPhone’s glass from additional cracks, using a case is a practical solution. A sturdy case can provide an extra layer of protection, reducing the risk of further damage caused by accidental drops or bumps. However, it’s essential to note that using a case does not fix the cracked back glass itself, but rather acts as a preventive measure.
2. Considering Buying a New Phone
In some cases, especially if your iPhone is old or you’ve been thinking about upgrading, buying a new phone may seem like a viable solution. Upgrading to a new iPhone not only brings you a device with the latest features and technology but also ensures that your phone’s glass is in pristine condition. However, it’s crucial to evaluate the cost and potential benefits of purchasing a new phone before making a decision.
3. Professional Repair
For a thorough and effective solution, seeking help from a reputable repair shop or a trusted expert is highly recommended. Professional repair ensures that the cracked back glass is replaced by a skilled technician, restoring the phone’s appearance and functionality. This option is particularly beneficial if you want to maintain the original integrity of your iPhone and avoid potential DIY repair complications.
Remember, choosing the right option depends on your budget, personal preferences, and the extent of the back glass damage.
Now that you are aware of the available options, you can make an informed decision about the best way to address your iPhone’s cracked back glass issue.
Option
Pros
Cons
Covering with a Case
– Prevents further damage – Provides added protection – Affordable
– Does not fix the issue – Does not restore appearance
Considering Buying a New Phone
– Upgraded features and technology – Pristine glass condition
– Expensive – Potential data transfer complexities
Professional Repair
– Skilled technician’s expertise – Restored appearance and functionality – Maintains original integrity
– Cost may vary – Repair duration
Professional Repair Costs and Recommendations
When it comes to iPhone back glass repair, seeking the assistance of a professional is highly recommended. uBreakiFix by Asurion is a reliable option for expert repair services. This popular repair shop has a team of trained technicians who specialize in repairing iPhones, including replacing the back glass.
The repair costs at uBreakiFix by Asurion typically range from £110 to £230, depending on the specific iPhone model that needs repair. It is worth noting that these costs may vary slightly depending on the location and additional services required.
By choosing uBreakiFix by Asurion, you can be confident that your iPhone’s back glass repair will be handled with utmost care and professionalism. Their technicians have the expertise and experience to safely and efficiently replace the back glass, ensuring the integrity and functionality of your device.
Additionally, uBreakiFix by Asurion uses high-quality replacement parts to guarantee optimal performance and durability. You can trust that your iPhone will be restored to its original condition, providing you with a seamless user experience.
If you are concerned about the affordability of professional repairs, it’s important to consider the long-term benefits. By opting for professional repair services, you can avoid potential complications and further damage that may arise from DIY attempts or inexperienced repair providers.
Investing in professional repairs not only ensures the longevity of your device but also saves you from potential costly repairs or replacement in the future.
The Advantages of Choosing uBreakiFix by Asurion for iPhone Back Glass Repair:
Expert technicians with specialized knowledge in iPhone repair
High-quality replacement parts
Efficient and reliable service
Guaranteed integrity and functionality of the device
Affordable repair costs compared to potential future expenses
If you are in need of iPhone back glass repair, consider visiting uBreakiFix by Asurion for a professional and hassle-free solution. Not only will they ensure the safe and effective repair of your device, but they will also provide you with peace of mind knowing that your iPhone is in the hands of experts.
Conclusion
When it comes to smartphone rear glass replacement, proper handling and the use of the right tools are crucial. Following expert tips and guidelines can greatly improve your chances of successfully repairing the panel. Whether you decide to tackle the replacement yourself or opt for professional assistance, prioritizing safety and preserving your device’s integrity and style are essential.
Replacing the rear glass of your smartphone requires careful attention to detail. By following the step-by-step instructions and using the recommended tools, you can ensure a smooth and effective repair process. Remember to protect yourself with safety gear, such as gloves, safety glasses, and a mask, to avoid any potential injuries from broken glass.
If you are uncertain about your DIY skills or concerned about causing further damage to your device, it is recommended to seek the help of a professional repair service. They have the expertise and experience to handle the replacement with precision, ensuring that your smartphone is restored to its original condition. Additionally, professional repair services can provide warranty coverage for their work, giving you peace of mind.
By considering the expert tips, investing in the proper tools, and prioritizing safety, you can successfully replace the rear glass panel of your smartphone. Whether you choose to take on the repair yourself or enlist the help of professionals, your efforts will result in a device that not only functions well but also looks stylish and intact.
FAQ
What are some tips for smartphone rear glass panel replacement?
When replacing the rear glass panel of a smartphone, it is important to follow some expert tips. These include wearing safety gear, disassembling the phone carefully, and using the proper tools. It is also crucial to handle the broken glass with caution and ensure a proper fit for the new glass panel.
How do I disassemble the phone for rear glass replacement?
To disassemble the phone for rear glass replacement, start by removing the back plate and screws. Use a plastic flap to pry the phone open by inserting it into the small holes on the sides. Remove the battery and the touch screen cable, being extra cautious with LED displays. This will help access the broken glass and prepare for replacement.
How do I remove the broken glass from my smartphone?
Removing the broken glass from a smartphone requires careful handling. Start by removing the side tape that attaches the glass to the phone. Then, use a plastic playing card to separate the glass from the phone, starting from the lower corner and working your way up. Ensure that the tape is fully cut before proceeding to avoid any damage.
How do I insert the new glass panel?
To insert the new glass panel, begin by removing any remaining tape from the sides of the phone to ensure a proper fit. Remove the inner protection film from the new glass and insert the touch screen cable through the phone. Carefully place the glass panel on the phone, making sure it aligns correctly. Test the phone to ensure everything works properly after replacement.
What are my options for a cracked iPhone back glass?
If your iPhone back glass is cracked, you have a few options. Using a case can help prevent further damage, but it does not fix the underlying issue. If your phone is old or you are considering an upgrade, buying a new phone may be a viable solution. However, for a professional and effective repair, it is recommended to seek help from a repair shop or a trusted expert.
How much does professional iPhone back glass repair cost?
Professional iPhone back glass repair costs typically range from £110 to £230, depending on the iPhone model. To ensure the integrity and functionality of your device, it is recommended to visit a trusted repair shop like uBreakiFix by Asurion, where trained experts can safely and efficiently replace the back glass of your iPhone.
What are some key recommendations for smartphone rear glass panel replacement?
When replacing a smartphone rear glass panel, it is important to prioritize safety and protect your device’s integrity and style. Whether you choose to attempt the replacement yourself or seek professional help, following expert tips and guidelines can help ensure a successful panel repair. Always handle the glass with care, use proper tools, and test the phone after the replacement to ensure everything works properly.
To restore your iPhone 12 Pro screen to its original condition, it’s important to know effective techniques for removing scratches. Whether it’s a minor scratch or a more noticeable one, there are various methods you can try to improve the appearance of your device. Here are some techniques that have proven successful in removing scratches…
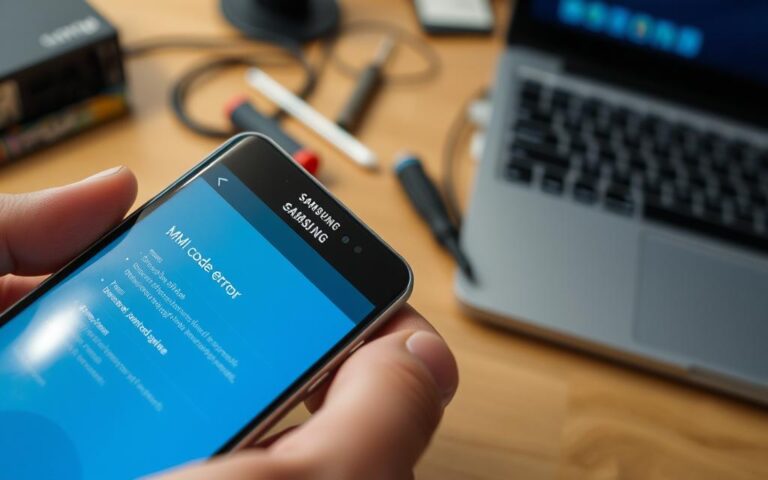
Facing MMI code errors on Samsung devices can be annoying. MMI stands for Man-Machine Interface. It lets users access special features. Errors can block these features, making it hard to use your phone. This guide offers simple and advanced ways to fix these issues. It uses advice from trusted tech experts. Whether it’s an invalid…
DIY phone repair is becoming increasingly popular as mobile phone screen replacement costs continue to rise. In this comprehensive step-by-step guide, we will walk you through the process of replacing your mobile phone screen at home. By following this guide, you can save time and money on repairs while gaining the satisfaction of fixing your…
The cost to fix an iPhone 14 screen varies a lot. Apple’s website says it can cost between £200 and £400. Knowing the different repair costs helps you make a smart choice. Apple’s repair service costs about £280 for a new screen. But, third-party services might charge less. It’s important to think about the total…
Are you looking to maximize the battery performance of your Samsung Galaxy S20+? Battery calibration might be the solution you’re seeking. By calibrating the battery of your device, you can potentially extend its battery life and improve overall performance. While the effectiveness of battery calibration may vary based on usage habits and the age of…
The cost to fix an iPhone 11 screen can change a lot. It depends on who fixes it, if you have a warranty, and how bad the damage is. Apple usually asks for about £129 to replace a screen. But, you might find lower or higher prices, from £40 to £350, at other places. This…