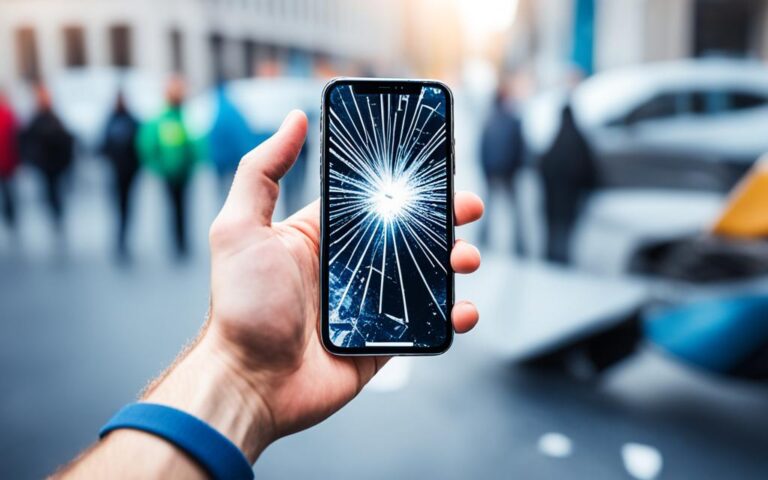
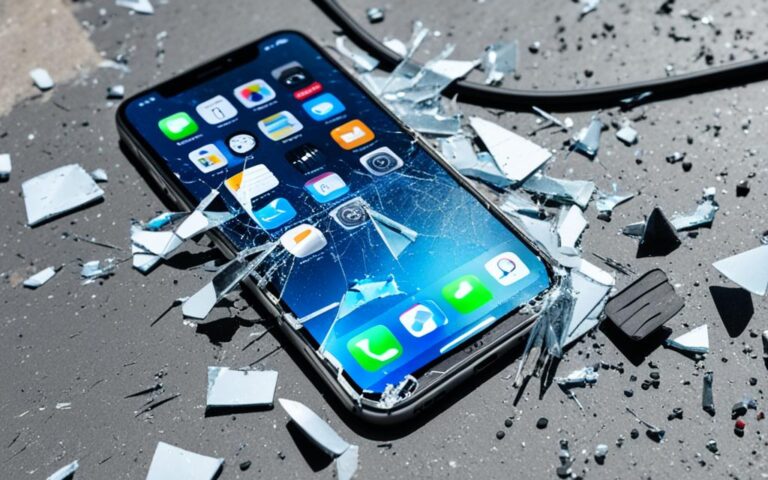
iPhone back glass repair and replacement have become common needs for many users. Cracked back glass not only affects the aesthetics of your device but also poses practical concerns such as water seepage, loss of wireless charging functionality, and the risk of cuts. That’s why it’s essential to be aware of the expert techniques available for iPhone back glass replacement.
Whether you own the latest iPhone 14 with a removable back glass or older models that require the expertise of trained professionals, this article will provide you with the necessary information to restore your device to its sleek and intact appearance. We understand the value you place on your iPhone, and we’re here to help.
A similar Apple troubleshooting case also shows up in smartphone rear glass panel, especially when software checks and hardware symptoms need to be weighed together.
In this comprehensive guide, we will explore different models and repair methods, discuss various repair options along with their pros and cons, and delve into specific repair techniques such as using heat and pry tools, performing a back housing/assembly swap, and utilizing laser machines (although we do not recommend the latter for DIY repairs).
Cost considerations and prerequisites will also be discussed to help you make an informed decision regarding your iPhone back glass repair. We understand that choosing the right repair method is crucial, as it directly affects the safety and functionality of your device. Whether you opt for professional repair services or decide to embark on a DIY repair journey, our expert advice will guide you.
Stay tuned for the upcoming sections as we delve into the world of iPhone back glass repair and equip you with the knowledge required to make the best decision for your iPhone’s repair needs.
When it comes to iPhone back glass replacement, the difficulty and cost can vary depending on the model of your device. Let’s take a closer look at the different iPhone models and the repair methods associated with them.
1. iPhone 14 and iPhone 14 Plus
The iPhone 14 and iPhone 14 Plus have removable back glass, which makes the repair process easier and less expensive. If you own one of these models and need to replace the back glass, you can consider DIY options or seek professional assistance.
2. iPhone 12, iPhone XR, and iPhone 11
Models such as the iPhone 12, iPhone XR, and iPhone 11 have back glass that is fastened to internal components, making the repair process more complex. To ensure a successful back glass replacement, it is recommended to seek professional expertise. Trained technicians have the necessary skills and tools to safely replace the back glass of these models.
3. iPhone 8, iPhone X, and iPhone XS
Older iPhone models, including the iPhone 8, iPhone X, and iPhone XS, also feature back glass that is attached to internal components. Repairing the back glass of these models requires professional assistance to ensure the integrity of the device remains intact.
Understanding the specific repair methods for your iPhone model is crucial to determine the best course of action for your back glass replacement needs. Whether you have a removable back glass or a model that requires professional expertise, it’s important to choose the right repair method to maintain the quality and functionality of your device.
iPhone Model
Repair Method
iPhone 14, iPhone 14 Plus
DIY or professional repair
iPhone 12, iPhone XR, iPhone 11
Professional repair
iPhone 8, iPhone X, iPhone XS
Professional repair
Repair Options and Pros/Cons
When it comes to repairing your iPhone back glass, you have several options to consider. Each option has its pros and cons, so it’s important to understand them before making a decision.
1. Apple Repair
If you want a professional repair with warranty coverage, Apple repair is the go-to option. Apple offers authorized repair services, ensuring quality results. However, Apple repairs can be expensive and may require sending your phone away, which can be inconvenient.
2. Authorized Apple Service Provider
Authorized Apple service providers offer similar quality repairs as Apple but at potentially lower costs. They can be a more affordable alternative to Apple repair, especially if you’re not covered by warranty. However, they are still generally more expensive than other options.
3. Third-Party Repair Shop
Third-party repair shops offer more affordable solutions for iPhone back glass repair. They often have faster turnaround times, which is convenient if you need your phone back quickly. However, the quality and warranty may vary depending on the repair shop. It’s important to choose a reputable and reliable third-party repair shop for the best results.
4. DIY Repair
For those looking for the most affordable option, DIY repair is available. You can attempt to replace the back glass yourself, but it is a complex task that should only be undertaken by individuals with technical skills and the proper tools. DIY repair carries the risk of causing further damage to your iPhone if not done correctly.
Consider these repair options and weigh their pros and cons carefully before deciding which one suits your needs and budget.
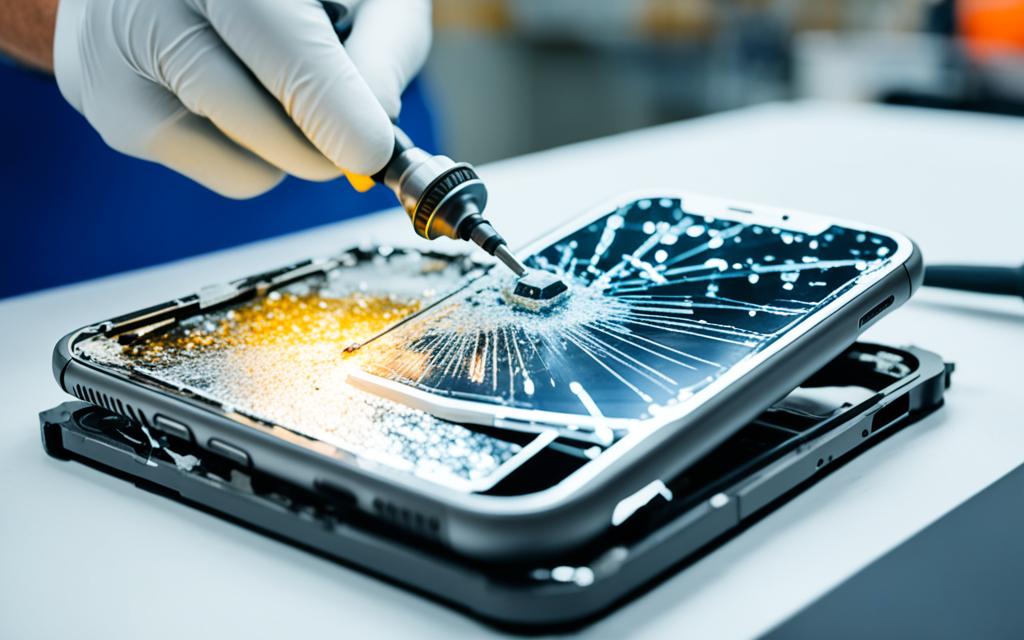
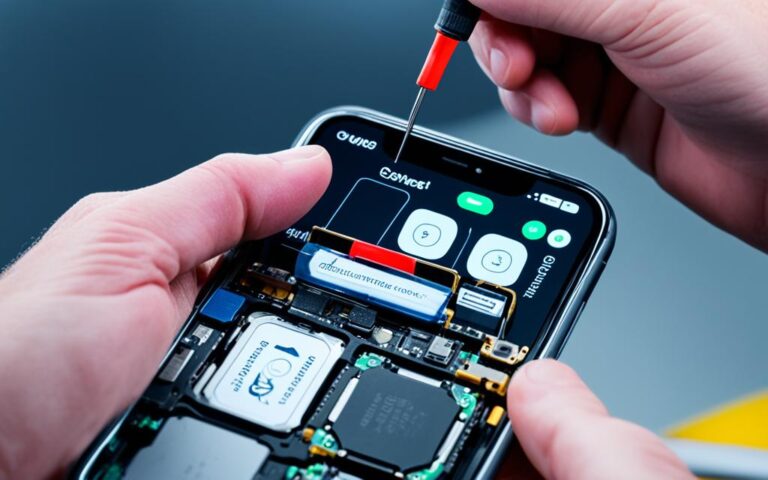
Repair Techniques: Using Heat and Pry Tools
One popular method for iPhone back glass repair is using heat and pry tools. This technique involves applying heat to soften the adhesive that holds the back glass in place and then carefully prying the glass away from the frame. It is a cost-effective DIY option that requires basic repair skills and specific tools like a heat gun or hairdryer, a set of pry tools, and protective gloves. Following the steps of this method can help you successfully replace the back glass of your iPhone.
Using heat and pry tools is a widely practiced technique for iPhone back glass repair. By heating the adhesive and utilizing precise prying tools, you can safely remove the damaged glass and replace it with a new one, restoring the sleek appearance of your iPhone.
Step-by-step Guide: Repairing iPhone Back Glass with Heat and Pry Tools
Gather the necessary tools and materials to perform the repair: a heat gun or hairdryer to apply heat, a set of pry tools for careful removal, and protective gloves to ensure safety.
Start by heating the damaged back glass using the heat gun or hairdryer. Apply the heat evenly across the glass surface, allowing the adhesive to loosen.
Once the adhesive has softened, use the pry tools to gently separate the back glass from the frame. Begin at one edge and work your way around the device, applying even pressure to avoid causing further damage.
Continue carefully prying the glass away from the frame, ensuring that all adhesive is detached. Be cautious not to pry too forcefully, as this can lead to cracking or breaking the glass.
Once the glass is completely separated, clean the frame and remove any remaining adhesive residue.
Prepare the replacement back glass by removing any protective film or adhesive backing.
Align the new glass with the frame and press it firmly into place, ensuring a secure bond.
Apply pressure to the glass to ensure proper adhesion and allow the adhesive to set according to the manufacturer’s instructions.
Once the adhesive has fully cured, inspect the device to ensure the back glass is securely in place.
It’s important to note that using the heat and pry method requires skill and caution. If you’re unsure about performing the repair yourself, it’s recommended to seek professional assistance from an authorized repair service or a reputable third-party repair shop.
If you’re considering DIY iPhone repair, make sure to follow proper safety precautions and use the appropriate tools. Remember, any damage caused during the repair process may void your device’s warranty.
Advantages:
Advantages of Using Heat and Pry Tools for iPhone Back Glass Repair
Cost-effective DIY option
Enables you to replace the back glass without professional assistance
Restores the original sleek look of your iPhone
By utilizing heat and pry tools, you can save money on professional repair services and successfully replace the back glass of your iPhone. However, it’s crucial to proceed with caution and ensure you have the necessary skills and tools before attempting this repair method.
Repair Techniques: Back Housing/Assembly Swap
When it comes to comprehensive iPhone back glass repair, the back housing/assembly swap method is highly recommended for DIY enthusiasts. This technique involves replacing the entire back assembly of the iPhone, including the glass, frame, and attached components. It is an ideal solution for extensive back glass damage or situations where other repair methods are impractical or ineffective.
However, it’s crucial to note that the back housing/assembly swap method requires careful disassembly of the phone and the possibility of soldering skills. Therefore, prior experience in phone repair or a thorough understanding of disassembly techniques is strongly recommended before attempting this method. If you’re not confident in your skills, it’s best to seek professional assistance to avoid further damage to your device.
One of the significant advantages of the back housing/assembly swap method is that it provides a comprehensive solution to your iPhone back glass issues. By replacing the entire back assembly, you ensure that not only the glass but also the frame and attached components are in premium condition, resulting in a device that looks and feels like-new.
If you decide to pursue the back housing/assembly swap method, be sure to approach the disassembly process with caution and follow a step-by-step guide specific to your iPhone model. Taking proper precautions and using the right tools will help you carry out a successful repair and achieve a professional-looking result.
Benefits of Back Housing/Assembly Swap
Here are some notable benefits of opting for the back housing/assembly swap method:
Comprehensive Solution: Replacing the entire back assembly ensures that all components are in top condition, giving your iPhone a refreshed look and functionality.
Improved Durability: By swapping the back housing, you eliminate any potential weaknesses or structural issues, enhancing the overall durability of your device.
Professional-Like Result: When performed with precision, this method yields results that are comparable to professional repairs, giving your iPhone a polished appearance.
It’s essential to assess your skills and comfort level before attempting this method. If you have any doubts or concerns, it’s wise to seek the assistance of professional repair services to ensure a successful and safe repair process.
Back Housing/Assembly Swap Guide
If you’re confident in your repair skills and want to proceed with the back housing/assembly swap method, refer to the following general steps:
Gather the necessary tools, such as screwdrivers, pry tools, and a heat gun or hairdryer.
Power off your iPhone and carefully remove the SIM card tray (if applicable).
Apply heat to the back of the device using the heat gun or hairdryer to soften the adhesive that holds the back glass in place.
Once the adhesive is softened, use the pry tools to carefully separate the back glass from the frame. Take your time and apply gentle pressure to avoid damaging any internal components.
Once the back glass is removed, disconnect any attached components, such as the camera module or wireless charging module, from the old back housing.
Transfer these components to the new back housing, ensuring they are securely attached.
Clean the frame and prepare it for the installation of the new back housing.
Align the new back housing with the frame and press firmly to ensure proper adhesion.
Reinsert the SIM card tray (if applicable) and power on your iPhone to verify that everything is functioning correctly.
Remember, these steps are general guidelines, and specific instructions may vary depending on your iPhone model. Always refer to detailed repair guides or seek professional advice to ensure a successful repair.
Pros
Cons
Comprehensive and long-lasting repair solution
Requires advanced disassembly skills and possible soldering
Restores the iPhone to a like-new appearance
High risk of causing further damage if not done correctly
No compromise on quality and durability
Not recommended for beginners or those without technical expertise
Comparable results to professional repairs
May void device warranty if not performed by an authorized service provider
If you’re confident in your technical skills and want a comprehensive solution for your iPhone back glass repair, the back housing/assembly swap method offers a viable option. However, exercise caution and consider seeking professional help if uncertain about your abilities. A successful back housing/assembly swap can restore your iPhone’s aesthetics and functionality, ensuring an enhanced user experience.
Repair Techniques: Using a Laser Machine (Not Recommended for DIY)
A highly precise but not recommended method for iPhone back glass repair is using a laser machine. This technique involves using expensive equipment and expertise to strip the back glass and prepare the phone for replacement. It is typically used by professional repair shops and should not be attempted by inexperienced individuals. While this method offers the cleanest and most precise repair, it carries a high risk of damaging the phone or other components if not used correctly.
“Using a laser machine for iPhone back glass repair provides the highest level of precision and accuracy. However, this advanced repair method requires specialised tools and knowledge that only professional technicians possess. Attempting this repair on your own can lead to irreversible damage to your device.”
The use of a laser machine enables technicians to precisely remove the damaged back glass without causing additional harm to the surrounding components. The laser’s concentrated heat allows for a controlled and efficient process, ensuring the integrity of the device is preserved.
Benefits of Using a Laser Machine for iPhone Back Glass Repair
Unmatched precision: The laser machine ensures a clean and precise removal of the back glass, leaving no residue or adhesive behind.
Minimal risk of damage: With its focused beam, the laser minimizes the risk of accidental damage to other components during the repair process.
Efficient and time-saving: The use of a laser machine reduces the repair time, allowing technicians to complete the task quickly and effectively.
However, it is important to note that a laser machine is a specialized tool that requires proper training to operate safely and effectively. Without the necessary expertise and equipment, attempting this repair method as a DIY project can lead to disastrous consequences. It is highly recommended to rely on professional repair services to ensure the best possible outcome for your iPhone back glass replacement.
Repair Technique
Precision Level
Difficulty
Recommended For
Laser Machine
High
Expert
Professional repair shops
Heat and Pry Tools
Moderate
Intermediate
Experienced DIYers
Back Housing/Assembly Swap
Low
Advanced
Extensive back glass damage
Cost Considerations and Prerequisites
The cost of iPhone back glass repair varies depending on the model, repair method, and warranty coverage. If you have AppleCare+, the repair cost for certain models can be significantly reduced. Without AppleCare+, the cost can range from affordable to more expensive, depending on the model and repair complexity.
When deciding between repair and replacement, several factors should be taken into consideration. The age of the phone plays a significant role, as older models may not be worth investing in extensive repairs. Additionally, if you are considering an upgrade in the near future, it may be more cost-effective to replace the phone altogether rather than repairing the back glass.
DIY repairs are a popular option for those looking to save money, but they come with their own set of risks. It is important to note that attempting a DIY repair without proper technical skills and experience can result in further damage to the phone. If you decide to pursue a DIY repair, ensure that you have the necessary tools and expertise to carry out the task successfully.
Repair Method
Cost Range
Prerequisites
Apple Repair
Varies
–
Authorized Apple Service Provider
Varies
–
Third-Party Repair Shop
Varies
–
DIY Repair
Cost of tools
Technical skills and experience
Consider all cost factors and prerequisites before making a decision on iPhone back glass repair. Consulting with professionals and weighing the costs against the benefits will help you make an informed choice that suits your needs and budget.
Note: The image above is for illustrative purposes only and does not represent the actual cost of iPhone back glass repair.
Conclusion
When faced with a cracked back glass on your iPhone, it is essential to choose the right repair method for your specific model. Opting for professional repair services or authorized Apple service providers ensures that your device is in the hands of experts who have the necessary expertise and tools for a successful back glass replacement.
While DIY repairs may appear cost-effective, they come with risks that could permanently damage your phone. It is crucial to consider the potential consequences and the high level of technical skills required before attempting a DIY repair.
By prioritizing the safety and functionality of your device, you can make an informed decision on the repair method that suits your needs. Whether you rely on professional repair services or choose to go the DIY route, always seek expert advice and ensure that your iPhone back glass replacement is handled with professional care.
FAQ
What is iPhone back glass repair?
iPhone back glass repair is the process of replacing the cracked or damaged back glass of an iPhone to restore its appearance and functionality.
What are the common concerns associated with cracked back glass?
Some common concerns associated with cracked back glass include water seepage, loss of wireless charging functionality, and the risk of cuts or injuries.
Which iPhone models require professional expertise for back glass replacement?
iPhone models like the iPhone 12, iPhone XR, iPhone 11, iPhone 8, iPhone X, and iPhone XS have back glass that is fastened to internal components, requiring professional expertise for replacement.
What are the options for iPhone back glass repair?
The options for iPhone back glass repair include professional repairs offered by Apple or authorized service providers, third-party repair shops, and DIY repair.
What is the heat and pry method for iPhone back glass repair?
The heat and pry method involves applying heat to soften the adhesive that holds the back glass in place and then carefully prying the glass away from the frame using specific tools.
How does the back housing/assembly swap method work for iPhone back glass repair?
The back housing/assembly swap method involves replacing the entire back assembly of the iPhone, including the glass, frame, and attached components, to provide a comprehensive solution and restore the device’s appearance.
Can a laser machine be used for iPhone back glass repair?
Yes, a laser machine can be used for iPhone back glass repair, but it is a highly precise method that requires expensive equipment and expertise, typically used by professional repair shops.
How much does iPhone back glass repair cost?
The cost of iPhone back glass repair varies depending on the model, repair method, and warranty coverage. Apple offers reduced repair costs for certain models with AppleCare+.
Should I attempt DIY repair for iPhone back glass?
DIY repair for iPhone back glass should only be attempted by those with technical skills and experience, as it carries a high risk of damaging the phone permanently.
Which repair method is the most suitable for my iPhone model?
The most suitable repair method for your iPhone model depends on factors like the extent of the damage, the age of the phone, and your technical skills. It is recommended to consult professional repair services or authorized service providers for expert advice.
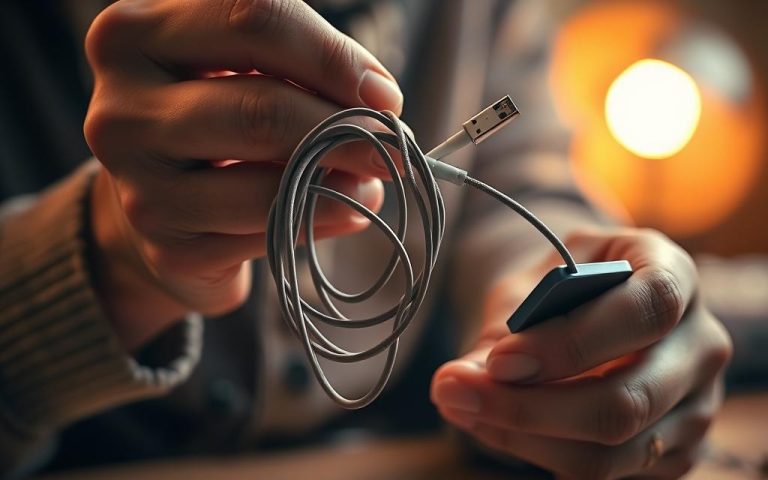
Damaged charging cables can be frustrating, but replacing them isn’t always necessary. With a few simple steps, you can extend the life of your iPhone charger and avoid unnecessary expenses. Common issues like frayed wires or debris buildup often cause connectivity problems. Before attempting any repairs, check for visible damage and follow Apple’s safety guidelines…
The iPhone 11 Pro Max is experiencing a common issue known as ghost touch, where the screen behaves as if it’s being touched when it isn’t. Users have reported that the screen moves slowly in certain directions or activates features unintentionally. This problem can be quite frustrating, but there are several solutions available to fix…
When it comes to maintaining a strong and reliable connection on your iPhone, a properly functioning antenna is crucial. However, issues with the antenna can occur, especially after water damage, leading to poor signal strength and connectivity problems. In such cases, seeking expert repair services is essential to restore your device’s performance. Repairing the antenna…
Welcome to our comprehensive guide on iPhone proximity sensor repairs for screen functionality. If you’re experiencing issues with your iPhone’s proximity sensor, you’re in the right place. Our expert repair services are available across the UK, offering reliable solutions to restore your device’s proper functionality. The proximity sensor is a vital component of iPhones, responsible…
When it comes to iPhone screen repair or display replacement, ensuring proper calibration and testing is essential for a seamless user experience. After all, no one wants to deal with issues like unresponsive touch functions, color inaccuracies, or unexpected screen behavior after a repair. That’s why it’s crucial to understand the importance of calibration and…
When faced with a cracked iPhone screen, users often wonder whether they should opt for temporary fixes or a full screen replacement. This article explores the different options available, weighing the pros and cons of each. Understanding the Causes of iPhone Screen Cracks iPhone screens can crack easily due to the design compromise made by…