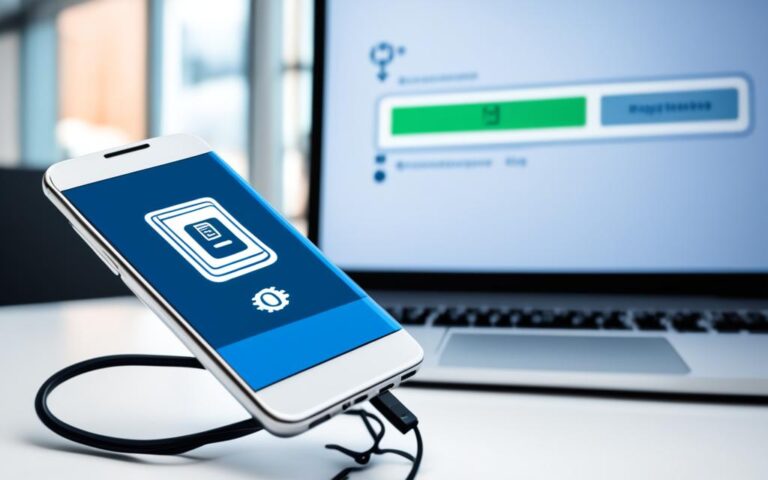
Welcome to our guide on smartphone gyroscope repairs for the auto-rotate function. Are you frustrated with your smartphone’s screen not rotating when you tilt it? This issue can be caused by various factors, such as disabled settings, firmware problems, faulty sensors, or conflicts with third-party apps. In this article, we will explore different solutions to restore the auto-rotate feature on your smartphone. A similar Apple troubleshooting case also appears in fixing auto-rotate function iphone xr, where software checks and hardware symptoms often overlap.
A related repair case also appears in smartphone microphone clearer calls, where the same kind of fault can point to parts wear, diagnosis steps, or replacement choices.
If you’re experiencing difficulties with the auto-rotate feature on your Android phone, don’t worry – we’ve got you covered. By following the steps outlined in this article, you’ll be able to troubleshoot and fix the auto-rotate function, ensuring that your smartphone operates smoothly and efficiently.
Whether you’re a tech-savvy individual or new to smartphone repairs, our comprehensive guide will provide you with the knowledge and solutions needed to address the auto-rotate function on your device. From enabling the feature to troubleshooting app-specific issues, we’ll cover all the essential steps to get your smartphone’s screen rotating seamlessly again.
Stay tuned as we dive into the specifics of how to turn on the auto-rotate feature on Android, perform a restart to fix auto-rotate issues, troubleshoot app-specific issues and third-party conflicts, avoid disruptions caused by screen touch, consider using third-party rotation control apps, and, if necessary, perform a factory reset as a last resort.
The auto-rotate feature on your Android phone is essential for seamless screen orientation changes. If you’re experiencing issues with auto-rotate, the first step in troubleshooting is to ensure that the feature is enabled. Turning on auto-rotate is a simple process, and we’ll guide you through the necessary steps to get it working again.
Step 1: Access the Quick Settings Panel
To access the Quick Settings panel, swipe down from the top of your screen using two fingers or swipe down and then tap the small arrow icon in the top-right corner. This will open the expanded Quick Settings panel.
Step 2: Toggle the Auto-Rotate Switch
Look for the Auto-rotate option, typically represented by an icon with a circular arrow or a lock symbol. If the icon is grayed out or crossed out, it means auto-rotate is disabled.
To enable auto-rotate, tap the Auto-rotate icon to toggle it on. Once enabled, the icon will no longer be grayed out or crossed out.
Note: The location and appearance of the Auto-rotate option may vary depending on your Android device model and software version.
Once you’ve turned on auto-rotate, your Android phone will automatically adjust the screen orientation based on how you hold your device.
Device Model
Auto-Rotate Location
Samsung Galaxy S21
Quick Settings Panel
Google Pixel 5
Quick Settings Panel
OnePlus 9 Pro
Quick Settings Panel
LG Velvet
Quick Settings Panel
Xiaomi Mi 11
Quick Settings Panel
Perform a Restart to Fix Auto-Rotate Issues
If turning on the auto-rotate feature doesn’t solve the problem, the next step is to perform a restart of your Android phone. A restart can help resolve temporary glitches or conflicts that may be hindering the auto-rotate function. By pressing and holding the Power button and selecting Restart, you can give your phone a fresh start and check if the auto-rotate starts working again.
Restarting your phone is a simple yet effective troubleshooting step that can often solve common software-related issues. It allows the phone’s operating system to reset itself and close any problematic background processes that may be interfering with the auto-rotate function. It’s important to note that a restart will not delete any of your data or apps, so you don’t have to worry about losing any information.
To perform a restart on your Android phone, follow these steps:
Press and hold the Power button on your phone, typically located on the right or left side, or the top of the device.
A menu will appear on your screen with options like Power Off, Restart, or Emergency mode. Select the Restart option.
Wait for your phone to shut down completely and then automatically restart.
After the restart, check if the auto-rotate function is working as expected. Open an app that supports auto-rotate, such as the camera or a web browser, and tilt your phone to see if the screen orientation changes accordingly.
Tip: If your phone has a removable battery, you can also perform a restart by removing the battery, waiting for a few seconds, and then reinserting it. However, since most modern smartphones come with non-removable batteries, the first method described above is more commonly used.
If the auto-rotate issue persists even after the restart, don’t worry. There are further troubleshooting steps you can take to fix the problem, which we’ll explore in the next sections.
Troubleshoot App-Specific Issues and Third-Party App Conflicts
Sometimes, the auto-rotate function may not work for specific apps, such as the YouTube app, which often has issues with phone orientation detection. In such cases, updating the app or using workarounds like switching to full-screen mode can help. Additionally, conflicts with recently installed apps can also affect the auto-rotate function. Uninstalling the conflicting apps or checking individual app settings can resolve the issue.
App-Specific Issues
App-specific issues can cause difficulties with the auto-rotate function on your Android phone. One common example is the YouTube app, which is known to have problems detecting the phone’s orientation. When you encounter such issues, there are a few steps you can take to troubleshoot and resolve the problem.
Update the app: Ensure that you have the latest version of the app installed on your phone. App updates often come with bug fixes and improvements that can address auto-rotate issues.
Switch to full-screen mode: Some apps have a full-screen mode that bypasses the auto-rotate function. By enabling full-screen mode, you can enjoy a consistent orientation without relying on auto-rotate.
Clear app cache and data: Clearing the cache and data of a specific app can sometimes resolve auto-rotate problems. This step will remove temporary files and reset the app’s settings.
Third-Party App Conflicts
In addition to app-specific issues, conflicts with recently installed apps can interfere with the auto-rotate function on your Android phone. When you notice that auto-rotate is not working as expected, it is worth checking if any recently installed apps are causing the problem. Here’s what you can do:
Uninstall conflicting apps: Identify and uninstall any apps that were installed around the time you started experiencing auto-rotate issues. Removing these apps can help eliminate the conflict and restore the auto-rotate function.
Check individual app settings: Some apps have their own settings for auto-rotate that may override the system settings. Verify the app settings and make sure they allow for auto-rotate if desired.
Restart your phone in safe mode: Booting your phone in safe mode disables all third-party apps, allowing you to determine if any of them are causing auto-rotate problems. If auto-rotate works fine in safe mode, it indicates that a third-party app is the culprit.
By troubleshooting app-specific issues and resolving conflicts with third-party apps, you can overcome auto-rotate problems on your Android phone. Ensure that your apps are up to date, consider using full-screen mode, and uninstall any conflicting apps. With these steps, you can restore the functionality of the auto-rotate feature and enjoy seamless screen rotation on your smartphone.
Avoid Touching the Screen While Rotating
When attempting to rotate your phone, it’s crucial to refrain from touching the screen. Touching the screen during the rotation process can inadvertently disable the auto-rotate function, causing it to malfunction and not respond correctly. This issue commonly arises when using web browsers or performing tasks that require screen interaction. Therefore, it’s vital to exercise caution and avoid any contact with the screen while changing the phone’s orientation.
By refraining from touching the screen while rotating your phone, you can maintain the proper functioning of the auto-rotate feature. When the phone’s orientation changes without any interference, the sensors can accurately detect the movement and trigger the auto-rotate function accordingly. This will ensure that the screen rotates as intended, providing you with a seamless user experience.
Remember, a gentle touch or swipe on the screen during rotation can disrupt the auto-rotate function. This interruption may result in the screen remaining fixed in a specific orientation, failing to rotate when needed. By exercising caution and avoiding any physical contact with the screen, you can prevent such issues from occurring and ensure the smooth operation of the auto-rotate feature on your smartphone.
Key points to remember:
Avoid touching the screen while changing the phone’s orientation
Touching the screen can disable the auto-rotate function
Exercise caution, especially when using web browsers or performing screen-based tasks
Additional Tips:
Avoid touching the screen when rotating your phone. This can prevent accidental interference with the auto-rotate function, ensuring it functions correctly and maintains the desired screen orientation.
Do’s and Don’ts of Rotating Your Phone
Do
Don’t
Avoid touching the screen while rotating the phone
Touch the screen during the rotation process
Keep the phone stable during rotation
Shake or move the phone excessively while rotating
Follow the recommended screen orientation settings
Override the auto-rotate settings without a valid reason
Consider Using a Third-Party Rotation Control App
If the built-in auto-rotate feature doesn’t work or you prefer a more customizable solution, you can consider using a third-party rotation control app. These apps allow you to change the screen orientation automatically based on sensor input or manually. They may also offer additional features like an overlay for easy orientation changes. One popular app is Control Screen Rotation, which can be downloaded from the app store.
Using a rotation control app provides an alternative to relying solely on the auto-rotate feature built into your smartphone. These apps offer greater flexibility and control over your device’s screen orientation. Whether you want to rotate the screen for a specific app or prefer to have more precise control over when the screen rotates, a rotation control app can meet your needs.
One of the advantages of using a rotation control app is the ability to set up custom orientations. This means you can have alternative screen orientations beyond just the portrait and landscape options provided by the default auto-rotate feature. With custom orientations, you can optimize the screen display for certain tasks or preferences.
Using a rotation control app can be particularly useful in situations where the auto-rotate feature gets triggered unintentionally. By disabling auto-rotate and relying on a rotation control app, you can ensure that the screen orientation remains fixed even when you hold the device at different angles or make sudden movements.
Another benefit of rotation control apps is the ability to create shortcuts or tiles for easy access to screen rotation settings. For example, certain apps offer an “auto-rotate tile” that you can add to the Quick Settings panel or home screen. This tile allows for quick toggling between auto-rotate and fixed orientations with just a tap.
Pros
Cons
Greater control over screen orientation
Customizable orientations
Prevention of unintentional screen rotations
Additional app to install and manage
Potential compatibility issues with certain apps
Learning curve for adjusting settings
Whether you want to enhance the auto-rotate functionality or have complete control over your device’s screen orientation, a rotation control app can be a valuable addition to your smartphone. By exploring different options and experimenting with various settings, you can find the app that best suits your needs and preferences.
Perform a Factory Reset as a Last Resort
If all other troubleshooting steps fail to fix the auto-rotate issue, a factory reset may be the last resort option. However, it’s important to note that a factory reset will erase all data on your device and restore it to its original state. Make sure to back up your data before proceeding with a factory reset. There are different methods to perform a factory reset, and it’s recommended to refer to your device’s specific instructions or consult professional assistance.
“Performing a factory reset should be a last resort when all other methods have been exhausted. It’s a drastic step that wipes your device clean, so it’s crucial to backup your data before proceeding.”
If you’ve tried all the previous steps and the auto-rotate function still isn’t working on your Android phone, a factory reset may be necessary. Before you begin the process, it’s essential to understand the implications of a factory reset. This procedure will erase all data on your device, including apps, settings, and personal files. It essentially restores your phone to its original out-of-the-box state.
To perform a factory reset, the exact steps may vary depending on your device’s make and model. It’s best to consult your device’s user manual or the manufacturer’s website for specific instructions. Alternatively, you can reach out to professional assistance to ensure the process is carried out correctly.
Before initiating the factory reset, it’s crucial to back up your data to prevent permanent loss. You can use cloud storage services, such as Google Drive or Dropbox, or connect your phone to a computer and transfer your files manually. Additionally, make a note of any important settings or customizations you wish to restore after the reset.
Once you’ve backed up your data, you can proceed with the factory reset. The procedure typically involves accessing the Settings menu on your Android phone, then navigating to the Backup & Reset or System section. From there, you’ll find options to perform a factory reset. It may be labeled as “Factory Data Reset” or similar.
After confirming your decision, your phone will begin the factory reset process. This can take several minutes, during which your device will restart multiple times. Once the reset is complete, your phone will be restored to its original state, and you’ll need to set it up again as if it were new.
Remember to reinstall any necessary apps, restore your backed-up data, and personalize your settings once the factory reset is finished. This can be a time-consuming process, but it may be the final step required to fix the auto-rotate issue on your Android phone.
Pros
Cons
Resets your device to its original state, potentially resolving software conflicts
Erases all data on your device, including apps, settings, and files
Provides a clean slate for troubleshooting hardware or software issues
Time-consuming process to back up and restore data
Recommended as a last resort when all other troubleshooting steps fail
May require professional assistance for complex devices or unfamiliar procedures
Conclusion
In conclusion, if your smartphone’s auto-rotate function is not working, there are several steps you can take to troubleshoot and resolve the issue. Start by checking and enabling the auto-rotate feature, perform a restart, troubleshoot app-specific issues and third-party conflicts, avoid touching the screen while rotating, consider using a third-party rotation control app, and if all else fails, perform a factory reset. By following these steps, you can restore the auto-rotate function and enjoy the convenience of automatic screen rotation on your smartphone.
FAQ
How do I turn on the auto-rotate feature on my Android phone?
To turn on the auto-rotate feature, access the Quick Settings panel and toggle the Auto-rotate switch.
Why isn’t the auto-rotate function working on my Android phone?
There can be several reasons why the auto-rotate function may not work, such as disabled settings, firmware problems, faulty sensors, or conflicts with third-party apps.
What can I do if turning on the auto-rotate feature doesn’t solve the problem?
If turning on the auto-rotate feature doesn’t work, you can try performing a restart of your Android phone to resolve temporary glitches or conflicts.
Why doesn’t the auto-rotate function work for certain apps?
The auto-rotate function may not work for specific apps, such as the YouTube app, due to issues with phone orientation detection. Updating the app or using workarounds like switching to full-screen mode can help resolve this issue.
What should I do if the auto-rotate function is disabled when I touch the screen while rotating?
To prevent the auto-rotate function from being disabled when touching the screen while rotating, avoid touching the screen while changing the phone’s orientation, especially when using a web browser.
Is there an alternative to the built-in auto-rotate feature on Android?
Yes, you can consider using a third-party rotation control app, such as Control Screen Rotation, which allows for more customization and additional features like an overlay for easy orientation changes.
What should I do if none of the troubleshooting steps fix the auto-rotate issue?
If all other troubleshooting steps fail, a factory reset may be the last resort option. However, it’s important to note that a factory reset will erase all data on your device, so be sure to back up your data before proceeding.
Are you looking to maximize the battery performance of your Samsung Galaxy S20+? Battery calibration might be the solution you’re seeking. By calibrating the battery of your device, you can potentially extend its battery life and improve overall performance. While the effectiveness of battery calibration may vary based on usage habits and the age of…
Welcome to our comprehensive guide on repair solutions for smartphones with cracked screens. Whether you have an iPhone, Samsung, Google, Xiaomi, OnePlus, Oppo, or any other smartphone brand, we have gathered all the information you need to know about fixing your cracked screen. From the cost of repairs to the options for screen replacement, we…
Many iPhone users have reported experiencing screen flickering issues on their devices. This problem can occur randomly and can be quite frustrating. The screen may flicker, display dull colors, or show horizontal and vertical lines. It is important to address this issue as it can affect the overall usability and visual experience of the iPhone….
If your Samsung Galaxy S10 device is bricked and won’t turn on or function properly, don’t worry, there are steps you can take to unbrick it. Follow these OS reinstallation tips to revive your bricked Samsung Galaxy S10 device. In this article, we will guide you through the process of reinstalling the operating system (OS)…
If you’ve encountered a bricked phone, don’t panic! There are solutions available to unbrick your Android device. Understanding the different types of bricking and the common causes can help you determine the best approach to revive your device. The most common types of bricking include soft brick, where your phone freezes, gets stuck in a…
It’s really annoying when your Samsung Galaxy S7 camera stops working, especially with the “Camera Failed” error. Luckily, these Samsung Galaxy S7 camera issues are mostly due to software problems. So, there are ways to fix it and get back to capturing your favorite moments. In this guide, you’ll learn how to tackle the camera…