Recovering Data from a Crashed MacBook
If you’ve experienced a crashed MacBook and need to recover your lost files and data, there are efficient data recovery services available in the UK. Whether your MacBook won’t turn on at all or it has suffered from hardware damage, there are methods to retrieve your important files. In this article, we’ll explore different data recovery options and steps you can take to recover data from your crashed MacBook.
Recovering Data from a MacBook that Won’t Turn On
If you’re facing the frustrating issue of your MacBook not turning on, don’t panic. Even if your MacBook refuses to power up, there’s still a chance to recover your valuable data. One effective method is to retrieve the hard drive from your non-responsive MacBook and connect it to another computer using a USB to SATA adapter.
This ingenious device allows you to access the files stored on your MacBook’s hard drive and conveniently copy them to another device for safekeeping. It’s a simple and straightforward way to recover your data without the need for specialized technical expertise.
Here’s how this process works:
Related:


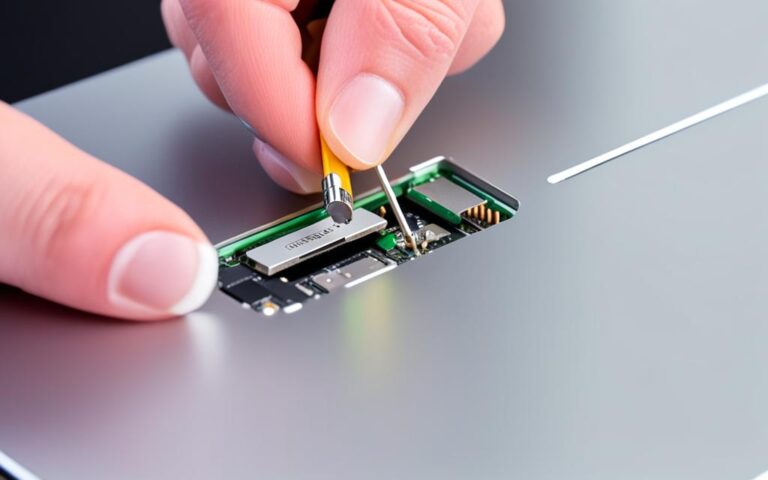
- Begin by carefully removing the hard drive from your MacBook. You may require a set of specialized tools, such as screwdrivers, to safely proceed with this step.
- Once the hard drive is detached, connect it to another functioning computer using a USB to SATA adapter. This adapter bridges the connection between the hard drive and the computer, enabling data transfer.
- After making the connection, the hard drive will appear as an external device on the computer. You can navigate through the folders and files, just like you would with any other external storage device.
- Select the files you wish to recover and copy them to another device, such as a USB flash drive or an external hard drive. Ensure that you have enough storage space on the destination device.
- Once you’ve successfully copied your files, safely disconnect the hard drive from the adapter and reassemble your MacBook, ready for potential repairs or troubleshooting in the future.
It’s important to note that if you’re connecting the hard drive to a PC rather than a Mac, you may need to install additional software to read the macOS file system. This software ensures seamless compatibility and enables you to access and recover your data without any hassle.
“Recovering your data from a MacBook that won’t turn on can be a straightforward and stress-free process. By utilizing a USB to SATA adapter, you can retrieve your valuable files and documents, ensuring that your data remains safe and accessible.”
– Amelia Thompson, Data Recovery Specialist
By following these steps, you can salvage your important files and documents from a non-responsive MacBook. Whether it’s for personal or professional reasons, recovering your data provides peace of mind and minimizes the impact of a non-functional MacBook on your workflow.
| Data Recovery Method | Difficulty Level | Success Rate |
|---|---|---|
| Using USB to SATA Adapter | Easy | High |
| Professional Data Recovery Services | Advanced | High |
| Other DIY Data Recovery Methods | Varies | Medium |
As shown in the table above, utilizing a USB to SATA adapter offers an easy-to-implement solution with a high success rate. However, if you’re uncomfortable performing the recovery yourself or your MacBook’s hard drive requires professional assistance, it’s advisable to seek the expertise of reputable data recovery services.
Recovering Data from a Water-Damaged MacBook
If your MacBook has suffered water damage and won’t start up, it’s crucial to first ensure that the hard drive is not water damaged. Once verified, there are steps you can take to recover your data and potentially salvage your valuable files.
Steps for Data Recovery from a Water-Damaged MacBook:
- Disconnect and Power Off: Immediately disconnect your MacBook from its power source and shut it down to prevent further damage.
- Check for Water Damage: Carefully inspect your MacBook for signs of water damage. Look for water stains, corrosion, or any other visible indicators.
- Remove the Hard Drive: If the hard drive appears unaffected by the water damage, it’s possible to retrieve your data by removing it from your MacBook. Refer to the manufacturer’s instructions or seek professional assistance if needed.
- Connect to Another Computer: Use a USB to SATA adapter to connect the removed hard drive to another working computer. This will allow you to access the files on the hard drive.
- Recover Your Data: Once connected, navigate through the file system of the hard drive and copy the desired files to the working computer or an external storage device. It’s important to act quickly to prevent any further damage to the data.
If you plan on getting your water-damaged MacBook repaired, it is advisable to reinstall the hard drive before taking it in. However, always remember to back up your data regularly to prevent loss in the event of such incidents.
Note: The procedure described above may vary depending on the specific model and condition of your MacBook. Consult the manufacturer’s documentation or seek professional assistance for detailed guidance.
To illustrate the process, here is a visual representation of the steps:
| Steps | Description |
|---|---|
| 1 | Disconnect and Power Off |
| 2 | Check for Water Damage |
| 3 | Remove the Hard Drive |
| 4 | Connect to Another Computer |
| 5 | Recover Your Data |
Recovering Data from a Dead MacBook Pro with Retina Screen
If you have a dead MacBook Pro with a retina screen and need to recover your data, there are effective methods available. One such method is using data recovery software like Disk Drill.
By connecting your dead MacBook Pro to a working Mac in recovery mode, you can utilize the powerful features of Disk Drill. It is a reliable and user-friendly tool that can scan and recover your data efficiently, even from a dead Mac.
With Disk Drill’s advanced algorithms and capability to handle high volumes of data, you can trust it to retrieve your precious files and documents. It supports various file formats and provides a seamless recovery experience.
- Connect your dead MacBook Pro to a working Mac using the appropriate cables.
- Boot the working Mac in recovery mode by restarting it and holding down the Command and R keys until the Apple logo appears.
- Launch Disk Drill on the working Mac.
- From the Disk Drill menu, select the connected dead MacBook Pro as the target device for data recovery.
- Start the scanning process and wait for Disk Drill to analyze the storage of the dead MacBook Pro.
- Once the scanning is complete, Disk Drill will display a list of recoverable files.
- Select the files you want to recover and choose a location on the working Mac to save them.
- Click the Recover button to initiate the data recovery process. Disk Drill will transfer the selected files from the dead MacBook Pro to the designated location on the working Mac.
It’s important to note that the success of data recovery depends on the condition of the dead MacBook Pro’s storage device. If the storage device is physically damaged, specialized professional assistance may be required.
Recovering data from a dead MacBook Pro with Disk Drill is a reliable and efficient solution. Its intuitive interface and powerful scanning capabilities make it a valuable tool for retrieving files from a non-functional Mac.
Key Benefits of Using Disk Drill for Data Recovery:
- User-friendly interface
- Advanced scanning algorithms
- Support for high volumes of data
- Ability to recover various file formats
- Compatibility with Mac operating systems
| Benefit | Description |
|---|---|
| User-friendly interface | Disk Drill’s interface is designed to be intuitive and easy to navigate, making the data recovery process straightforward for users. |
| Advanced scanning algorithms | The advanced algorithms employed by Disk Drill ensure thorough scanning and precise identification of recoverable files on the dead MacBook Pro. |
| Support for high volumes of data | Disk Drill can handle large amounts of data, ensuring that no files are left behind during the recovery process. |
| Ability to recover various file formats | Whether your dead MacBook Pro contains photos, videos, documents, or other file types, Disk Drill can recover them, providing comprehensive data retrieval. |
| Compatibility with Mac operating systems | Disk Drill is compatible with different versions of macOS, ensuring seamless integration with your working Mac for data recovery purposes. |
Using an External Hard Drive for Data Recovery
If you’ve tried using data recovery software but still haven’t been able to recover your data from a dead MacBook, don’t worry. There’s another solution you can try: using an external hard drive. By utilizing an external hard drive, you can create a disk image backup of your dead Mac via Disk Utility, allowing you to transfer your valuable data to the external drive.
To get started, you’ll need a working Mac, an external hard drive, and data recovery software. Make sure the external hard drive has sufficient capacity to accommodate all your data. Once you have everything prepared, follow these steps:
- Boot your dead MacBook into recovery mode by holding down the Command and R keys while starting it.
- In the recovery mode, open Disk Utility, which can be found in the Utilities menu.
- Select your dead MacBook’s internal drive from the list of available drives.
- Click on the “Restore” tab in Disk Utility.
- Choose the external hard drive as the destination for the disk image backup.
- Start the restore process and let Disk Utility create the disk image backup.
- Once the backup is complete, you can then transfer the data from the disk image to the external hard drive.
This method allows you to safeguard your data by creating a backup on an external hard drive. It’s a reliable way to ensure that your important files are preserved, even if your dead MacBook is irreparable. With the assistance of Disk Utility and an external hard drive, you can have peace of mind knowing that your valuable data is safe and recoverable.
“Using an external hard drive for data recovery provides a convenient and effective way to protect your files. By creating a disk image backup, you can transfer your data to an external drive, allowing for easy access and retrieval. This method is especially useful when other data recovery options have been unsuccessful.” – David Johnson, IT Specialist
With a well-executed data recovery plan and the right tools at your disposal, you can overcome the challenges of a dead MacBook and successfully recover your precious data.
| Pros | Cons |
|---|---|
| Provides a backup of your data on an external hard drive | Requires a working Mac and external drive |
| Preserves your valuable files even if your MacBook is irreparable | Requires data recovery software |
| Offers easy access and retrieval of data | Relies on Disk Utility for the backup process |
By following the steps above and utilizing an external hard drive, you can increase your chances of successfully recovering data from a dead MacBook. Remember to handle your MacBook and external drive with care to minimize the risk of further damage. If you’re unsure about performing the data recovery process yourself, it’s always advisable to seek professional assistance for a safe and efficient recovery.
Creating a macOS Bootable USB Disk for Data Recovery
When it comes to data recovery on your MacBook, creating a macOS bootable USB disk can be a highly effective method. This approach is particularly useful if previous recovery methods have failed or if your MacBook’s internal drive is inaccessible. To create a macOS bootable USB disk, follow these steps:
- First, you’ll need a USB flash drive with sufficient storage capacity. Make sure it’s formatted and empty, as the process will erase any existing data on the drive.
- Next, download the macOS installation file from the official Apple website or through the App Store. Choose the version of macOS that matches your MacBook’s operating system.
- Connect the USB flash drive to a working Mac.
- Open Disk Utility, which you can find in the Utilities folder within the Applications folder.
- Select the USB drive from the list of drives on the left-hand side of the Disk Utility window.
- Click on the “Erase” button and choose the appropriate format for the USB drive (Mac OS Extended or APFS) and give it a name.
- Once the formatting is complete, open Terminal, which is also located in the Utilities folder.
- In the Terminal window, type the following command: sudo /Applications/Install\ macOS\ [name of the macOS version].app/Contents/Resources/createinstallmedia –volume /Volumes/[name of the USB drive]
- Press Enter and enter your administrator password when prompted. The process will take some time to complete.
- After the process finishes, you’ll have a bootable USB disk with macOS ready for data recovery.
Now that you have a macOS bootable USB disk, you can use it to boot your dead MacBook and perform data recovery using software like Disk Drill. By following these steps, you’ll have a powerful tool at your disposal for retrieving your valuable files and documents.
Disk Drill: Powerful Data Recovery Software
Disk Drill is a reliable and user-friendly data recovery software that can be used with a macOS bootable USB disk. It offers a range of powerful features designed to help you recover lost data from your MacBook.
“Disk Drill has been a lifesaver for many MacBook users. Its intuitive interface and advanced scanning algorithms make it an excellent choice for data recovery tasks. With Disk Drill, you can easily recover lost files, documents, photos, and even entire partitions from your dead MacBook.”
With Disk Drill, you can perform both quick and deep scans to locate and recover lost files. The software supports various file systems, including APFS, HFS+, and FAT32, ensuring compatibility with different storage devices. Additionally, Disk Drill offers features like file preview, which allows you to preview recoverable files before performing the actual recovery.
Whether you’ve accidentally deleted important files, formatted your MacBook’s internal drive, or experienced hardware failure, Disk Drill can help you recover your precious data. It’s a reliable and versatile tool that should be a part of your data recovery arsenal.
| Key Features of Disk Drill | Benefits |
|---|---|
| Quick and deep scans | Efficiently locate and recover lost files |
| Support for multiple file systems | Compatible with various storage devices |
| File preview | Preview files before performing recovery |
| Intuitive interface | User-friendly and easy to navigate |
| Reliable and trusted | Used by professionals in the data recovery industry |
With a macOS bootable USB disk and Disk Drill by your side, you have the tools necessary to recover your data and get your MacBook back up and running.
Conclusion
Recovering data from a crashed MacBook can be a challenging and stressful experience. However, there are various methods and tools available to help you retrieve your important files. Whether you choose to connect your hard drive to another computer or use data recovery software, it’s essential to assess the specific issue with your MacBook and determine the most suitable approach.
While there are DIY data recovery methods that you can attempt, it’s crucial to acknowledge that not all data loss scenarios can be resolved without professional assistance. If you find yourself unable to recover the data on your own or if the damage to your MacBook is severe, it is highly recommended to seek the services of professional data recovery specialists.
Additionally, it’s important to emphasize the value of regular data backups. By regularly backing up your files to an external storage device or cloud service, you can minimize the risk of data loss and ensure that your important information is protected. Prevention is always better than cure, and implementing a proactive approach to data management can save you from the detrimental consequences of data loss in the future.