Is your Xbox One controller suffering from joystick drift? Don’t worry, we’ve got you covered. Joystick drift, also known as analog stick drift, occurs when the thumbsticks move in unwanted directions, even when not being touched. This issue can seriously affect your gameplay experience. But fear not, because in this article, we will guide you through the steps to fixjoystick drift in your Xbox One controller.
The causes of joystick drift are often related to worn-out thumbstick pads, worn-out springs, or a faulty thumbstick unit. But before you jump into complex repairs, it’s essential to start with the simplest fixes, such as cleaning the thumbstick pads. By following some easy steps, you can solve this issue and get back to enjoying uninterrupted gaming sessions. A related console issue also shows up in say goodbye controller drift fixing, especially when compatibility, settings, or controller behaviour affect play.
In this comprehensive guide, we will walk you through each troubleshooting step, offering detailed instructions and tips for a successful repair. Whether you’re a seasoned DIY enthusiast or just starting out, we’ve got you covered. So, let’s get started and restore your Xbox One controller to its pristine functionality!
The easiest fix for joystick drift involves cleaning the thumbstick pads. Over time, the rubber or plastic components of the pads can become worn or dirty, leading to drift issues.
Carefully wipe the surface of the thumbstick with the alcohol-soaked cotton swab.
Rotate the thumbstick and clean it thoroughly from all angles.
If the drift issue persists after cleaning the thumbstick pads, you may need to disassemble the controller to further investigate and fix the problem.
“Cleaning the thumbstick pads is a simple yet effective way to fix joystick drift on an Xbox One controller. It’s important to keep these components clean to ensure smooth and accurate movement during gameplay.” – Gaming Expert
To disassemble the controller:
Use a prying tool and T-8 or T-9 safety Torx to remove the screws securing the controller’s casing.
Check the position of the thumbsticks and ensure they are properly aligned.
If necessary, replace the thumbstick pads with new ones or use shims to secure them in place.
After reassembling the controller, test it to ensure the drift issue has been resolved.
Steps to Clean Thumbstick Pads
Apply isopropyl alcohol to a cotton swab
Wipe the thumbstick surface with the alcohol-soaked cotton swab
Rotate the thumbstick and clean it thoroughly from all angles
By following these steps, you can effectively clean the thumbstick pads of your Xbox One controller and address the issue of joystick drift.
Replacing the Thumbstick Springs
If cleaning the thumbstick pads does not resolve the drift issue, the next step is to replace the thumbstick springs. The springs help snap the thumbstick back to the center position when it is released. To replace the springs, you will need a prying tool, T-8 safety Torx, analog stick springs, and tweezers. Some controllers, including Xbox 360 controllers, use the same analog stick component as Xbox One controllers, allowing you to use springs from an old controller. Alternatively, you can purchase a replacement analog stick and take the springs from it.
Disassemble the controller using the prying tool and T-8 safety Torx. Carefully remove the green plastic covers on the bottom and right side of the thumbstick assembly. Remove the old springs and replace them with new ones or springs from another controller. Snap the green plastic covers back into place, reassemble the controller, and test for operation.
Tools and materials needed:
Prying tool
T-8 safety Torx
Analog stick springs
Tweezers
Follow these step-by-step instructions to replace the thumbstick springs:
Use the prying tool and T-8 safety Torx to disassemble the controller.
Carefully remove the green plastic covers on the bottom and right side of the thumbstick assembly.
Remove the old springs from the thumbstick assembly.
Replace the old springs with new ones or springs from another controller.
Snap the green plastic covers back into place.
Reassemble the controller.
Test the controller to ensure the thumbstick drift issue is resolved.
Note: If you are not confident in performing these repairs yourself, consider seeking professional assistance or contacting Microsoft for warranty support.
Replacing the Thumbstick Unit
If cleaning the thumbstick pads and replacing the springs does not resolve the drift issue, it may be necessary to replace the entire thumbstick unit. This is a more complex repair that requires desoldering and soldering skills.
To replace the thumbstick unit, you will need the following tools and supplies:
A prying tool
T-8 or T-9 safety Torx
T-7 Torx
A desoldering tool
A soldering tool
Solder
A replacement analog stick assembly
Follow these steps to replace the thumbstick unit:
Using the prying tool and T-8 or T-9 safety Torx, disassemble the Xbox One controller by removing the case.
Use a T-7 Torx to remove the circuit board from the controller.
With the desoldering tool, carefully remove the old analog stick assembly from the circuit board.
Insert the new analog stick assembly into the circuit board.
Using the soldering tool and solder, secure the new analog stick assembly in place.
Reassemble the controller by following the disassembly steps in reverse order.
Test the controller for operation to ensure that the drift issue has been resolved.
Note: Replacing the thumbstick unit requires advanced soldering and desoldering skills. If you are not experienced in these techniques, it is recommended to seek professional assistance to avoid damaging the controller.
Tools and Supplies
Description
Prying tool
A tool used to separate and open the Xbox One controller case.
T-8 or T-9 safety Torx
Torx screwdrivers used to remove the screws that secure the controller case.
T-7 Torx
A Torx screwdriver used to remove the circuit board from the controller.
Desoldering tool
A tool used to remove the old analog stick assembly from the circuit board.
Soldering tool
A tool used to secure the new analog stick assembly to the circuit board.
Solder
A material used to create a permanent bond between the new analog stick assembly and the circuit board.
Replacement analog stick assembly
A new thumbstick unit that will be installed in place of the old one.
Additional Troubleshooting Steps
If the previous fixes do not resolve the joystick drift issue with your Xbox One controller, there are some additional troubleshooting steps you can try.
Sticky Buttons:
If you’re experiencing sticky buttons, a common issue with controllers, you can try cleaning the areas where the buttons are sticky. To do this, dip a cotton swab in rubbing alcohol and gently clean around the buttons to remove any dirt or residue that may be causing the stickiness.
Controller Won’t Turn On:
If your Xbox One controller won’t turn on, there are a few things you can check:
Install new batteries in the controller, ensuring they are correctly inserted.
Check the battery contacts inside the controller for any corrosion or debris. Clean them gently with a cloth or cotton swab if necessary.
Update the firmware of your controller. To do this, connect the controller to the Xbox console using a USB cable. Press the Xbox button to open the Guide, then go to Settings > Kinect & devices > Devices & accessories > Firmware version. Select Update now to initiate the firmware update.
Updating the firmware can often resolve any software-related issues that may be preventing the controller from turning on.
Note: It’s important to use a genuine Xbox One controller and not a third-party controller, as compatibility and troubleshooting steps may differ.
Issue
Troubleshooting Steps
Sticky Buttons
– Clean the areas around the buttons with rubbing alcohol – Remove any dirt or residue causing stickiness
Controller Won’t Turn On
– Install new batteries correctly – Check battery contacts for corrosion or debris – Update controller firmware
These additional troubleshooting steps may help resolve any remaining issues with your Xbox One controller before considering purchasing a new one. By attempting these fixes, you can potentially save money and extend the lifespan of your controller.
Conclusion
Joystick drift on Xbox One controllers can be a frustrating issue, but fear not, as there are effective solutions available. By following a step-by-step approach, starting with simple fixes like cleaning the thumbstick pads, and advancing to more complex repairs like replacing the thumbstick springs or unit, you can successfully troubleshoot the majority of joystick drift cases.
It is important to exercise caution when disassembling and repairing your controller. If you are not comfortable with DIY repairs, it is advisable to seek professional assistance or contact Microsoft for warranty support. Remember, safety should always be a priority.
With the right approach and the appropriate fixes, you can restore your Xbox One controller to a fully functional state and get back to enjoying a smooth gaming experience. Don’t let joystick drift hold you back, take action and reclaim your gaming prowess!
FAQ
How do I fix joystick drift on my Xbox One controller?
To fix joystick drift on your Xbox One controller, you can start by cleaning the thumbstick pads, replacing the thumbstick springs, or even replacing the entire thumbstick unit. If these steps don’t resolve the issue, there are also some additional troubleshooting steps you can try.
How do I clean the thumbstick pads?
To clean the thumbstick pads, you will need isopropyl alcohol, cotton swabs, a prying tool, T-8 or T-9 safety Torx, and replacement thumbstick pads or shims. Apply isopropyl alcohol to a cotton swab and carefully wipe the surface of the thumbstick. Rotate the thumbstick and clean it thoroughly. If the drift issue persists, you can disassemble the controller and replace the thumbstick pads or use shims to secure them.
What should I do if cleaning the thumbstick pads doesn’t work?
If cleaning the thumbstick pads doesn’t resolve the drift issue, the next step is to replace the thumbstick springs. You will need a prying tool, T-8 safety Torx, analog stick springs, and tweezers. Disassemble the controller, remove the old springs, and replace them with new ones or springs from another controller. Then, reassemble the controller and test for operation.
What can I do if replacing the thumbstick springs doesn’t fix the problem?
If replacing the thumbstick springs doesn’t resolve the joystick drift issue, it may be necessary to replace the entire thumbstick unit. This is a more complex repair that requires desoldering and soldering skills. You will need a prying tool, T-8 or T-9 safety Torx, T-7 Torx, desoldering tool, soldering tool, solder, and a replacement analog stick assembly. Disassemble the controller, remove the old analog stick assembly, insert the new analog stick assembly, solder it in place, and reassemble the controller.
Are there any additional troubleshooting steps I can try?
Yes, if the previous fixes do not resolve the joystick drift issue, you can try troubleshooting sticky buttons by cleaning them with rubbing alcohol. If the controller won’t turn on, try installing new batteries, checking the battery contacts, and updating the firmware. These steps may help resolve any remaining issues before considering a new controller.
What should I do if none of the fixes work?
If none of the fixes work, and you are still experiencing joystick drift on your Xbox One controller, it is advisable to seek professional assistance or contact Microsoft for warranty support. Attempting further repairs without the necessary experience may risk damaging the controller.
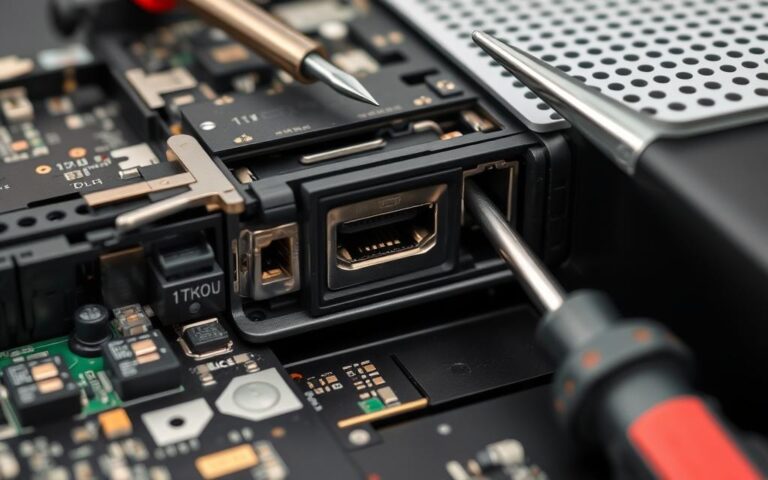
Your Xbox One opens a vast gaming world. But, a faulty HDMI port can spoil the fun. We’ll show you how to fix the HDMI port, focusing on the Xbox One. The HDMI link is key. It sends high-quality sound and picture from your console to your screen. If your Xbox One shows a dark…
Knowing how long the Xbox controller warranty lasts is crucial for gamers who care about their equipment. This warranty protects your controller if it has issues or breaks. We’ll cover everything you need to know about the warranty, like what it includes and how long it lasts. This info is key to keeping your gaming…
Xbox achievements sync is an exciting feature that allows gamers to track their progress and unlock accomplishments in their favorite games. However, it can be frustrating when achievements are not unlocking as expected. If you’re facing issues with Xbox achievements not unlocking, you’ve come to the right place. In this article, we will provide troubleshooting…
Are you facing Xbox game installation issues on your Xbox One? One common problem that many users encounter is the “installation stopped” error. It can be frustrating, but worry not, as there are troubleshooting methods available to help you fix these issues and get your games up and running smoothly again. There could be several…
Xbox One party chat problems can really get in the way, ruining your gaming fun with friends. NAT issues are a big problem for many Xbox One players, affecting both gameplay and chat. To solve these issues, it’s key to know what’s causing them and take the right steps to fix them. About 70% of…
Experiencing xbox cloud gaming lag can be really frustrating. It’s important to fix lag on xbox for a smooth gaming experience. Understanding what causes lag is key, including internet connection, device performance, and game optimization. Improving your internet connection and device settings can greatly enhance your gaming. Regular updates to graphics and hardware drivers are…