If you’re experiencing coil whine in your laptop, there are several solutions you can try to minimize or eliminate the noise. Coil whine is caused by vibrations of the electromagnetic coils in your laptop’s components, such as the graphics card or power supply. This article will provide practical steps to help you solve this issue and enjoy a noise-free computing experience.
Coil whine in laptops is often caused by vibrations in the electromagnetic coils of the laptop’s components. These coils, found in parts like the graphics card or power supply, can generate audible noise when they vibrate. A related repair case also appears in troubleshooting how frozen laptop cursor, where the same fault patterns can change the best fix path.
The vibrations stemming from the electromagnetic coils are usually transferred through the metal case or PCI-E brackets to other parts of the laptop, amplifying the noise and resulting in coil whine. It’s crucial to comprehend the root cause of this issue before attempting to fix it.
Coil whine occurs as a result of the interaction between the electromagnetic fields generated by the coils and the magnetic fields of the surrounding components. These interactions create vibrations that produce the audible noise. The intensity of the noise can vary depending on factors such as the quality of the coils and the load on the components.
“Coil whine is a common phenomenon in electronic devices, including laptops. It can be annoying and distracting, especially in quiet settings. Understanding its cause is the first step towards finding an effective solution.” – Laptop Repair Specialist
When the laptop’s components draw power from the electrical supply, the electromagnetic coils within these components generate magnetic fields. These magnetic fields then interact with the magnetic fields of other nearby components, inducing vibrations in the coils. These vibrations are responsible for the audible noise known as coil whine. It’s important to note that coil whine is not a sign of a faulty laptop; rather, it’s a common occurrence in many electronic devices.
Coil whine can be more prevalent when the laptop is under heavy load or performing demanding tasks, as the increased power draw can exacerbate the vibrations and make the noise more noticeable. Factors such as component design, quality, and manufacturing tolerances can also affect the presence and intensity of coil whine.
To illustrate the cause of coil whine, consider a scenario where you are running intensive applications or playing graphics-intensive games on your laptop. As the demanding workload puts stress on the components, the power draw increases, causing the electromagnetic coils to generate stronger magnetic fields and consequently more pronounced vibrations. These vibrations can then propagate through the laptop’s structure, resulting in audible noise.
The Role of Electromagnetic Coils:
Electromagnetic coils are essential components in laptops and other electronic devices. They are used in various applications, including power regulation, data transmission, and signal processing. The electromagnetic coils consist of wire wound around a core, creating a magnetic field when an electric current flows through the wire. This magnetic field is responsible for the coil whine phenomenon when it interacts with other magnetic fields.
The type and quality of the coils used in a laptop can impact the likelihood and severity of coil whine. Factors such as the material of the core, the number of windings, and the manufacturing tolerances can all contribute to the presence and intensity of coil whine. Additionally, the positioning of the coils in relation to other components can determine how the vibrations propagate throughout the laptop’s structure.
Noise Level
Possible Causes
Low
Coils with tighter windings, higher quality components, and better shielding
Medium
Coils with slightly looser windings or lower quality components
High
Coils with very loose windings, poor quality components, or inadequate shielding
Using Rubber Grommets to Reduce Coil Whine
Coil whine can be an annoying issue for laptop users, but there are effective solutions available to minimize or eliminate the noise. One such solution is the use of rubber grommets. These grommets act as a barrier between the GPU and other components, such as the sound card, isolating them from each other.
By placing rubber grommets between these components, the vibrations from the electromagnetic coils are dampened, resulting in a significant reduction in coil whine. Users have reported positive results after installing rubber grommets in their laptops, experiencing a quieter and more enjoyable computing experience.
Benefits of Rubber Grommets for Reducing Coil Whine
Minimize vibrations
Isolate GPU and other components
Significantly reduce or eliminate coil whine
By effectively reducing coil whine, rubber grommets offer a practical and cost-effective solution for laptop users seeking a quieter computing experience. Installing rubber grommets is a simple process that can be done by individuals with basic technical knowledge.
“Rubber grommets have made a noticeable difference in reducing coil whine on my laptop. The annoying buzzing noise has been significantly quietened, allowing me to focus on my work without distractions.” – Laptop user
Installation Steps for Rubber Grommets:
Identify the components causing coil whine, such as the GPU and sound card.
Carefully place rubber grommets between these components to create a barrier.
Ensure that the grommets are securely positioned to effectively dampen vibrations.
Test the laptop to confirm the reduction in coil whine.
By following these steps and using rubber grommets, laptop users can enjoy a quieter computing experience with reduced coil whine. It is important to note that while rubber grommets can be effective, they may not completely eliminate coil whine in all cases. If the issue persists, other solutions such as optical SPDIF connections or tightening components should be considered.
Next, we will explore another potential solution to address coil whine – the use of optical SPDIF connections to external DACs or amplifiers.
Consider Optical SPDIF Connection
One effective solution to address coil whine in your laptop is to consider using an optical SPDIF connection to an external DAC (Digital-to-Analog Converter) or amplifier. This can help bypass the internal sound card of your laptop and reduce the interference caused by coil whine. By utilizing an external audio solution, you may be able to minimize or eliminate the noise caused by coil whine.
An optical SPDIF connection allows for a digital audio signal to be transmitted from your laptop to an external DAC or amplifier, which then converts the digital signal into an analog one that can be fed into your speakers or headphones. This can provide a cleaner audio signal and potentially reduce the impact of coil whine on your audio output.
Using an external DAC or amplifier with an optical SPDIF connection can help deliver high-quality audio while minimizing the effects of coil whine that may be present in your laptop’s internal sound card.
When utilizing an optical SPDIF connection, make sure you have a compatible external DAC or amplifier that supports this type of connection. Some popular options include the FiiO E10K USB DAC and the Audioengine D1 24-Bit DAC, both of which offer optical SPDIF inputs.
It is also important to note that in order to use an optical SPDIF connection, your laptop must have an optical SPDIF output port. If your laptop does not have this port, you may need to consider alternative solutions for addressing coil whine.
To set up an optical SPDIF connection, follow these steps:
Ensure your external DAC or amplifier is powered on and connected to your laptop via an optical SPDIF cable.
Access the audio settings on your laptop and select the external DAC or amplifier as the audio output device.
Adjust the volume settings on both your laptop and the external DAC or amplifier to achieve the desired audio level.
By considering an optical SPDIF connection to an external DAC or amplifier, you can potentially fix the issue of coil whine in your laptop and enjoy a clearer and more enjoyable audio experience.
Pros
Cons
Bypasses the internal sound card of your laptop.
Potentially reduces interference caused by coil whine.
Provides cleaner audio output.
Requires a compatible external DAC or amplifier with optical SPDIF input.
Your laptop must have an optical SPDIF output port.
Additional cables and setup required.
Example of an Optical SPDIF Connection Setup
In the example above, the laptop is connected to an external DAC/Amplifier using an optical SPDIF cable. The DAC/Amplifier is then connected to speakers for audio output. This setup allows for improved audio quality and potential reduction in coil whine interference.
Ensuring Proper Component Tightening
Properly tightening all the components in your laptop is essential for preventing coil whine. Loose components can contribute to vibrations and increase the chances of coil whine occurring. Therefore, it is crucial to ensure that all components are securely fastened and properly seated in their respective slots.
One effective way to achieve proper component tightening is by using rubber grommets or plastic spacers. These can be strategically placed in the right spots to provide additional support and stability to the components, reducing the chances of vibrations that lead to coil whine.
Using Rubber Grommets
Rubber grommets are small, flexible pieces that can be inserted between the components and the laptop’s frame. They act as shock absorbers, dampening the vibrations and preventing them from spreading to other parts of the laptop. By isolating the components, rubber grommets help minimize the risk of coil whine. Make sure to choose grommets that are compatible with the specific components in your laptop.
Using Plastic Spacers
Plastic spacers are another excellent option for ensuring proper component tightening. They are small plastic discs that can be placed between the components and the laptop’s chassis. Plastic spacers provide stability and prevent any movement or displacement of the components, effectively reducing the chances of coil whine caused by vibrations.
By implementing these measures, you can significantly minimize the likelihood of coil whine and enjoy a quieter computing experience.
Proper component tightening is crucial for preventing coil whine. By securely fastening and supporting the components, you can minimize vibrations and eliminate the annoying noise. Consider using rubber grommets or plastic spacers to ensure a stable and silent laptop.
Testing with MSI Kombustor
When it comes to diagnosing coil whine in your laptop, using a reliable stress-testing tool like MSI Kombustor can be incredibly helpful. This software is specifically designed for testing the performance of graphics cards, making it a valuable tool in identifying and analyzing any potential coil whine issues.
By running MSI Kombustor, you can put your laptop’s GPU under heavy load and observe if coil whine occurs. This allows you to determine whether the presence of coil whine is performance-dependent or if it is triggered by specific games or applications. Testing with MSI Kombustor can provide valuable insights into the nature and severity of the coil whine problem in your laptop.
It is worth noting that testing with MSI Kombustor should be done in a controlled environment, preferably with headphones or speakers to ensure accurate detection of any coil whine noise. Additionally, it is recommended to compare the test results with your regular usage to determine if coil whine is prevalent during typical laptop activities.
How to Use MSI Kombustor for Coil Whine Testing
Download and install the latest version of MSI Kombustor from the official MSI website. Ensure compatibility with your laptop’s graphics card.
Launch MSI Kombustor and select the stress test option specific to your GPU. This will initiate a benchmark that puts your graphics card under heavy load.
Observe your laptop for any signs of coil whine during the test. Listen carefully for any high-pitched noises that may indicate the presence of coil whine.
Take note of the specific conditions under which coil whine occurs, such as the intensity of the load, duration of the test, or specific games and applications that trigger the noise.
Repeat the test multiple times under different scenarios to gather more data and validate the consistency of the coil whine issue.
Remember, the results obtained from MSI Kombustor testing can provide essential information about the presence and behavior of coil whine in your laptop. This knowledge will help you in selecting and implementing the most effective solutions to mitigate or eliminate coil whine altogether.
With MSI Kombustor as a powerful testing tool at your disposal, you can take proactive steps towards resolving the coil whine problem in your laptop and ensure a more enjoyable and distraction-free computing experience.
Advantages of Testing with MSI Kombustor
Limitations of Testing with MSI Kombustor
Accurate assessment of coil whine behavior under heavy GPU load
Identification of performance-dependent coil whine issues
Observation of coil whine triggers in specific games or applications
Comparison of coil whine presence during regular laptop usage
Unable to pinpoint the exact source of coil whine within the laptop
No in-depth analysis of coil whine causes or potential fixes
“Testing with MSI Kombustor provides valuable insights into the nature and severity of coil whine issues in your laptop, allowing for informed decision-making in addressing this common problem.” – Laptop Performance Magazine
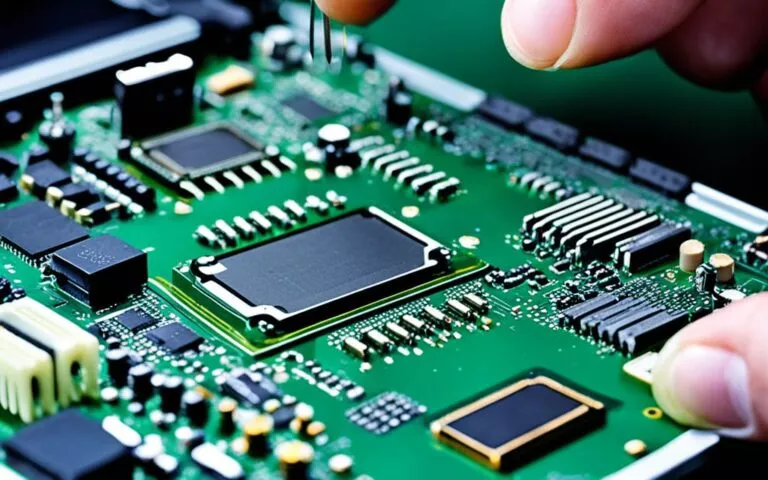
Applying Super Glue to Choke Coils
If you have access to the choke coils in your laptop’s components, applying super glue can be an effective way to reduce noise. The low viscosity super glue should be carefully applied into the gaps between the choke coil and the PCB, allowing it to wick and create a dampening effect.
“Applying super glue to the choke coils helped significantly reduce the noise in my laptop. The vibrations caused by coil whine were noticeably diminished, resulting in a quieter computing experience.”
This method has worked for many users in quieting coil whine and providing noise reduction benefits. It is important to exercise caution and precision when applying the super glue to avoid any unintentional damage to the surrounding components.
By addressing the issue at its source, you can fix the coil whine problem and enjoy a more peaceful and enjoyable computing experience.
Applying super glue to the choke coils is a practical solution that has yielded positive results for numerous laptop users.
Conclusion
In conclusion, coil whine can be a frustrating issue for laptop users. However, there are several solutions available to alleviate or eliminate the noise. From using rubber grommets and optical SPDIF connections to ensuring proper component tightening and applying super glue, each method offers a potential fix for laptop coil whine.
We recommend trying these solutions and seeing which one works best for your specific laptop and situation. Experimentation and troubleshooting may be required to find the most effective solution, as different laptops and components may respond differently to each method.
By implementing these solutions, you can enjoy a quieter computing experience without the annoyance of coil whine. Don’t let coil whine disrupt your productivity or gaming sessions any longer. Take action today and reclaim the silence of your laptop.
FAQ
What causes coil whine in a laptop?
Coil whine in a laptop is caused by vibrations in the electromagnetic coils of its components, such as the graphics card or power supply.
How can I reduce or eliminate coil whine?
There are several solutions you can try to minimize or eliminate coil whine, including using rubber grommets, considering an optical SPDIF connection, ensuring proper component tightening, and applying super glue to choke coils.
How do rubber grommets help reduce coil whine?
Rubber grommets can be placed between the GPU and other components to isolate them and dampen the vibrations of the electromagnetic coils, reducing or eliminating coil whine.
What is an optical SPDIF connection?
An optical SPDIF connection is a type of connection that can be used to bypass the internal sound card of a laptop and reduce interference caused by coil whine. It connects to an external DAC or amplifier.
Why is proper component tightening important?
Proper component tightening is essential for preventing coil whine as loose components can contribute to vibrations. It is crucial to ensure all components are securely fastened and properly seated in their respective slots.
How can I test for coil whine using MSI Kombustor?
MSI Kombustor is a stress-testing tool for graphics cards. By running this software and putting your GPU under heavy load, you can observe if coil whine occurs, helping you identify whether coil whine is performance-dependent and which games or applications may trigger it.
How can super glue help reduce coil whine?
If you have access to the choke coils in your laptop’s components, applying super glue into the gaps between the choke coil and the PCB can create a dampening effect and reduce noise caused by coil whine.
Are there any other solutions to fix laptop coil whine?
In addition to the mentioned solutions, you can also explore other methods such as updating your laptop’s BIOS or seeking professional assistance if the issue persists.
Acer laptops sometimes show a black screen, which can pop up out of nowhere. This makes the screen not work. It’s very important to fix this quickly. If not, you might lose data and your laptop won’t work well. A few things could cause this problem. These include bad system files, viruses, and old graphics…
If you’re experiencing issues with your laptop speakers, replacing them may be necessary to restore optimal sound quality. Whether you’re a tech enthusiast or a novice, this guide will walk you through the process of replacing your laptop’s internal speakers step-by-step. Before getting started, it’s important to note that specific laptop models may vary in…
Replacing a broken laptop screen yourself can save you money and time. Most basic laptop screen replacements take around an hour and cost £80. This step-by-step guide will walk you through the process of replacing your laptop’s LCD screen. Before starting, make sure to inspect your laptop for other possible damages and test the graphics…
An overheating laptop is a common issue. However, it is not an issue you must overlook because it may lead to data loss, performance problems, and even hardware damage. Instead of overreacting, take it easy. It is normal for your laptop to heat up because its internal components generate heat when the laptop runs. More…
Laptop processors, also known as CPUs (Central Processing Units), play a crucial role in the performance of any computer. While upgrading a CPU on a desktop is a common practice, the same cannot be said for laptops. Most modern laptops have their CPUs soldered directly onto the motherboard, making it difficult, if not impossible, to…
Is your laptop unable to detect an external GPU? Don’t worry, we’ve got you covered. When your laptop fails to detect an external GPU, it can severely impact your system’s graphics performance. But fear not, we have the solutions to fix this frustrating issue. There can be several reasons why your laptop is experiencing this…