Fixing a broken key on your MacBook Pro can be a real headache. Especially when you think about how much it costs to fix it professionally. Prices can hit between £500 to £700 for a full top case replacement, and £200 for a new keyboard. But, there’s a silver lining. Thanks to guides on iFixit and YouTube, you can tackle the problem yourself.
Let’s get into the various ways you can fix your MacBook Pro’s keyboard at home. This can save you a trip to the Mac Store and a lot of money. After all, professional repair costs can spiral to between £400 and £500. Fixing it yourself could save you a lot, and it only takes about 30 minutes of your time. A similar Apple troubleshooting case also appears in fixing broken keys macbook pro, where software checks and hardware symptoms often overlap.
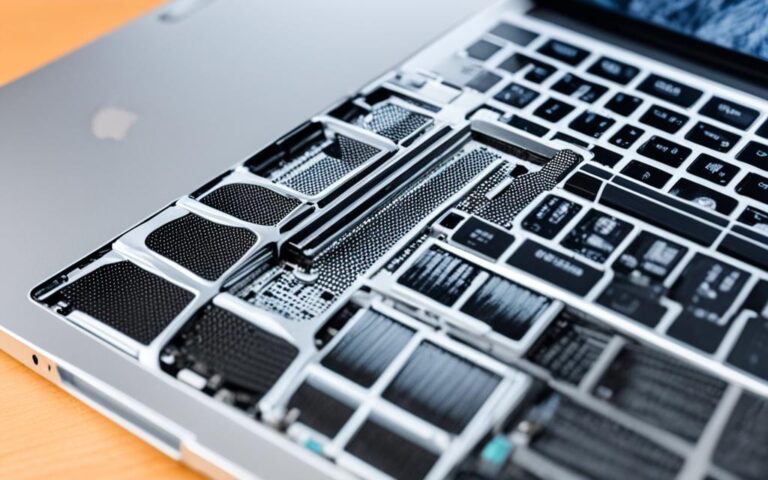
Understanding MacBook Pro keyboard issues requires knowledge of its mechanics. The design of the MacBook Pro keyboard has changed greatly. The butterfly keyboard was introduced to make typing more stable and responsive. However, it has had problems like sticky keys and failures.
On the other hand, the older scissor mechanism is more reliable and satisfying. Knowing both mechanisms helps in fixing problems efficiently. Every part, such as the keyboard button and the key mechanism, is important for its performance.
The butterfly mechanism has been criticized, especially after a lawsuit. Apple said only a few keyboards had failures. But, many have reported problems, especially with the 2016 MacBook Pro 13-inch model.
Users reported keyboard issues almost three and a half years after buying their MacBook. Apple’s Keyboard Service Program repairs could take up to a week. During these repairs, Apple started a program to fix these defects for free.
Keyboard Mechanism
Durability
Common Issues
Repair Cost
Butterfly Keyboard
Less reliable
Sticky keys, failure rates
$700 and upwards
Scissor Mechanism
More reliable
Fewer reported issues
Varies by model
In conclusion, knowing the difference between butterfly and scissor keyboards helps with repairs. It lets users take better care of their MacBook Pro. Understanding these parts leads to better handling and fixing of keyboard issues.
Common Issues with MacBook Keys
Many users face common MacBook keyboard problems that hinder everyday tasks. Key issues often involve stuck keys and broken keys. Dirt and debris are usually to blame, causing keys to stick or fail.
Some keys pose more problems than others. The space key, for instance, is known to jam. This is due to its unique design. Many have shared their struggles online, finding success in using air canisters to clean it.
Apple offers a free keyboard replacement programme for some models. This is helpful for issues caused by spills or dirt. Tilting the MacBook at 75 degrees can also free stuck keys.
Software issues can also affect keyboard responsiveness. Updating macOS might solve these problems. Adjusting settings like 3D Touch and checking keyboard preferences can enhance performance. Be wary, as features like Sticky Keys or Slow Keys can sometimes confuse users.
Using an external keyboard helps identify if the problem is software or hardware. If issues continue, it’s best to contact Apple for expert help. This ensures your keyboard works as intended.
How to Fix a Broken Key on Your MacBook Pro
To fix a MacBook key, you need to be careful and have the correct tools. First, it’s key to know how to spot problems with your keyboard. A planned method helps avoid more harm and saves time.
Identifying the Problem
Start by figuring out the issue. MacBook keys can stop working for a few reasons:
Dirty or damaged keys
Software updates needed
Faulty applications causing keyboard problems
Slow Keys setting turned on
Faulty or damaged keyboard hardware
Check your MacBook carefully to find the main problem. To make your keyboard work better, turn off your MacBook, shake it slightly to get rid of dirt, and clean it well with compressed air or a soft brush.
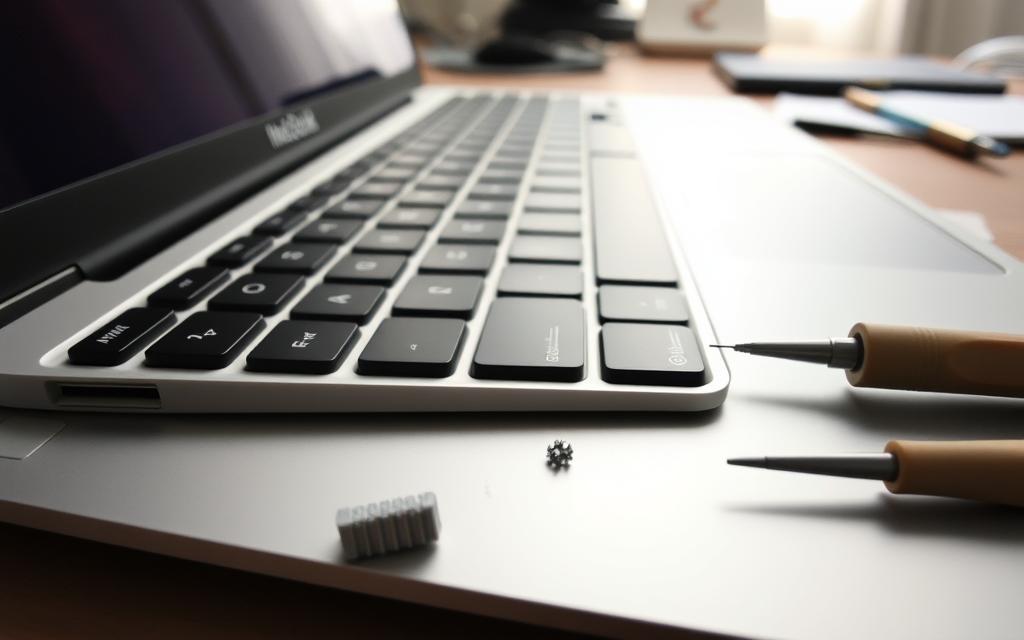
Gathering Necessary Tools
Having the correct repair tools makes the repair easier. You’ll need:
A plastic spudger to remove the key safely
Needle-nose tweezers for small parts
A small jeweller’s screwdriver for screws
Looking at online repair guides and videos can be really helpful. They show you how to take apart and fix MacBook keyboards. With the right tools, fixing your MacBook key or any keyboard issue can be done with confidence.
Locating Replacement Parts for Your MacBook Key
Finding MacBook replacement parts can be tricky. Especially if you need specific keys. There are different places to get these parts. Knowing where to look is key to keeping your MacBook working right.
Where to Buy Replacement Keys
One top spot to buy MacBook keys is online shops. Shops like The Bookyard focus on used caps and clips. This can be cheaper. Most find online stores save money and offer more choices than regular shops, which might not have what you need.
Considerations for Used vs. New Parts
Choosing between new and used parts? Think about the key’s condition. New parts are more durable but tougher to find. This is because Apple limits their sale to consumers. Used parts are easier to find but might be worn out. This could affect how they work. It’s important to balance these points for a good fix that won’t let you down.
Part Type
Durability
Availability
Price
New Key
High
Low
£15-£25
Used Key
Medium
High
£5-£15
Whether you go for used or new parts, picking carefully helps keep your MacBook in top shape.
Step-by-Step Guide to Replacing a Key
Getting a new key for your MacBook Pro can make it work like new. You can do it yourself in a few simple steps, needing just a few tools. This guide will show you how to replace a key effectively.
Removing the Broken Key
Begin with taking off the damaged key. It’s best to use a plastic tool to avoid damage. Remember these tips:
Gently push around the key cap’s sides, targeting the removable plastic notches.
A slim, bendable card might work better than a thicker one.
Watch out for the delicate black piece under the key. Too much force can break it.
Installing the Replacement Key
After taking out the old key, it’s time to put in the new one. You need to place and secure it correctly.
First, align the scissor mechanism with the notches accurately.
Insert the key cap’s lower edge first, making sure it fits right.
Press the top edge until you hear clicks, indicating it’s in place. Big keys like the space bar might click up to four times.
If you handle things gently, replacing a key can be quick, under 20 minutes. This DIY keyboard repair lets you fix your MacBook without needing a pro.
Alternative Repair Techniques for Stuck or Misaligned Keys
Dealing with stuck MacBook keys or misaligned keys can be a big hassle. Luckily, there are some DIY fixes that can get your keyboard working again. These methods tackle common problems with minimal tools and household items.
Fixing a Stuck Key Mechanism
If you’re dealing with a stuck key, take a look under it first. Dust and crumbs often get stuck there, making keys stick. You can use a few easy techniques:
Try using a thin object, like a toothpick or twisty tie, to gently remove any blockages under the key. This is also good for fixing keys that aren’t sitting right.
If the key still won’t press properly, the keyboard’s mechanics might be off. A component could be out of place, causing issues.
If a key has popped off, a bit of superglue can reattach any loose retainers. Watch the locking clips closely. If these clips are broken, the key won’t fit back on correctly.
The space bar is a bit trickier because it’s held on with a metal retainer. If it’s acting up, swapping it with a less used key can be a temporary solution. This buys you time to find a proper replacement.
Issue
Potential Solution
Notes
Key stuck due to debris
Use a toothpick to clear
Gently apply pressure to avoid damage
Misaligned key
Inspect and adjust mechanism
Ensure components are securely in place
Key fell off
Reattach using superglue
Ensure retainers are undamaged
Space bar issues
Test with other keys
Consider different connection method
These handy tips can help solve keyboard issues, keeping your MacBook keyboard in good shape. You won’t always need to call in the experts.
Tips for Preventing Future Keyboard Issues
Keeping your keyboard in top shape requires regular and proactive keyboard maintenance. Using effective MacBook Pro tips can help avoid keyboard troubles before they start. Here are some handy tips:
Use compressed air to clean your keyboard and remove dust and debris.
Don’t eat or drink near your MacBook to minimize spill risks.
A keyboard cover can guard against dirt and smaller spills.
Type gently to avoid stressing the keys.
To further prevent keyboard issues, ensure your software is always current. Include these steps in your upkeep routine:
Regularly updating your macOS software brings bug fixes and enhancements.
Turn off Mouse Keys and Slow Keys to keep keyboard response snappy.
Fix misbehaving Modifier Keys by reconfiguring them.
Check and tweak keyboard layout settings if you use different input sources.
If your MacBook starts showing regular problems, consider resetting NVRAM and SMC, particularly for older models. These preventive steps won’t solve every issue but they make a big difference. Following these MacBook Pro tips will help your keyboard last longer and work better.
When to Seek Professional Help
Some keyboard problems need a professional’s touch. If many keys aren’t working or are broken, you might need a new keyboard. This kind of job is best left to experts.
If the keyboard’s structure is visibly damaged, it’s smart to contact an authorized service. Big damage can make repairs tricky, so getting help from a pro is crucial. Knowing when to ask Apple for help can avoid extra hassle and save time.
Continuous issues with your keyboard after you’ve tried to fix it show you need a professional. Issues like keys not working right after cleaning show it’s not a simple fix. A professional can properly diagnose the problem and find the right solution.
Multiple broken keys
Visible damage to the keyboard
Persistence of problems after self-repair attempts
Unavailability of replacement parts
When you talk to Apple stores or certified repair centres, explain what’s wrong. They’ll check if your keyboard problems are covered by warranty. This is especially true for Apple’s Keyboard Service Program and its butterfly keyboard issues.
Conclusion
In this guide on fixing MacBook keyboards, we looked into issues that might pop up, especially after repairs or updates. Problems can seem big but are often fixable with a bit of know-how on DIY MacBook repair. Learning to fix keys can improve your typing and help your device last longer.
We need to be careful when fixing keyboards ourselves. It can work well but carries risks if we’re not cautious. Always check your system settings and hardware condition first. If problems keep happening, getting advice from Apple support is wise to see if you need a new keyboard.
Keeping your keyboard in good shape is key to avoiding future issues. Knowing about common faults lets you handle small fixes confidently. This way, your MacBook Pro stays an efficient part of your daily work.
FAQ
What are the common issues with MacBook Pro keys?
Common problems include keys that don’t respond, keys that stick, and clips that break. Many users find the space key and others problematic due to the keyboard’s butterfly mechanism.
How can I identify the problem with my MacBook keyboard?
First, figure out if it’s a physical break, misalignment, or something trapped under the keys. Watching how the key behaves can pinpoint the problem.
Where can I find replacement keys for my MacBook Pro?
Replacement keys are mostly found on online shops like The Bookyard, selling used caps and clips. Finding new parts can be hard since Apple doesn’t sell them directly.
What tools do I need to fix my MacBook key?
You’ll need a few basic tools. A plastic spudger to remove the key without damage, tweezers for small parts, and maybe a tiny screwdriver for putting things back together.
What steps should I follow to replace a broken key?
Start with a plastic spudger to carefully lift off the broken key. Then, make sure the replacement keys’ scissor mechanism is correctly aligned. Finally, press down the new key cap until it clicks twice.
How can I prevent my keyboard keys from getting stuck in the future?
Keeping your keyboard clean is key. Use compressed air for cleaning, keep liquids away, and maybe get a keyboard cover. This helps prevent stuck keys by keeping out dust and spills.
When should I consult a professional for MacBook keyboard issues?
If you have many broken keys or serious damage, it’s time to see a pro. Also, seek help if DIY fixes don’t solve the problem. Apple’s certified repair services offer professional solutions.
It’s important to fix your MacBook Pro keyboard to keep your device running well. Many people have problems with their MacBook keyboards, from keys not working to the whole keyboard stopping. Luckily, knowing how to fix or replace your MacBook keyboard can save you lots of money. A repair might cost less than $30, much…
The MacBook Air is a popular choice for many users due to its sleek design and portability. However, some users have experienced a frustrating issue known as thermal throttling, which can have a significant impact on the laptop’s performance and overall user experience. Thermal throttling occurs when the MacBook Air’s processor cores shut down or…
Are you experiencing AirPlay mirroring issues on your MacBook Pro? You’re not alone. Many MacBook Pro users have encountered troubles with AirPlay mirroring after upgrading to the Big Sur operating system. The frustration is real, as AirPlay mirroring is an essential feature for streaming and screen sharing. But fret not, we’re here to help you…
If you own a MacBook and have encountered stuck pixels on your screen, you’ve come to the right place. Stuck pixels are small points on your Apple laptop’s display that maintain a single color, causing screen issues and visual disruptions. In this article, we will explore the causes of stuck pixels, different methods for identifying…
A flickering screen on your MacBook Pro can really ruin your work and fun. Many people are talking about screen issues because it’s so common. Knowing why your screen flickers—either due to software bugs or hardware problems—is key to fixing it properly. This piece aims to be your go-to for solving the flickering screen issue….
The MacBook Pro Touch Bar is a special feature at the top of the keyboard. It can stop working for many reasons. Apple says 40% of problems are due to memory or CPU issues. About 60% of issues come from software bugs or old operating systems. This leads to touch bar problems. Twenty percent of…