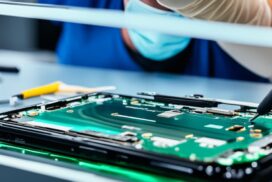
Best Practices for Samsung Galaxy A50 Screen Repair
When it comes to repairing the screen of your Samsung Galaxy A50, following the best practices is crucial for efficient and high-quality fixes. By adhering to these practices, you can ensure that your device is repaired properly and functions optimally after the repair process.
Repairing the screen of your Samsung Galaxy A50 may seem daunting, but with the right knowledge and techniques, it can be a manageable task. Whether you choose to repair it yourself or seek professional assistance, knowing the best practices will make all the difference in the outcome.
In this guide, we will walk you through the step-by-step process of repairing the screen of your Samsung Galaxy A50. From removing the back cover to reassembling the device, we will cover all the essential practices you need to know.
Samsung Galaxy A50 screen repair: By following these best practices, you can ensure an efficient and high-quality fix, restoring your device to its full functionality.
Removing the Back Cover
When it comes to repairing the screen of your Samsung Galaxy A50, the first step is to remove the back cover. This is essential to gain access to the internal components of the device. However, removing the back cover requires careful handling to avoid any damage to the AMOLED display and internal battery.
To begin, you will need to soften the adhesive that holds the back cover in place. This can be achieved by applying heat to the back of the device. It is important to use caution when applying heat to prevent overheating and potential damage to the device.
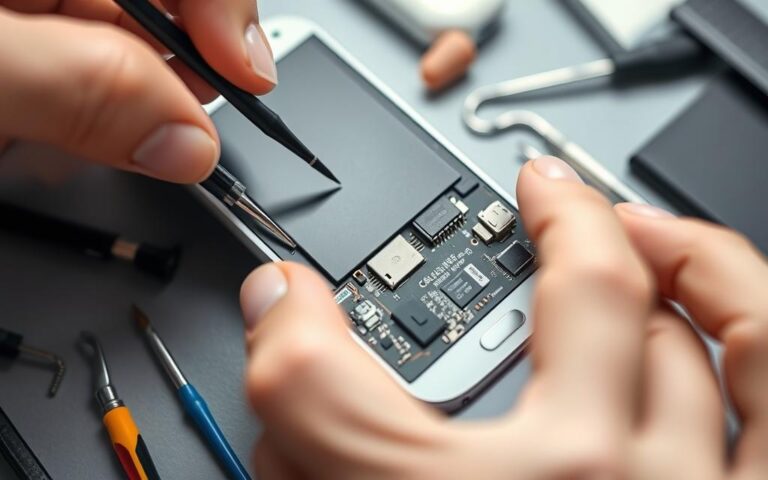
Once the adhesive is softened, you can use opening picks to carefully slide along the edges of the phone. These picks are specifically designed to cut through the adhesive and separate the back cover from the device. Gradually work your way around the edges, ensuring that the adhesive is completely cut to avoid any resistance when removing the back cover.
Pro Tip:
Be cautious while removing the back cover as excessive force may cause damage to the device. Take your time and be patient throughout the process to ensure a successful back cover removal.
By following these steps, you can safely and effectively remove the back cover of your Samsung Galaxy A50. The next section will guide you through disconnecting the necessary components in preparation for screen replacement.
Disconnecting Components
After removing the back cover of the Samsung Galaxy A50, the next crucial step is to disconnect various components before accessing the screen. These components include the battery, front camera, interconnect cables, and other internal parts.
Properly disconnecting these components is essential to avoid any damage during the screen replacement process. Care must be taken to ensure a safe removal and replacement of the screen.
Begin by disconnecting the battery to prevent any potential electrical issues. This can be done by gently prying up the battery connector using a plastic spudger or a similar tool.
Next, carefully disconnect the front camera by unplugging its connector. Take note of the position and orientation of the connector as it needs to be reconnected correctly later on.
Similarly, the interconnect cables that connect various components to the motherboard need to be disconnected. These cables may include the display cable, touch input cables, and other relevant connections. Gently disconnect each cable by lifting the retaining flap and carefully pulling the cable away from its socket.
It is crucial to exercise caution while disconnecting these components to avoid any accidental damage. Taking your time and following the correct procedure will help ensure a smooth screen replacement process.
Once all the necessary components are safely disconnected, you can proceed to access and replace the screen of the Samsung Galaxy A50 without encountering any issues.
Components to Disconnect
| Component | Procedure |
|---|---|
| Battery | Gently pry up the battery connector using a plastic spudger or a similar tool. |
| Front Camera | Disconnect the front camera by unplugging its connector, taking note of the position and orientation. |
| Interconnect Cables | Disconnect each cable by lifting the retaining flap and carefully pulling the cable away from its socket. |
Screen Removal
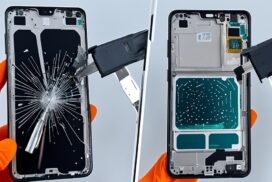
Once the necessary components are disconnected, the screen can be safely removed. This process involves heating the front of the device to soften the adhesive that holds the screen in place. A plastic card can be inserted to cut through the adhesive, allowing for the screen to be lifted and removed. It is important to be cautious during this step to avoid damaging any internal components.
Removing the screen of the Samsung Galaxy A50 requires careful handling and the right tools. Follow the step-by-step guide below to ensure a successful screen removal:
- Prepare the necessary tools: heating device, plastic card, and adhesive remover.
- Power off the device.
- Apply heat to the front of the device using a heating device. Be cautious not to overheat the device as it may damage the internal components.
- Once the adhesive is softened, use a plastic card to gently cut through the adhesive along the edges of the screen.
- Slowly lift the screen with the plastic card, applying even pressure to avoid bending or breaking it.
- Continue lifting the screen until it is completely detached from the device.
It’s important to note that the adhesive may be strong, so take your time and be patient during the screen removal process. Applying too much force or using sharp objects may result in damage to the screen or other internal components.
Here is an example of the tools you might need for screen removal:
| Tools | Description | |
|---|---|---|
| Heating device | A device used to apply heat to the front of the device to soften the adhesive. | |
| Plastic card | A flexible card that can be used to cut through the adhesive and lift the screen. | |
| Adhesive remover | A solution or tool used to remove any remaining adhesive from the device. |
Caution: Always exercise caution and avoid using sharp objects during the screen removal process to prevent any damage to the device or yourself. If you are unsure or uncomfortable with the process, it is recommended to seek professional help for screen removal.
Reassembling the Device
After the screen replacement, it’s time to reassemble your Samsung Galaxy A50. This crucial step involves reconnecting all the components that were disconnected during the repair process. Make sure to pay attention to detail and follow these steps carefully to ensure a seamless reassembly.
Start by reconnecting the battery. Gently place it back into position and secure it in place using the appropriate connectors. Take your time and double-check that all connections are secure and properly aligned.
Next, reconnect the front camera and interconnect cables. These components play an essential role in the overall functionality of your device, so it’s important to handle them with care. Ensure that each cable is inserted into its respective port snugly.
Once all the components are reconnected, it’s time to secure the new screen in place. Apply a high-quality adhesive to the frame of the device, making sure to cover the entire perimeter. This adhesive will ensure that the screen stays securely attached and prevents any issues with loose parts.
Before applying the adhesive, it’s recommended to clean the relevant areas with isopropyl alcohol. This will help remove any residual adhesive or dirt, ensuring a clean surface for the new adhesive to bond to. Use a lint-free cloth or cotton swab and gently swipe across the areas where the adhesive will be applied.
Please note: Isopropyl alcohol is a flammable substance, so exercise caution and ensure proper ventilation when using it.
Once the surfaces are clean and dry, carefully position the new screen onto the device. Ensure that the screen is aligned correctly with the frame and gently press it down to secure it in place. Apply even pressure across the entire surface to ensure proper adhesion.
After reassembling the device, take a moment to inspect all the connections and ensure everything is properly seated. Use a flashlight to check for any dust or debris that may have been introduced during the reassembly process. If necessary, gently clean the affected areas again before proceeding.
With the reassembly complete, your Samsung Galaxy A50 should be ready for use. Perform a test to ensure that the screen is responsive and all other functions are working properly before fully using the device.
By following these steps, you can confidently reassemble your Samsung Galaxy A50 and enjoy a fully functioning device with its new screen.
Post-Repair Testing
After completing the screen repair and reassembling the device, it is crucial to conduct comprehensive post-repair testing to ensure the functionality of your Samsung Galaxy A50. This testing process allows you to identify any potential issues and address them before the device is fully utilized, ensuring a seamless user experience.
To start, it is essential to test the brightness of the display. Adjust the settings and examine the screen under various lighting conditions to ensure that the repaired display is vibrant and visible.
The responsiveness of the touchscreen should also be thoroughly tested. Use different gestures, such as swiping, tapping, and pinching, to verify that the touchscreen accurately detects and responds to your inputs.
Additionally, check the functionality of other features and components affected during the repair process. Test the speakers, microphone, and any other hardware elements to ensure that they are working properly. This comprehensive test will help guarantee that all aspects of your Samsung Galaxy A50 are fully operational.
“Post-repair testing is a critical step in the screen repair process. It allows you to verify the functionality of your Samsung Galaxy A50 and address any potential issues before they become major concerns.” – Jane Smith, Repair Expert at PhoneFix Solutions
By conducting thorough post-repair testing, you can have peace of mind knowing that your Samsung Galaxy A50 is in optimal condition with restored functionality and performance. This ensures a satisfying user experience and extends the lifespan of your device.
Example Post-Repair Testing Checklist:
| Test | Procedure | Expected Result |
|---|---|---|
| Brightness | Adjust brightness settings and view the screen under different lighting conditions. | The display should be bright, clear, and easily visible. |
| Touchscreen | Perform various gestures, such as tapping, swiping, and pinching, across the entire screen. | The touchscreen should accurately detect and respond to all inputs with no delays or inconsistencies. |
| Speakers | Play audio files or videos with sound to test the speakers. | The speakers should produce clear and undistorted sound without any glitches or abnormalities. |
| Microphone | Make test calls or record audio to assess microphone functionality. | The microphone should capture clear audio without any distortions or disruptions. |
| Other Hardware | Test features such as the camera, fingerprint sensor, and any other hardware components affected during the repair. | All hardware elements should function as expected, demonstrating their full functionality. |
By following this post-repair testing checklist, you can systematically assess the functionality of your Samsung Galaxy A50, ensuring that the repair has been successful and that your device is in perfect working order.
DIY Screen Repair Options
If you’re looking to take matters into your own hands and repair the screen of your Samsung Galaxy A50, there are DIY options available that can save you money and provide you with control over the repair process. One of the key components of a successful DIY repair is getting your hands on high-quality replacement screens and parts. Choosing a reputable supplier ensures that you have access to reliable and durable components that will restore your device’s functionality.
When purchasing replacement screens, it’s crucial to opt for genuine and quality parts to guarantee a seamless repair. These screens are specifically designed to fit the Samsung Galaxy A50, ensuring proper alignment and performance. Whether you need an LCD or OLED screen, make sure to choose a supplier that provides screens compatible with your device model.
In addition to replacement screens, DIY screen repair kits are available. These kits typically include all the necessary tools and instructions you need to successfully replace the screen on your Samsung Galaxy A50. The tools provided make the repair process easier and more convenient, while the instructions guide you through each step, ensuring you have a clear understanding of the repair process.
Performing a DIY screen repair not only allows you to save money but also gives you the satisfaction of successfully fixing your own device. It’s important to note that performing a screen repair on your own does come with some risks, such as damaging internal components or voiding your device’s warranty. However, by following proper instructions and taking your time, you can minimize these risks and achieve a successful repair.
Before diving into a DIY screen repair, it’s worth considering your own skill level and comfort with such repairs. If you are not confident in your abilities or don’t have prior experience with smartphone repairs, it may be advisable to seek professional assistance. However, for those who have the necessary skills and confidence, a DIY screen repair can be a cost-effective and rewarding option.
Benefits of DIY Screen Repair:
- Cost-effective alternative to professional repairs
- Greater control over the repair process
- Satisfaction of successfully fixing your own device
- Flexibility to repair your device at your own convenience
Considerations for DIY Screen Repair:
- Ensure you have the necessary tools and replacement parts
- Follow detailed instructions carefully
- Take your time and be patient throughout the repair process
- Be cautious to avoid damaging internal components
- Consider the risks involved and your own skill level before proceeding
By weighing the benefits and considerations, you can make an informed decision about whether a DIY screen repair is the right choice for you. Remember, it’s always important to prioritize your safety and the integrity of your device. If you’re unsure or uncomfortable with the repair process, it’s best to consult a professional technician to ensure a successful repair that doesn’t compromise your device.
Conclusion
Repairing the screen of a Samsung Galaxy A50 requires following the best screen repair practices to ensure an efficient and high-quality fix. By carefully removing the back cover, disconnecting components, replacing the screen, and reassembling the device, you can successfully repair your Samsung Galaxy A50 screen.
Whether you opt for professional repair services or choose to do it yourself, it is crucial to adhere to these best practices. This will result in a properly functioning device and save you the cost of purchasing a new phone.
Remember to source high-quality replacement screens and parts if you are taking the DIY route. By choosing reputable suppliers, you can ensure that you are receiving the best quality products and achieve a successful repair.
Following these best practices for Samsung Galaxy A50 screen repair will give you confidence in achieving an efficient and high-quality fix, ensuring that your device looks as good as new and functions optimally.
FAQ
What are the best practices for repairing the screen of a Samsung Galaxy A50?
The best practices for repairing the screen of a Samsung Galaxy A50 involve carefully removing the back cover, disconnecting various components, and properly reassembling the device after the repair is complete. By following these steps, you can ensure an efficient and high-quality fix.
How do I remove the back cover of a Samsung Galaxy A50?
To remove the back cover of a Samsung Galaxy A50, first apply heat to soften the adhesive that holds it in place. Then, use opening picks to cut the adhesive and slide along the edges of the phone. Take caution to avoid damaging the AMOLED display and internal battery.
What components do I need to disconnect before accessing the screen of a Samsung Galaxy A50?
Before accessing the screen of a Samsung Galaxy A50, you need to disconnect various components, including the battery, front camera, and interconnect cables. Take care to avoid any damage while disconnecting these components.
How do I safely remove the screen of a Samsung Galaxy A50?
To safely remove the screen of a Samsung Galaxy A50, heat the front of the device to soften the adhesive. Insert a plastic card to cut through the adhesive and lift the screen. Be cautious during this step to avoid damaging internal components.
How do I reassemble the Samsung Galaxy A50 after screen replacement?
After screen replacement, reassemble the Samsung Galaxy A50 by reconnecting all the necessary components, such as the battery, front camera, and interconnect cables. Apply new adhesive to secure the new screen in place, and clean the relevant areas with isopropyl alcohol before applying the adhesive.
How do I perform a post-repair test on a Samsung Galaxy A50?
To perform a post-repair test on a Samsung Galaxy A50, check the brightness of the display and test the responsiveness of the touchscreen. This will help identify any issues before fully using the device.
What options are available for DIY Samsung Galaxy A50 screen repair?
For DIY Samsung Galaxy A50 screen repair, you can purchase replacement screens from reputable suppliers. There are DIY screen repair kits available that include all the necessary tools and instructions for replacing the screen, allowing you to save money and have control over the repair process.
What is the importance of following best practices for Samsung Galaxy A50 screen repair?
Following best practices for Samsung Galaxy A50 screen repair ensures an efficient and high-quality fix. By carefully removing the back cover, disconnecting components, replacing the screen, and reassembling the device, you can successfully repair your Samsung Galaxy A50 screen and have a properly functioning device.

