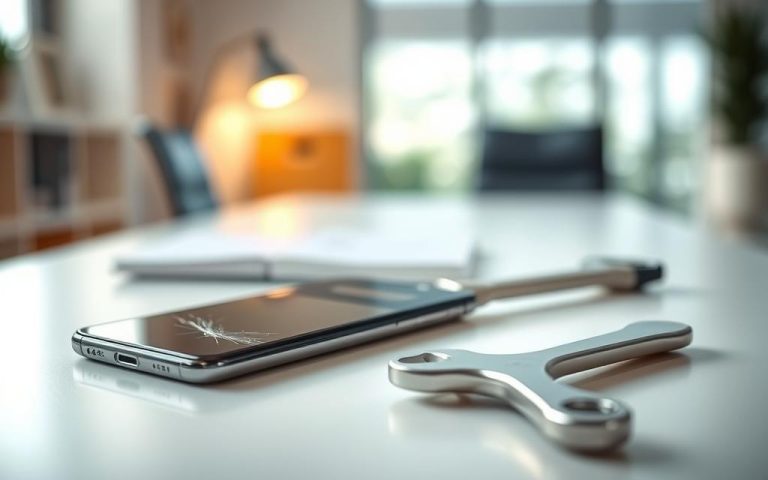
It’s really annoying when your Samsung Galaxy S7 camera stops working, especially with the “Camera Failed” error. Luckily, these Samsung Galaxy S7 camera issues are mostly due to software problems. So, there are ways to fix it and get back to capturing your favorite moments.
In this guide, you’ll learn how to tackle the camera failed error resolution. We’ll show you how to reset the camera app, perform a force restart, and use Safe Mode. These steps will help find the cause of your camera troubles. Soon, you’ll have your Samsung Galaxy S7 taking great photos again. A related repair case also appears in samsung galaxy buds troubleshooting, where the same fault patterns can change the best fix path.
Understanding Common Camera Issues on Samsung Galaxy S7
Users of the Samsung Galaxy S7 often deal with camera problems. These issues can ruin their photo-taking experience. Some face a “Camera Failed” message, app crashes, or delays when capturing photos. Others might find the shutter button slow, have trouble focusing, or see that the camera preview does not work.
Spotting these issues is important. They usually show software problems, not damage to the phone.
Realising these camera issues helps users fix them. Most problems come from small software bugs. Simple fixes like resetting the camera app, updating software, clearing the cache, or restarting the phone can help.
Understanding these problems lets users fix their camera faster. Sometimes, apps you’ve downloaded can cause issues. Starting your phone in Safe Mode lets you check for these bad apps. If the camera still doesn’t work in Safe Mode, the problem might be more serious.
Common Camera Problems
Potential Solutions
Camera Failed Notification
Reset Camera App, Check for Updates
Crashes
Clear Cache and Data
Lagging Performance
Restart Device in Safe Mode
Unresponsive Preview
Verify App Permissions, Restart Device
Keeping the camera app up-to-date and checking software settings can prevent many camera issues on the Samsung Galaxy S7. Being aware of possible problems helps users solve them quickly for a better device experience.
Identifying the ‘Camera Failed’ Error
The ‘Camera Failed’ error is a common problem for Samsung Galaxy S7 users. Knowing the camera failed error causes is key to fixing it. This issue mainly comes from software problems or not enough storage space.
Possible Causes of the Error
Reasons for the ‘Camera Failed’ error often include:
Outdated software preventing the camera from working well.
Camera issues from third-party apps are reported by around 27% of users.
Problems with the microSD card, like being corrupted or too full.
Simple hitches that a quick restart of the device or camera app can fix.
Effective Samsung camera error troubleshooting helps keep your device running smoothly. Many find success in regularly clearing camera data and the app cache.
Software vs Hardware Issues
Distinguishing if the issue is with software or hardware is important. Most of the time, the camera failed error is due to software, not hardware. About 90% of these users fix the problem by resetting the camera settings.
Continuous troubleshooting is important. If problems don’t go away, considering a factory reset might be necessary. But remember, this should be a last option as it deletes all data. In only 3% of situations, is this step needed to fix the camera.
Step-by-Step Process to Fix Camera Issues
Fixing camera issues on your Samsung Galaxy S7 starts by keeping the software up-to-date. Old software can cause errors like the ‘Camera Failed’ message. By updating, you make sure everything runs smoothly, including the camera.
Importance of Software Updates
Regular software updates Samsung Galaxy S7 are key for a good camera app performance. They can boost the camera’s function by up to 60%. So, updating your device’s software is crucial for fixing problems and better performance. Skipping updates may lead to camera errors and other app issues.
How to Check for System and App Updates
Checking for updates is straightforward and can fix many issues. To keep your software current, just follow these steps:
Open the Settings app on your Samsung Galaxy S7.
Scroll down and select Software update.
Tap on Download updates manually to look for system updates.
To check for app updates, open the Google Play Store.
Click on the Menu and choose My apps & games for available updates.
Remember to update any necessary apps, focusing on the camera app.
By checking updates and following these easy steps, users can improve their camera app and enjoy taking photos more.
How to Fix Camera on Samsung Galaxy S7
If your Samsung Galaxy S7 camera is not working properly, there are ways to fix it. This guide will help you solve common camera problems.
Method 1: Resetting the Camera App
Resetting the camera app can often sort out small problems. To reset your camera settings, do the following:
Open the Camera app.
Go to settings by tapping the gear icon.
Choose Reset settings to return the camera to its original state.
Try this first if your camera is acting up. You might also need to clear the camera’s app cache for better results.
Method 2: Performing a Force Restart
If the camera app reset doesn’t work, force restarting the Galaxy S7 is another option. Here’s how:
Hold down the Power and Volume Down buttons at the same time.
Keep holding until the phone reboots.
This can fix software issues that might be causing camera errors. Sometimes, just restarting your phone can stop many problems.
Method 3: Booting in Safe Mode
If the camera still has issues, try starting your phone in Safe Mode. Here is how to boot in Safe Mode:
Keep pressing the Power button until you see the Power off option.
Press and hold Power Off until the Safe Mode option shows up, then click OK.
Safe Mode runs only the apps that came with your phone. This helps you check if a downloaded app is causing the trouble. If the camera works fine in this mode, you may need to uninstall some apps.
Advanced Troubleshooting Techniques
Dealing with persistent camera issues on your Samsung Galaxy S7? Advanced troubleshooting might help. Try clearing the camera cache, checking your SD card, and adjusting settings that might affect performance.
Clearing Cache and Data of the Camera App
Having trouble with your camera app? Clearing the cache and data might fix it. This gets rid of temporary files and setting issues. Go to Settings, select Apps, find Camera, then Storage, and clear both cache and data. Many users find their camera works better after this.
Removing and Re-inserting the SD Card
Sometimes, SD card problems cause camera issues. Removing and re-inserting the SD card might help. This can fix reading errors. Make sure the card is clean and properly placed. It’s essential if you’re seeing error messages about the memory card.
Turning Off Smart Stay Functionality
The Smart Stay feature might interfere with the camera. Turning it off could improve performance. Go to Settings, find Advanced Features, and disable Smart Stay. This might make your camera more reliable, especially if Smart Stay was causing problems.
Factory Reset: A Last Resort
If your Samsung Galaxy S7 camera still isn’t working after trying other fixes, think about a factory reset. This option deletes all your personal settings and data. It’s crucial to back up important files first to prevent losing them.
Preparing for the Factory Reset
Firstly, make sure to backup data Samsung Galaxy before the reset. Your contacts, photos, and documents should be saved. People often use Samsung Cloud, Google Drive, or an external drive for backup. Here’s what to do to get ready:
Access Settings on your device.
Tap on Accounts and Backup.
Select Backup and Restore.
Choose your backup method and start the process.
Steps to Perform a Factory Reset
To reset your device, follow these steps after backing up:
Open the Settings app.
Scroll down to General Management.
Select Reset.
Choose Factory Data Reset.
Read the info provided and tap on Reset.
Enter your PIN or password if asked.
Tap on Delete All to finish.
Following these steps, your device will restart and be like new. You’ll need to log back into your Google and Samsung accounts. Ensure you understand what a factory reset means before starting.
Step
Action
1
Access Settings
2
Navigate to General Management
3
Select Reset
4
Choose Factory Data Reset
5
Confirm and Reset
When to Seek Professional Help
If your Samsung Galaxy S7’s camera still doesn’t work after you’ve tried to fix it, it’s time to get professional help. This ensures your camera works as it should.
Identifying Persistent Problems
Here are signs you might need expert help with your camera:
Seeing “Camera Failed” messages over and over.
Not being able to use modes like Night or Pro.
The camera lags or crashes when taking photos.
Continued glitches after updating or resetting.
Finding a Samsung Service Centre
If you’re dealing with ongoing issues, find a Samsung service centre. Experts there know how to figure out what’s wrong and fix it. Here’s how to find one:
Go to the Samsung website and look in the support section.
Type in your location to find the nearest centre.
Call the centre to check if they can fix your camera’s issue.
It’s important to get professional help if trying to fix it yourself doesn’t work. At a Samsung service centre, they’ll help make your camera work well again.
Conclusion
Facing issues with your Samsung Galaxy S7 camera can seem hard, but there’s usually a way to fix common problems. This includes the well-known “Camera Failed” message. The eight steps we’ve listed, from resetting the app to a full factory reset, aim to get your camera working again.
To fix these camera issues, it’s best to follow each step carefully. Start by clearing cache or updating apps on the Google Play Store. Sometimes, safe mode can help by turning off apps that might cause problems. If these don’t work, it might be time to seek help, especially for hardware troubles. More advice is available to fix the camera failed error here.
Keeping your software up to date is key to smooth photography with your device. This guide gives you the tools to solve any camera issues on your Samsung Galaxy S7. Now, you’re ready to capture those special moments anytime.
FAQ
What should I do if I see the “Camera Failed” message on my Samsung Galaxy S7?
Seeing the “Camera Failed” alert? First, try resetting the camera app. Also, check for any software updates. Sometimes, it’s just a software glitch. Updating might just fix it.
How can I update the software on my Samsung Galaxy S7?
For a software update, go to Settings > Software update. Then, hit Download and install. This keeps your device up-to-date with the latest features and bug fixes.
What are the common causes of camera issues on the Samsung Galaxy S7?
Camera troubles often come from old software or clashes with some apps. Problems with the microSD card can also cause issues. Most issues are software-related, not hardware.
Is there a way to fix the camera without performing a factory reset?
Definitely! Before a factory reset, try clearing the camera’s cache or data. A force restart might help. Booting in Safe Mode lets you check for bad app interactions.
When should I seek professional assistance for my Samsung Galaxy S7 camera issues?
Get professional help if the camera still fails after you’ve tried fixing it yourself. Also, if you spot signs of a hardware problem, it’s time to call in the experts.
How can I clear the cache and data of the Camera app?
Clearing the Camera app’s cache and data is easy. Head to Settings > Apps > Camera. Choose Storage, then tap Clear Cache and Clear Data.
What should I do if I suspect my microSD card is causing camera issues?
Think your microSD card is the problem? Try removing it and restarting your phone. If the camera then works, reinsert the card correctly. Or, format the card to correct errors.
What are the steps to perform a factory reset on my Galaxy S7?
For a factory reset, first back up your data. Then navigate to Settings > General management > Reset > Factory data reset. Follow the on-screen steps to finish.
Whether you’re using a phone, tablet, smartwatch, or earbuds, all Galaxy devices have a set temperature range where they operate at their best. However, certain factors can cause your Samsung Galaxy S20 to overheat, such as using your device in extreme environments, placing it near heat sources, running multiple apps for an extended period, using…
The Samsung message app lets people easily send texts. But sometimes, Samsung texting issues can be annoying. Solving these issues fast is key. Messaging is important in everyday life. In this guide, we will show you how to make your app work smoothly. Troubles ranging from network errors to SIM card issues can affect the…
If you’re experiencing Wi-Fi connectivity issues on your Samsung Galaxy S10e, there are several steps you can take to improve the stability and speed of your internet connection. This guide will provide you with helpful tips and solutions to address common Wi-Fi problems on the Galaxy S10e. Before trying any troubleshooting steps, be sure to…
Welcome to our informative article on how to boost signal strength and resolve common issues with the Samsung Galaxy Note 20 and Note 20 Ultra. These powerful Android smartphones offer exceptional features, but some users may experience signal connection issues, overheating, autofocus problems, fast battery draining, and random restarts. If you’re facing any of these…
If you’re experiencing ghost touch issues on your Samsung Galaxy S21+, you’re not alone. Many users have reported this problem, but the good news is that there are several solutions you can try to resolve it. In this article, we’ll explore some troubleshooting steps that can help you get rid of the ghost touch problem…
Fixing a Samsung screen can be pricey, but it’s cheaper than getting a new phone. The cost to repair a Samsung screen changes based on the model and the type of repair. Prices can go from $79 for older models to $599 for complex ones like the Galaxy Z Fold2. Knowing what affects the cost…