Restoring Gaming Devices: Tips for Effective Restoration
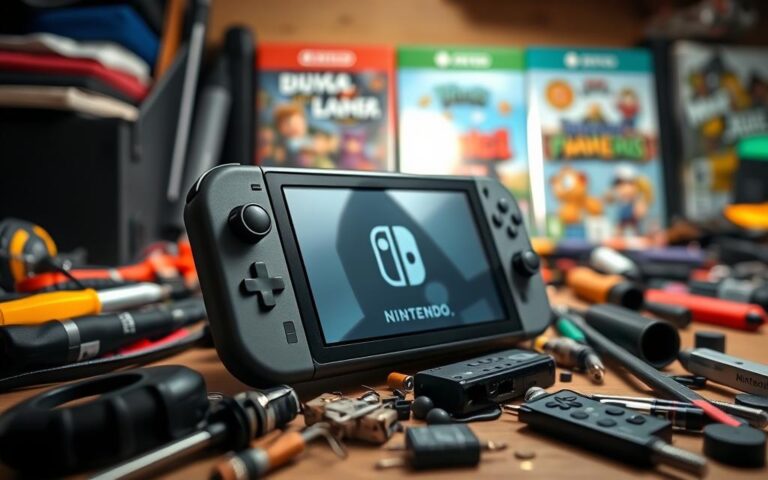
Gaming device restoration is a rewarding pursuit for enthusiasts and collectors. Whether you’re looking to revive retro consoles or bring new life to classic peripherals, following the right restoration techniques is crucial for optimal results. In this article, we will explore essential tips and recommendations to help you achieve effective gaming device restoration.
To restore gaming devices successfully, it’s important to start with a solid foundation of knowledge. Researching online forums and websites dedicated to restoration projects can provide valuable insights into the best practices and strategies employed by experienced enthusiasts. Additionally, investing in resources like the Big Blue Book by Randy Fromm can serve as a comprehensive guide, offering step-by-step instructions and troubleshooting tips. A related console issue also shows up in restoring software ps4 slim after, especially when compatibility, settings, or controller behaviour affect play.
Once armed with the necessary information, it’s time to gather the essential tools for your restoration project. Having the right tools on hand will enable you to disassemble and clean the gaming device components with precision. Screwdrivers with various sizes, anti-static brushes, tweezers, and cleaning solutions are just a few examples of the tools you may need in your restoration toolkit.
Cleaning and repairing the electronics is a crucial step in the restoration process. Dust, dirt, and rust can hinder performance and even cause permanent damage if left unaddressed. Using vinegar, toothbrushes, and dish detergent, carefully clean the main board and shields of your gaming devices to remove contaminants. For damaged 72-pin connectors, it is recommended to replace them with refurbished OEM connectors for optimal performance.
Hygiene is also an important aspect of gaming device restoration. Controller cables, in particular, tend to accumulate dirt and bacteria over time. To ensure a clean and hygienic gaming experience, it’s recommended to clean and sanitize the controller cables using bleach wipes and electronics cleaner. Remember to clean in both directions to thoroughly remove any built-up grime.
Disassembling and cleaning the controller itself is another essential step. By removing screws, separating the controller board, and cleaning all the components, you can eliminate dirt and dust that may impede functionality. Warm water, antibacterial soap, and careful handling are key for cleaning the back cover and buttons without damaging any parts or losing small plastic pieces.
Related:


In conclusion, effective gaming device restoration requires attention to detail and proper techniques. By following the tips and recommendations mentioned above, you can restore your gaming devices to their optimal condition. From cleaning and repairing the electronics to gathering the necessary information and tools, each step plays a critical role in the restoration process. Let’s embark on this exciting journey of restoring gaming devices and rediscovering the joy of classic gaming.
Cleaning and Repairing the Electronics
One crucial step in gaming device restoration is cleaning and repairing the electronics. When gaming devices have been sitting unused for a long time, they can accumulate dust, dirt, and even rust. By effectively cleaning and repairing the electronics, you can ensure that your gaming devices function optimally and provide an enjoyable gaming experience.
To clean the electronics, it is important to remove any rust, dirt, and other contaminants from the main board and shields. This can be done using vinegar, toothbrushes, and dish detergent. Vinegar is particularly effective in removing rust, while toothbrushes and dish detergent help remove dirt and grime. It is important to exercise caution when cleaning sensitive electronic components, ensuring that no excess liquid seeps into the device.
If the 72-pin connector, which is responsible for connecting the game cartridge to the console, is damaged, it is highly recommended to replace it with a refurbished OEM connector. This replacement ensures optimal performance and helps prevent compatibility issues with game cartridges.
“Effective cleaning and repair of the electronics is crucial for restoring gaming devices to their optimal condition and ensuring a seamless gaming experience.”
| Cleaning and Repairing the Electronics Tips |
|---|
| Use vinegar, toothbrushes, and dish detergent to clean the electronics |
| Exercise caution when cleaning sensitive electronic components |
| Replace damaged 72-pin connectors with refurbished OEM connectors |
Gathering Information and Tools
Before embarking on the restoration process for your gaming devices, it is crucial to gather the necessary information and tools. This preparatory stage will ensure a smooth and successful restoration. Here are some essential steps to follow:
Research Online Forums and Websites
One of the best ways to gather information for restoration is by exploring online forums and websites dedicated to gaming device restoration. These platforms are a treasure trove of valuable insights, tips, and techniques shared by experienced enthusiasts. By participating in relevant discussions and reading through restoration projects, you can gain a deep understanding of the process and avoid common pitfalls. Look for forums and websites that focus specifically on gaming device restoration to find the most targeted and reliable information.
Invest in Comprehensive Restoration Guides
While online resources provide a wealth of information, investing in comprehensive restoration guides can be invaluable. One highly recommended resource for gaming device restoration is the Big Blue Book by Randy Fromm. This book serves as a comprehensive guide, covering various aspects of console and arcade machine restoration. From understanding circuit boards to troubleshooting common issues, this guide offers step-by-step instructions and expert advice. Having a physical reference like the Big Blue Book can be incredibly helpful, especially for those who prefer a comprehensive and structured approach to learning.
By combining the insights gained from online forums with the detailed instructions found in resources like the Big Blue Book, you can ensure that you have all the necessary information at your fingertips. Armed with this knowledge, you’ll be better equipped to tackle the restoration project ahead.
Assembling Essential Tools
Alongside gathering information, it is essential to have the right set of tools for gaming device restoration. Here is a list of essential tools that can help you successfully restore your gaming devices:
| Tool | Description |
|---|---|
| Screwdrivers | Various sizes and types of screwdrivers are needed to disassemble and reassemble gaming devices. |
| Isopropyl Alcohol | Isopropyl alcohol is commonly used for cleaning electronic components and removing dirt, grime, and corrosion. |
| Cotton Swabs | Cotton swabs are ideal for applying cleaning solutions to small or delicate areas such as connectors and switches. |
| Anti-Static Wrist Strap | An anti-static wrist strap helps prevent static electricity damage to sensitive electronic components. |
| Soft Brushes | Soft brushes are useful for removing dust and debris from hard-to-reach areas, such as cooling fans and vents. |
| Heat Gun | A heat gun can be used for soldering, desoldering, and reshaping plastic components. |
These are just a few examples of the essential tools you may need during the restoration process. Depending on the specific gaming device and the issues you encounter, additional tools may be necessary.
By gathering the right information and equipping yourself with the essential tools, you’ll be well-prepared to embark on your gaming device restoration journey. This thorough preparation will set the foundation for a successful restoration project.
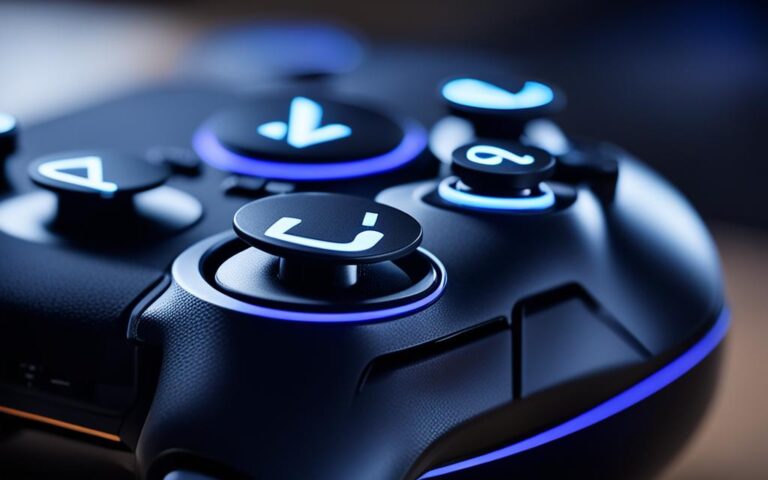
Cleaning and Sanitizing the Controller Cables
The cables of retro console controllers often accumulate dirt and bacteria, making it essential to clean and sanitize them. Regular cleaning of controller cables not only promotes their longevity but also ensures a hygienic gaming experience.
When cleaning gaming controller cables, it is recommended to use bleach wipes and electronics cleaner. These cleaning agents effectively remove dirt and bacteria, leaving the cables fresh and sanitized. It is important to ensure that the cleaning agents used are suitable for electronics to avoid damage.
To achieve a thorough cleaning, it is advised to go in both directions down the cord. This helps dislodge any difficult-to-reach dirt or grime, ensuring a comprehensive clean. Additionally, using a soft, lint-free cloth or cotton swabs can aid in removing debris.
It is imperative to handle the controller cables with care during the cleaning process. Pulling or twisting the cables vigorously can potentially cause damage.
By incorporating regular cleaning and sanitization of your gaming controller cables into your gaming device restoration routine, you can enjoy a cleaner and more hygienic gaming experience.
Benefits of Cleaning and Sanitizing Controller Cables
Cleaning and sanitizing the controller cables offer several advantages:
- Improved hygiene: Removing dirt and bacteria from the cables helps create a cleaner gaming environment.
- Enhanced performance: Clean cables ensure optimal connectivity and responsiveness, improving overall gaming performance.
- Extended lifespan: Regular cleaning and maintenance of the cables can prolong their lifespan, reducing the need for premature replacements.
- Prevention of damage: Accumulated dirt and debris can potentially cause damage to the cables and other components of the gaming controller. Regular cleaning eliminates this risk.
By incorporating proper cleaning and sanitization techniques into your gaming device restoration process, you can maintain the integrity and functionality of your controller cables, ensuring a hygienic and enjoyable gaming experience.
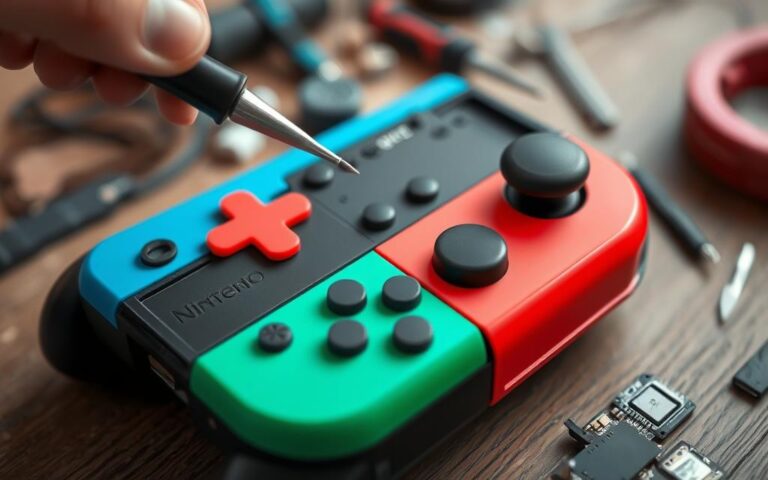
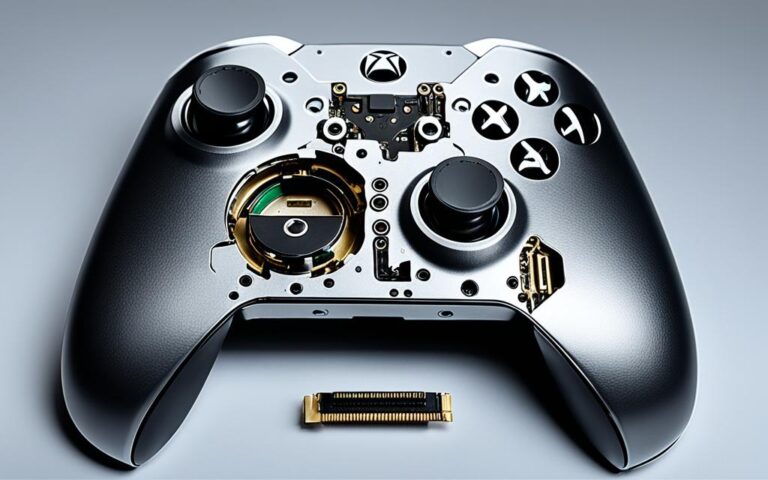
Disassembling and Cleaning the Controller
Disassembling and cleaning the controller is a crucial step in the restoration process. By carefully removing screws, separating the controller board, and cleaning all the components, you can ensure optimal performance and longevity for your gaming controller.
To begin, ensure you have a clean, well-lit workspace with all the necessary tools at hand. A small screwdriver set with various sizes will be required to remove the screws holding the controller together. Make sure to keep track of the screws to avoid losing them during disassembly.
Once you have carefully taken apart the controller, it’s time to clean the different components. The back cover and buttons can be effectively cleaned using a combination of hot or warm water and antibacterial soap. Gently scrub the surface with a soft cloth or a toothbrush to remove any dirt or grime.
Take extra care when cleaning the buttons to ensure no water or soap residue gets inside the small crevices. For the controller board, use a cotton swab lightly dampened with rubbing alcohol to clean any dust or debris. Avoid any excess liquid that could damage the circuitry.
Remember, thorough cleaning is important not only for aesthetics but also for the overall functionality of the controller. Dirt and debris can affect the performance of buttons and joysticks, leading to unresponsive or sticky controls. By properly cleaning all the components, you can restore your controller’s responsiveness and enjoy a smooth gaming experience.
Once you have completed the cleaning process, allow the components to dry completely before reassembling the controller. Check for any loose or damaged parts, and ensure all connections are secure.
Remember to follow this disassembling and cleaning process carefully to avoid any damage to your gaming controller. By dedicating time and effort to restore your controller, you can prolong its lifespan and enhance your gaming sessions.
Conclusion
In conclusion, effective gaming device restoration requires meticulous attention to detail and the application of proper techniques. By following the expert tips and recommendations provided in this article, you can successfully restore your gaming devices to their optimal condition, ensuring they deliver peak performance.
One of the crucial steps in the restoration process is cleaning and repairing the electronics. This involves removing rust, dirt, and other contaminants from the main board and shields using tools like vinegar, toothbrushes, and dish detergent. Additionally, replacing a damaged 72-pin connector with a refurbished OEM connector can significantly enhance the device’s performance.
Gathering the necessary information and tools before starting the restoration process is paramount. Researching online forums and websites dedicated to restoration projects can provide valuable insights, while investing in resources like the Big Blue Book by Randy Fromm serves as a comprehensive guide for successful restoration.
Sanitizing the controller cables and disassembling and cleaning the controller are also critical steps in the restoration journey. Using bleach wipes and electronics cleaner effectively removes dirt and bacteria from the cables, ensuring a hygienic gaming experience. Disassembling the controller and cleaning its components meticulously with hot/warm water and antibacterial soap helps maintain its integrity and functionality.
With the right approach and adherence to these tips and techniques, your gaming devices can be restored to their former glory, providing you with an enjoyable and immersive gaming experience. So, roll up your sleeves, get the necessary tools, and embark on the rewarding journey of gaming device restoration.
FAQ
What is gaming device restoration?
Gaming device restoration is the process of cleaning, repairing, and bringing gaming devices back to their optimal condition.
Why is cleaning and repairing the electronics important in gaming device restoration?
Cleaning and repairing the electronics is important in gaming device restoration because it helps remove rust, dirt, and other contaminants that can affect the performance of the devices.
How can I clean and repair the electronics of my gaming device?
You can clean the electronics of your gaming device by using tools such as vinegar, toothbrushes, and dish detergent. Additionally, if the 72-pin connector is damaged, it is recommended to replace it with a refurbished OEM connector for optimal performance.
What information and tools do I need for gaming device restoration?
To restore gaming devices, it is essential to gather the necessary information and tools. Researching online forums and websites dedicated to restoration projects can provide valuable insights. Additionally, investing in resources like the Big Blue Book by Randy Fromm can serve as a comprehensive guide.
How do I clean and sanitize the controller cables of retro consoles?
To clean and sanitize the controller cables of retro consoles, you can use bleach wipes and electronics cleaner. It is recommended to go both directions down the cord for a thorough cleaning.
How do I disassemble and clean the gaming controller?
To disassemble and clean the gaming controller, you need to remove screws, separate the controller board, and clean all the components. Hot/warm water and antibacterial soap are effective for cleaning the back cover and buttons. Care must be taken not to damage any parts or lose small plastic pieces during this process.