Fixing Desktop GPU Fan Failures
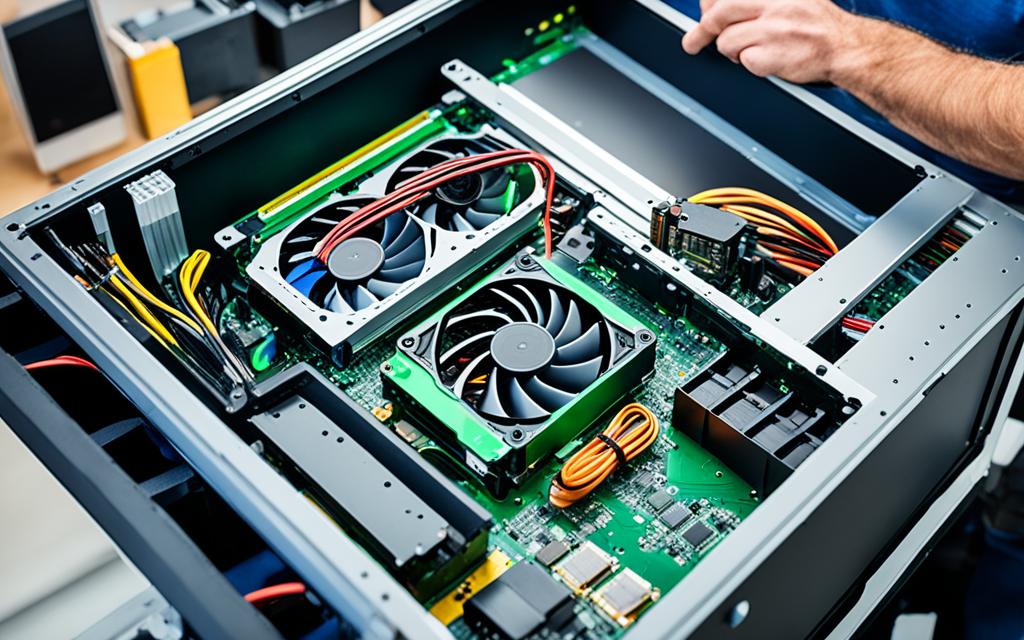
When your GPU fans fail to spin, it can lead to concerns of overheating and potential hardware failure. This article will provide troubleshooting steps and solutions to help resolve the issue. Whether you have a high-performance gaming rig or a workstation that relies on your desktop GPU, a malfunctioning fan can disrupt your system’s performance and threaten the lifespan of your graphics card.
The GPU fan plays a crucial role in keeping your graphics card cool by dissipating heat generated during intense gaming sessions or graphic-intensive tasks. When the fans stop spinning, your GPU becomes susceptible to overheating, which can result in performance throttling, graphical artifacts, system crashes, or even permanent damage to the GPU.
In the following sections, we will explore various troubleshooting methods to fix GPU fan failures. From testing the GPU under heavy load to checking cables and reseating the GPU, we will cover everything you need to know to diagnose and resolve this issue.
Testing GPU Under Heavy Load
When encountering issues with GPU fans not spinning, it is crucial to perform a comprehensive test on your graphics card under heavy load. This evaluation will help determine if the fans are functioning as intended, ensuring adequate cooling for your GPU. Here are the steps to conduct a thorough GPU fan test:
- Restart and observe: Begin by restarting your computer and closely monitoring the behavior of the GPU fan during the boot process. Pay attention to any signs of movement or lack thereof.
- Utilize a stress test utility: To further assess the performance of your GPU fans, consider employing a stress test utility such as FurMark. This software will push your graphics card to its limits and gauge the fan’s response.
If, after performing these tests, you observe that the GPU fans are still not spinning, it indicates a potential underlying issue that necessitates further troubleshooting. In such cases, it is crucial to explore additional remedies to address this concern.
Reseating the GPU and Checking Cables
Sometimes, the issue may stem from a loose connection. By reseating the GPU in the PCIe slot and checking all the cables, including the necessary power cables, you can ensure everything is properly connected. Refer to the motherboard and GPU manuals for guidance.
If you suspect that the GPU isn’t properly seated, follow these steps to reseat it:
- Power off your computer and unplug it from the power source.
- Open your computer case and locate the PCIe slot where the GPU is installed.
- Press the release latch on the PCIe slot to unlock the GPU.
- Carefully remove the GPU from the slot.
- Inspect the gold contacts on the bottom of the GPU for any dust or debris. Use a can of compressed air to clean them if necessary.
- Align the GPU with the PCIe slot and firmly insert it until it is fully seated.
- Secure the GPU in place by pushing down on the release latch until it clicks.
- Double-check that all the necessary cables, including the power cables, are properly connected to the GPU.
Once the GPU is reseated and all the cables are checked, you can close your computer case, reconnect the power, and turn on your computer to see if the issue persists.
Note:
If you find any damaged cables or connectors during the process, it’s important to replace them to ensure a proper connection. Additionally, make sure to avoid excessive force when reseating the GPU to prevent any damage to the slot or GPU itself.
Checking Cables:
Aside from reseating the GPU, it’s crucial to check all the cables connected to the GPU, including the power cables. A loose or faulty cable can cause the GPU to not be detected correctly.
Consult the motherboard and GPU manuals to identify the necessary cables and their proper connection. Ensure that all cables are securely plugged into their respective ports, and there are no signs of damage or wear.
Table of Troubleshooting Actions:
| Troubleshooting Action | Description |
|---|---|
| Reseat the GPU | Physically remove and reinstall the GPU in the PCIe slot to ensure a secure connection. |
| Check power cables | Verify that all necessary power cables are properly connected to the GPU. |
| Inspect PCIe slot | Examine the PCIe slot for any visible damage or debris that may affect the connection. |
| Inspect cables | Check all cables connected to the GPU for any signs of damage or loose connections. |
| Consult manuals | Refer to the motherboard and GPU manuals for specific guidance on installation and cable connections. |
Once you have reseated the GPU and checked all the cables, proceed to test your computer to see if the GPU is now detected properly. If the issue persists, further troubleshooting may be required.
Continue reading to the next section for information on cleaning dust from the GPU to ensure optimal performance.
Cleaning the Dust From the GPU
One common cause of GPU fan blockage and overheating is dust buildup. Over time, dust particles can accumulate on the GPU and its fans, inhibiting their proper functioning. To ensure optimal performance and prevent overheating, it is essential to regularly clean the GPU and remove any dust that may be obstructing the fan blades.
The cleaning process involves using compressed air and a lint-free cloth to carefully remove the accumulated dust. Compressed air can effectively dislodge dust from the nooks and crevices of the GPU, while a lint-free cloth can be used to wipe away any remaining residue. It is advisable to perform this cleaning procedure in a well-ventilated area to minimize the spread of dust particles.
To clean the GPU effectively:
- Power off your computer and unplug it from the power source.
- Open the computer case to access the GPU.
- Using compressed air, blow away the dust from the GPU and its fans. Be sure to hold the canister in an upright position to prevent any moisture from escaping.
- Gently wipe the GPU surfaces with a lint-free cloth to remove any remaining dust.
- Ensure that the fans are free from blockages and can spin freely. If necessary, use a toothpick or cotton swab to carefully remove any stubborn debris.
- Once the cleaning process is complete, close the computer case and reconnect all cables.
- Power on your computer and observe if the GPU fans are spinning properly.
Regularly cleaning your GPU can help prevent overheating and prolong its lifespan. It is recommended to clean the GPU at least every three to six months, or more frequently if you live in a dusty environment. By keeping your GPU free from dust and blockages, you can ensure optimal performance and maintain stable temperatures.
Updating GPU Drivers and Adjusting Fan Curve
One common reason for GPU fans not spinning is software glitches that can be resolved by updating the GPU drivers. Regularly updating your GPU drivers ensures compatibility with the latest software and fixes any bugs that may affect fan operation. To update your GPU drivers, follow these steps:
- Visit the official website of your GPU manufacturer and navigate to the “Support” or “Downloads” section.
- Locate the correct GPU model and download the latest driver for your operating system.
- Once the driver is downloaded, double-click on the installer file and follow the on-screen instructions to update your drivers.
After updating the GPU drivers, it’s important to customize the fan speed based on temperature to ensure optimal cooling. One popular tool for adjusting the fan curve is MSI Afterburner. The fan curve determines the speed at which the GPU fans spin at different temperatures, allowing you to find the balance between cooling performance and noise levels. Here’s how you can adjust the fan curve using MSI Afterburner:
- Download and install MSI Afterburner from the official website.
- Launch MSI Afterburner and click on the “Settings” icon at the bottom right corner.
- In the settings menu, navigate to the “Fan” tab.
- Enable “Enable User-defined Software Automatic Fan Control”.
- Click on the “Curves” button to customize the fan curve.
- Adjust the points on the curve to set the desired fan speed at different temperatures.
- Click “Apply” to save the changes.
By updating your GPU drivers and adjusting the fan curve using tools like MSI Afterburner, you can ensure proper cooling and prevent your GPU from overheating.
| Advantages of Updating GPU Drivers | Advantages of Adjusting Fan Curve |
|---|---|
| 1. Improved compatibility with the latest software. | 1. Customizable fan speeds for optimal cooling performance. |
| 2. Bug fixes and performance optimizations. | 2. Noise reduction by finding the right balance between cooling and fan speed. |
| 3. Enhanced stability and reliability. | 3. Prevents GPU overheating and potential hardware failures. |
Testing the GPU on Another System
If you’re experiencing a problem with your GPU fans not spinning, it’s essential to determine whether the issue lies with the graphics card itself or other components in your system. One effective way to narrow down the cause is by testing the GPU on a different system. This step can help identify potential issues with the power supply unit (PSU), PCIe cables, or even the motherboard.
By connecting the GPU to another compatible system, you can observe how the fans behave. If the fans spin properly on the second system, it suggests that the graphics card itself is functioning correctly. In such cases, it’s likely that the problem lies within your original system’s configuration.
However, if the GPU fans still don’t spin on the second system, it indicates that the issue is most likely with the graphics card itself. In this situation, you may need to consider GPU replacement or repairs to address the fan spinning problem.
Compatibility Considerations
When testing the GPU on another system, it’s crucial to ensure compatibility between the graphics card and the second system’s specifications. Check the motherboard’s compatibility with your GPU and verify that the PSU has sufficient power output to support the graphics card. Additionally, ensure that the necessary PCIe connectors and cables are available in the second system.
Note: If you’re uncertain about the compatibility or configuration of the second system, consult the respective product manuals or seek guidance from a professional technician.
Resolving GPU Fan Issues
Testing the GPU on another system helps in isolating the possible causes of GPU fan failure. If the issue doesn’t persist on the second system, it indicates a problem with the original system’s components and configuration. In such cases, you can consider replacing or troubleshooting individual components like the PSU, PCIe cables, or even the motherboard to resolve the fan spinning problem.
On the other hand, if the issue persists on multiple systems, replacing the faulty GPU may be the most appropriate solution. Consult reputable retailers or the GPU manufacturer for specific replacement options.
Image
Image illustrating the process of testing a GPU on another system to resolve fan spinning issues.
Returning the GPU to the Manufacturer
If all else fails, and your GPU is still under warranty, returning it to the manufacturer for a replacement or refund is a viable option. Attempting to replace the GPU fans yourself may not guarantee a fix and can void the warranty.
When faced with a faulty GPU, it’s important to consider the warranty options provided by the manufacturer. A GPU warranty typically covers defects in materials and workmanship for a specific period of time. By returning the faulty GPU, you can seek a replacement or refund, ensuring that you receive a properly functioning unit.
Before initiating the return process, it’s advisable to thoroughly read the warranty terms and conditions to understand the exact coverage and any relevant procedures. Follow the manufacturer’s instructions for initiating a warranty claim, which may involve contacting their customer support or filling out an online form.
When returning the GPU, ensure that you include all the necessary documentation, such as proof of purchase and the original packaging, if available. Properly packaging the GPU with sufficient protective materials will help prevent any transit damage during the return process.
Depending on the manufacturer’s policies and your location, you may be responsible for covering shipping costs when returning the GPU. It’s recommended to use a reliable and trackable shipping method to ensure that the GPU reaches the manufacturer safely.
Manufacturer’s Response and Resolution
Once the manufacturer receives the faulty GPU, they will assess its condition and determine the appropriate action. This may include repairing or replacing the GPU, depending on their evaluation. The manufacturer will communicate their decision to you and provide an estimated timeline for the resolution.
If a replacement is offered, it’s essential to verify that the replacement GPU is indeed in working condition and meets your requirements. You may also inquire about any warranty coverage for the replaced GPU to ensure ongoing support in case of future issues.
Keep in mind that the entire warranty process, including the time taken for shipping, assessment, and resolution, can vary depending on the manufacturer and your location. It’s advisable to maintain open communication with the manufacturer’s customer support to stay informed about the progress of your warranty claim.
| Pros of Returning the GPU to the Manufacturer | Cons of Returning the GPU to the Manufacturer |
|---|---|
| 1. Ensures compliance with warranty terms and eligibility for a replacement or refund. | 1. Shipping costs may be the responsibility of the customer. |
| 2. Provides an opportunity to receive a fully functioning GPU. | 2. Depending on the manufacturer’s policies, the resolution process may take time. |
| 3. Potential for an extended warranty on the replaced GPU. | 3. Limited availability of specific GPU models as replacements. |
Returning a faulty GPU to the manufacturer is a recommended course of action if all other troubleshooting methods have been exhausted. Taking advantage of the warranty coverage ensures that you receive appropriate support and resolution for your faulty GPU, ultimately providing a satisfactory solution to the fan spinning issue.
Conclusion
In conclusion, troubleshooting and fixing GPU fans that aren’t spinning requires careful analysis and following the steps outlined in this article. By testing the GPU, reseating and checking cables, cleaning dust, updating drivers, adjusting fan curve, testing on another system, and considering warranty support, you can resolve the issue and prevent overheating of your desktop GPU.
Ensuring that your GPU fans are functioning properly is crucial for maintaining optimal performance and preventing overheating. By identifying and addressing any issues with the fans, you can avoid potential hardware failures and extend the lifespan of your graphics card.
Remember, testing the GPU under heavy load and reseating it in the PCIe slot are initial steps to take when troubleshooting fan problems. Cleaning the dust regularly will help prevent blockages and optimize fan operation. Updating GPU drivers and adjusting the fan curve can further enhance cooling efficiency. If all else fails, testing the GPU on another system or seeking warranty support are viable options to consider.
By following these troubleshooting methods and preventive measures, you can keep your GPU running smoothly and cool, ensuring a seamless gaming or computing experience. Don’t let fan failure lead to overheating and potential damage to your valuable desktop GPU.
FAQ
How can I determine if my GPU fans are meant to spin?
To determine if your GPU fans are meant to spin, it’s important to test the GPU under heavy load. This can be done by restarting the computer and observing the fan’s behavior on boot, as well as using a stress test utility like FurMark to see if the fans kick in.
What should I do if my GPU fans still don’t spin?
If the fans still don’t spin, further troubleshooting is needed. Start by checking for loose connections by reseating the GPU in the PCIe slot and checking all the cables, including the necessary power cables. Refer to the motherboard and GPU manuals for guidance.
Can dust buildup be causing the GPU fans to not spin?
Yes, dust buildup can cause the GPU fans to not spin. It’s important to clean the GPU and its fans using compressed air and a lint-free cloth. Removing the dust will help prevent blockages and ensure proper fan operation.
Will updating my GPU drivers resolve the issue of fans not spinning?
Yes, keeping your GPU drivers updated can resolve software glitches that may be causing the fans to not spin. Additionally, adjusting the fan curve using utilities like MSI Afterburner or AMD Software can customize the fan speed based on temperature to ensure proper cooling.
Should I test my GPU on another system if the fans are not spinning?
Yes, testing the GPU on another system can help determine if the issue lies with the graphics card or other components in your system. This step can help identify potential PSU, PCIe cable, or motherboard issues. Replacing these components may resolve the fan spinning problem.
What should I do if none of the troubleshooting steps fix the fan spinning issue?
If all else fails, and your GPU is still under warranty, returning it to the manufacturer for a replacement or refund is a viable option. Attempting to replace the GPU fans yourself may not guarantee a fix and can void the warranty.
