If you’re experiencing charging port problems with your Samsung Galaxy S10, you’re not alone. Many users encounter issues such as loose connections or debris blocking the port, which can prevent proper charging. But before you worry about taking your phone to a professional repair shop, there are some DIY repair tips you can try at home.
By following these simple steps, you may be able to fix the charging port problem yourself and save both time and money. Plus, you’ll avoid the hassle of waiting for a repair appointment or shipping your phone off for service.
One important thing to note is that DIY repairs should only be attempted by those who feel comfortable working with electronic devices and have some technical knowledge. If you’re unsure or uncomfortable with the process, it’s best to seek professional assistance.
Next, we’ll explore how to remove the back glass and replace the charging port on your Samsung Galaxy S10. This step is crucial to accessing the port and resolving the underlying issue. We’ll also provide troubleshooting tips and discuss the option of professional repair if the DIY route isn’t for you.
Stay tuned for the remaining sections of the article where we’ll delve into the details of each step and guide you through the process of repairing your Samsung Galaxy S10 charging port.
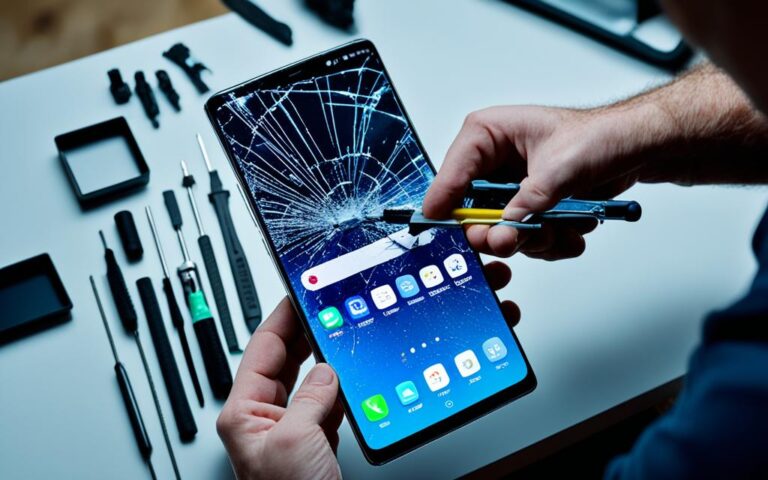
How to Remove Back Glass and Replace Charging Port
To begin the repair process for your Samsung Galaxy S10, you will need to remove the back glass. This step is necessary to gain access to the charging port for replacement. Follow the instructions below to safely remove the back glass and replace the charging port.
A related repair case also appears in front camera perfect selfies samsung, where the same fault patterns can change the best fix path.
A related repair case also appears in mobile kits they include, where the same kind of fault can point to parts wear, diagnosis steps, or replacement choices.
Step 1: Gather the Tools
Before starting the repair, make sure you have the necessary tools:
Heating bag
Plastic pry tool
Tweezers
Phillips screwdriver
Genuine Samsung charging port
Having these tools ready will ensure a smooth repair process.
Step 2: Apply Heat to the Back Glass
Use a heating bag to apply heat to the back glass of your Samsung Galaxy S10. This will soften the adhesive that holds the glass in place, making it easier to remove. Be cautious when applying heat and follow the safety precautions provided with the heating bag.
Step 3: Remove the Back Glass
Once the adhesive is softened, carefully insert a plastic pry tool between the back glass and the frame. Gently pry the glass away from the frame, moving along the edges until the glass is completely detached. Take your time and be gentle to avoid damaging the glass or other components.
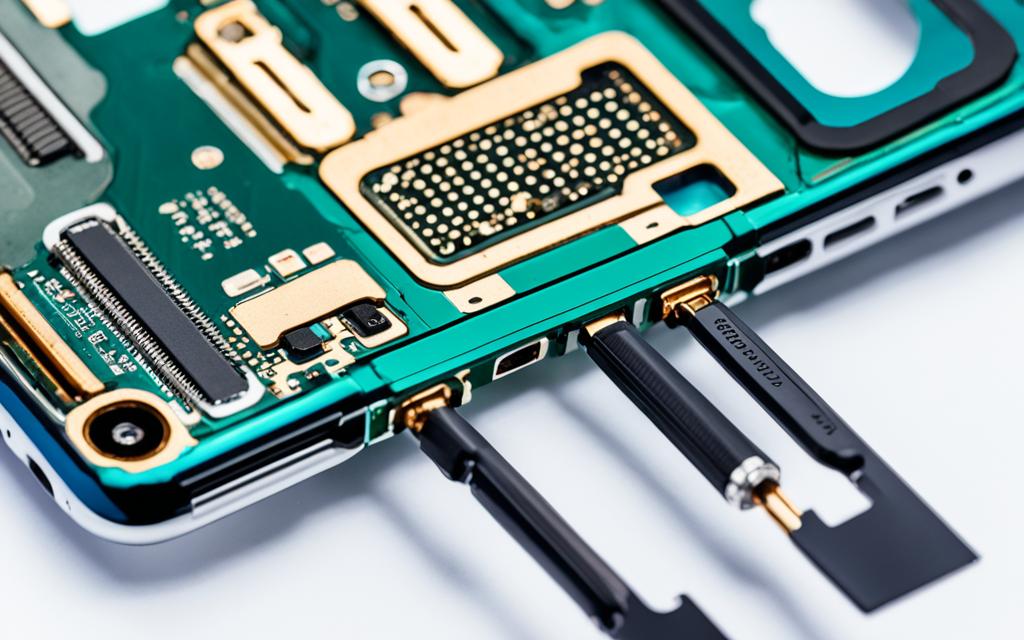
Step 4: Access and Replace the Charging Port
With the back glass removed, you can now access the charging port. Locate the charging port module and disconnect any cables or connectors attached to it. Remove the screws securing the charging port in place using a Phillips screwdriver.
Once the screws are removed, carefully lift and remove the old charging port from its position. Take note of the orientation and position of the cables and connectors for reference during the installation of the new charging port.
Place the new charging port in the designated position and secure it with the screws. Reconnect the cables and connectors, ensuring they are properly aligned and securely attached. Double-check the connections before proceeding.
Step 5: Reattach the Back Glass
Once the new charging port is in place, it’s time to reattach the back glass. Align the glass with the frame and gently press it down to secure it in place. The adhesive should hold the glass firmly, but you can apply gentle pressure to ensure a strong bond.
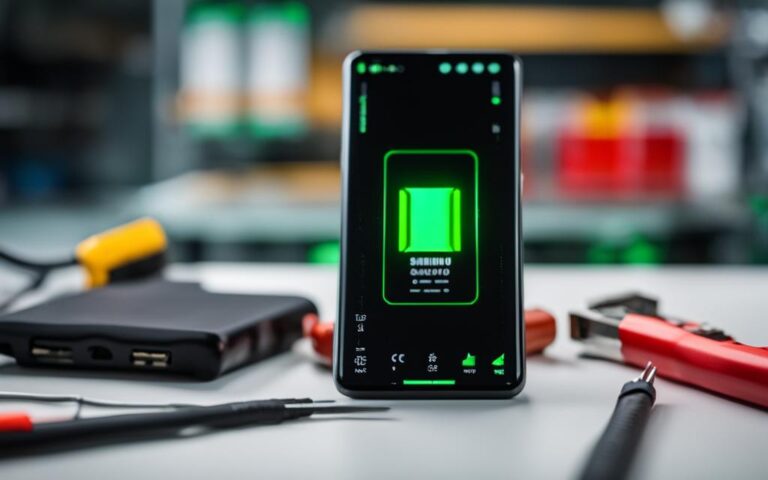
Step 6: Test the Charging Port
After the back glass is reattached, turn on your Samsung Galaxy S10 and test the charging port. Connect your phone to a charging cable and verify that it is charging properly. If everything is working as expected, congratulations! You have successfully replaced the charging port.
Benefits of DIY Repair
Benefits of Professional Repair
– Cost-effective
– Experienced technicians
– Learn a new skill
– Warranty on parts and labor
– Convenience of repairing at home
– Ensures proper functionality
– Avoids the hassle of finding a repair shop
– Saves time and effort
Troubleshooting Common Charging Port Issues
If you are experiencing charging port issues on your Samsung Galaxy S10, there are a few troubleshooting steps you can take before considering a port replacement. By following these troubleshooting tips, you may be able to fix the charging port problem without replacing it.
Try different charging cables and power sources: Sometimes, the issue may not be with the charging port itself, but with the cable or power source you are using. Test your phone with different cables and chargers to see if the problem persists.
Charge the phone while turned off: Occasionally, charging port issues can be resolved by charging the phone while it is turned off. This can help reset any internal settings that might be causing the problem.
Clean the charging port for any debris: Debris such as dust or lint can accumulate in the charging port over time, causing connection problems. Use a soft brush or compressed air to gently remove any debris from the port.
Check for signs of water damage: Water damage can affect the functionality of the charging port. Inspect your phone for any signs of water damage, such as a red or pink color indicator. If water damage is present, it is recommended to seek professional repair.
If these troubleshooting steps do not resolve the charging port issue, you may need to consider replacing the port. In the next section, we will discuss how to perform a DIY charging port replacement for your Samsung Galaxy S10.
DIY Charging Port Replacement for Samsung Galaxy S10
If the troubleshooting steps do not resolve the charging port issue with your Samsung Galaxy S10, you may need to consider a charging port replacement. While it is recommended for those who are tech-savvy and have experience with phone repairs, replacing the charging port yourself can be a challenging but rewarding DIY project. By following the step-by-step instructions provided and purchasing a new charging port from a reliable phone part supplier, you can restore the functionality of your Samsung Galaxy S10.
Step-by-Step Guide for Charging Port Replacement
Ensure you have the necessary tools: A small Phillips screwdriver, spudger tool, tweezers, and a prying tool.
Power off your Samsung Galaxy S10 and remove the SIM card tray.
Use a heat gun or hairdryer to apply heat to the back of the device, softening the adhesive that holds the back glass in place.
Insert the prying tool between the back glass and the frame, gently sliding it around the edges to loosen the adhesive.
Once the back glass is loosened, carefully lift it off the device.
Disconnect the battery connector and remove any additional screws securing the charging port assembly.
Use the prying tool to disconnect the charging port flex cable.
Remove the charging port assembly from the device and replace it with the new charging port.
Reassemble your Samsung Galaxy S10 by following the steps in reverse order.
It is crucial to exercise caution and precision during the DIY charging port replacement process to avoid causing further damage to your device. If you are unsure or uncomfortable with the repair, it is recommended to seek professional assistance from a reputable phone repair service.
Professional Charging Port Repair for Samsung Galaxy S10
If you’re not comfortable with performing a DIY charging port replacement for your Samsung Galaxy S10, don’t worry. There are professional repair services available to help you solve the issue effectively. Whether you prefer to visit a local repair shop or use an online mail-in service, professional repair technicians can replace the charging port for you, ensuring a proper and reliable repair.
By opting for professional repair services, you can benefit from the expertise and experience of trained technicians who specialize in Samsung devices. They understand the intricacies of the Samsung Galaxy S10 and can diagnose and fix charging port problems with precision. Additionally, professional repair services often offer warranties on both parts and labor, giving you peace of mind throughout the repair process.
Why Choose Professional Repair for Your Samsung Galaxy S10 Charging Port
Expertise: Professional repair technicians are highly skilled in handling intricate device repairs like charging port replacements. They have the knowledge and experience to identify and resolve any underlying issues that may be causing the problem.
Genuine parts: When you choose professional repair services, you can expect the use of genuine Samsung parts for the replacement. This ensures compatibility and optimal functionality, unlike third-party parts that may compromise the performance of your device.
Convenience: Instead of going through the hassle of DIY repairs, professional repair services offer convenience. You can drop off your device at a local repair shop or use an online mail-in service without worrying about finding the right tools or risking further damage.
Guaranteed results: Professional repair services take pride in their workmanship and strive for exceptional results. With warranties on parts and labor, you can trust that the charging port replacement will be done correctly, minimizing the chances of recurring issues.
When it comes to your Samsung Galaxy S10 charging port, seeking professional repair services can provide a reliable and efficient solution. These services offer the expertise, genuine parts, convenience, and guaranteed results that ensure your device is in the hands of professionals who can restore its functionality.
Benefits of Professional Charging Port Repair
DIY Repair Challenges
Expertise of trained technicians
Risk of causing further damage
Use of genuine Samsung parts
Compatibility issues with third-party parts
Convenience of drop-off or mail-in services
Need for specialized tools and equipment
Warranties on parts and labor
No guarantee of long-lasting results
By weighing the benefits of professional charging port repair against the challenges of DIY repair, you can make an informed decision that best suits your needs and preferences. Whether you choose to repair your Samsung Galaxy S10 charging port yourself or rely on professionals, the ultimate goal is to restore your device’s charging functionality and ensure its longevity.
Conclusion
If you are experiencing charging port issues on your Samsung Galaxy S10, there are solutions available for repair. By following DIY repair tips, you can attempt to fix common issues such as loose connections or debris blocking the port. However, if DIY repair is not feasible for you, considering professional repair services is a reliable option for a warranty-backed repair.
When attempting DIY repair, it is essential to exercise caution and follow step-by-step instructions to avoid causing further damage. Using genuine Samsung parts for replacement is crucial to ensure optimal functionality. Troubleshooting steps such as trying different charging cables and cleaning the charging port can also help resolve minor issues.
If DIY repair is not successful, professional repair services are recommended. Local repair shops or online mail-in services can provide expert assistance in replacing the charging port. With professional repair, you can have peace of mind knowing that the repair will be handled by trained technicians with experience in Samsung Galaxy S10 charging port repair.
In conclusion, whether you choose DIY repair or professional repair services, it is possible to resolve charging port problems on your Samsung Galaxy S10. By following these repair tips and exploring the available options, you can get your device charging properly again and avoid the hassle of a malfunctioning charging port.
FAQ
Can I fix charging port problems on my Samsung Galaxy S10 at home?
Yes, you can try DIY repair tips to fix common charging port issues on your Samsung Galaxy S10. This can help you avoid the hassle and cost of taking your phone to a professional repair shop.
How do I remove the back glass and replace the charging port of my Samsung Galaxy S10?
To remove the back glass and replace the charging port of your Samsung Galaxy S10, you need to apply heat to the back glass using a heating bag and follow the necessary safety precautions. Once the back glass is removed, you can access the charging port and replace it with a new one. It is crucial to use genuine Samsung parts for the replacement to ensure proper functionality.
What are some troubleshooting steps for common charging port issues on my Samsung Galaxy S10?
You can try these troubleshooting steps for common charging port issues on your Samsung Galaxy S10: try different charging cables and power sources, charge the phone while turned off, clean the charging port for any debris, and check for any signs of water damage.
How can I perform a DIY charging port replacement for my Samsung Galaxy S10?
To perform a DIY charging port replacement for your Samsung Galaxy S10, you can purchase a new charging port from a reliable phone part supplier and follow the step-by-step instructions provided. Please note that replacing the charging port yourself can be a challenging repair, and it is recommended for those who are tech-savvy and have experience with phone repairs.
What are the options for professional charging port repair for my Samsung Galaxy S10?
If you are not comfortable with performing a DIY charging port replacement, you can opt for professional repair services. Local repair shops or online mail-in services can replace the charging port for you, ensuring a proper and reliable repair. Professional repair services may also come with warranties on parts and labor, providing you with peace of mind during the repair process.
Are you looking to maximize the battery performance of your Samsung Galaxy S20+? Battery calibration might be the solution you’re seeking. By calibrating the battery of your device, you can potentially extend its battery life and improve overall performance. While the effectiveness of battery calibration may vary based on usage habits and the age of…
If you’re encountering speaker issues with your Samsung Galaxy Note 10, don’t worry. We’re here to help you troubleshoot these problems and enhance your audio experience. First, let’s check the volume settings. Ensure that the volume is set to maximum by using the volume key on the side of your device. Adjust the volume and…
If you’re a Samsung Galaxy Note 20 user and facing brightness issues with your device’s screen, you’re not alone. Many users have reported experiencing such problems, which can be frustrating and impact the overall user experience. In this article, we provide expert advice on how to repair the brightness of your Samsung Galaxy Note 20…
Facing MMI code errors on Samsung devices can be annoying. MMI stands for Man-Machine Interface. It lets users access special features. Errors can block these features, making it hard to use your phone. This guide offers simple and advanced ways to fix these issues. It uses advice from trusted tech experts. Whether it’s an invalid…
If you’re facing power button issues on your Samsung Galaxy A51, there’s no need to rush to a service centre just yet. There are several quick fixes you can try to restore functionality to your power button. Power button problems can be frustrating, as they affect your ability to turn your phone on or off,…
Samsung Galaxy Buds offer top-notch sound and performance. Yet, they can face problems like connection issues. It’s key to know how to troubleshoot these issues. This guide will help you fix common problems, so you can enjoy music and calls without interruptions. Keeping your Galaxy Buds updated and setting touchpad correctly can prevent battery drain…