If you are not familiar with planar tracking, this may sound complex. But just wait! It revolutionizes the way video editing and VFX are done! It tracks flat, two-dimensional planes in your video and lets you accurately replace or add objects.
A logo to be placed? Or a screen to be fitted in? Well, planar tracking is your best friend. As many so A related AI workflow also appears in future video creation image-to-video ai, where tool choice and output quality shape the final result.ftware programs are available, Wondershare Filmora is particularly effective yet incredibly easy to use. So, want to take your video content creation to the next level? Then let’s dive in and read this article!
So, first, we should understand what the planar tracker is. Doing so will help you understand the deeper aspects of it.
Well, it can be defined as the method utilized in video editing and VFX to track flat, two-dimensional surfaces in a shot. In contrast to point tracking, which tracks certain points in the video, planar tracking works with larger surfaces, so it becomes useful for such operations, especially adding objects, text, or even backgrounds to the video. Think about how it is even possible to place a screen in front of a shot without it moving along with the camera; this is the aim of the planar tracking.
It is quite useful for adding graphics, text, or visual effects to flat surfaces such as screens, walls, or floors.
Helps in integrating live-action footage.
Easy to improve product placements.
You can use it to add cinematic effects with ease.
However, it is important to avoid any mistakes to get professional video effects. So make sure to use a planar tracker precisely.
Part 2: How Does Planar Tracking Work?
Now, let’s figure out how it works. So, it is used in post-production to track the flat surfaces in the video. Firstly, you need to select the flat surface you want to track, like a wall or screen. Then, adjust settings such as the size of the tracking area and its sensitivity.
Once it is done, the software follows the surface as it moves while ensuring that graphics stay anchored perfectly. But you need to remember that planar tracking is not always as easy as it seems. However, there are several factors that can make it difficult to track the surface, such as reflections, shadows, or sudden lightning.
Moreover, it is quite different from 3D tracking, which deals with objects in space. If you are not aware of the tools to use the planar tracker to give your videos amazing visual effects, then don’t panic! There are tools such as Wondershare Filmora that will help you make your work easier than ever. We will discuss this tool in the next section.
Part 3: Wondershare Filmora: Prefect Tool For Planar Tracking!
Finally, your wait is over! Now it is time to discuss the tool Wondershare Filmora in depth. So, this is the tool or software that provides you with perfection when you use the planar track to add objects, text, images, or video clips to any moving flat surface in your video. With its four-point (corner pin) tracking system, it tracks key reference points like the corners of a screen or a license plate, analyzing position, scale, and rotation. Moreover, it offers a user-friendly interface and easy navigation; you can use this tool with ease.
So, without any worries, select between automatic or advanced tracking, particularly depending on your skills. However, it is not enough yet! Remember, it is a complete suite of video and audio edits. To explore more about it, go through its features mentioned below:
Key Features:
Easy to track the planar surface with its auto-planar tracker, especially for beginners.
Its advanced planar tracking helps professionals to manually adjust points and configure keyframe dotting for more precise results.
Conceal and blur the sensitive information effortlessly.
Provides you with easy tracking of objects within the reference frame and pin text, images, stickers, and effects to enhance the visualization.
Pros:
Export videos in different formats, such as MP4, WMV, AVI, MOV, and more.
Change resolution, quality, and frame rate according to your needs.
Directly share your video content on social media platforms such as YouTube, Vimeo, and TikTok.
Show great compatibility on Windows, Macs, iPhones, and Androids.
Pricing:
Opt for its free version if you have a tight budget.
Its basic plan comes with US $9.99/month.
For an advanced plan, you need to pay US $34.99/yr.
Its perpetual plan costs US $49.99.
Finding it amazing, right? Well, we have also mentioned its step-by-step guide for using its planar tracker. Check out how it works:
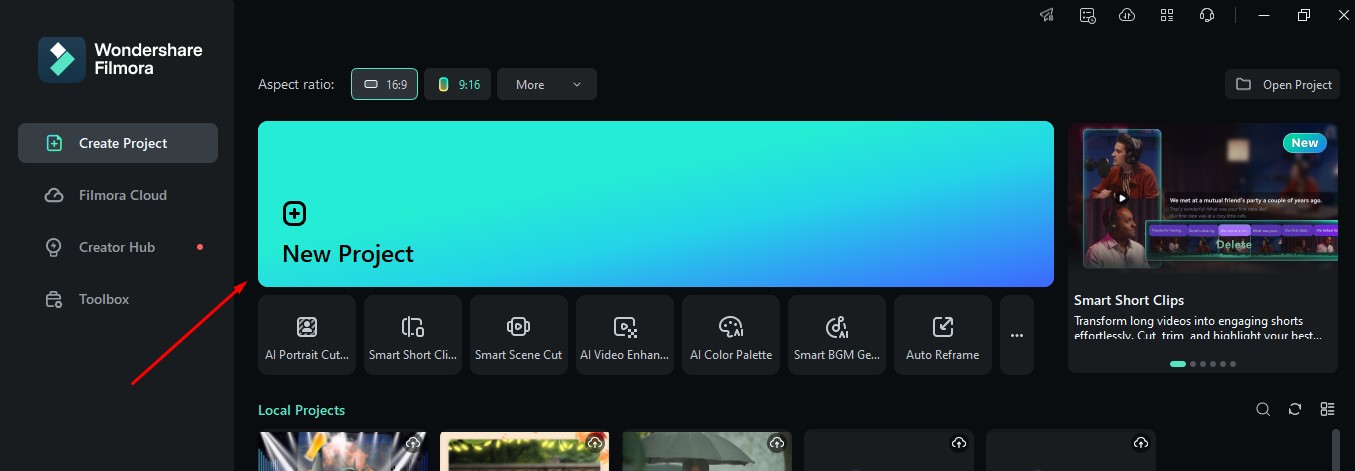
Step 1: Visit its official website and download the latest version on your PC. Then launch and open it, navigate to the New Project option, and click on it.
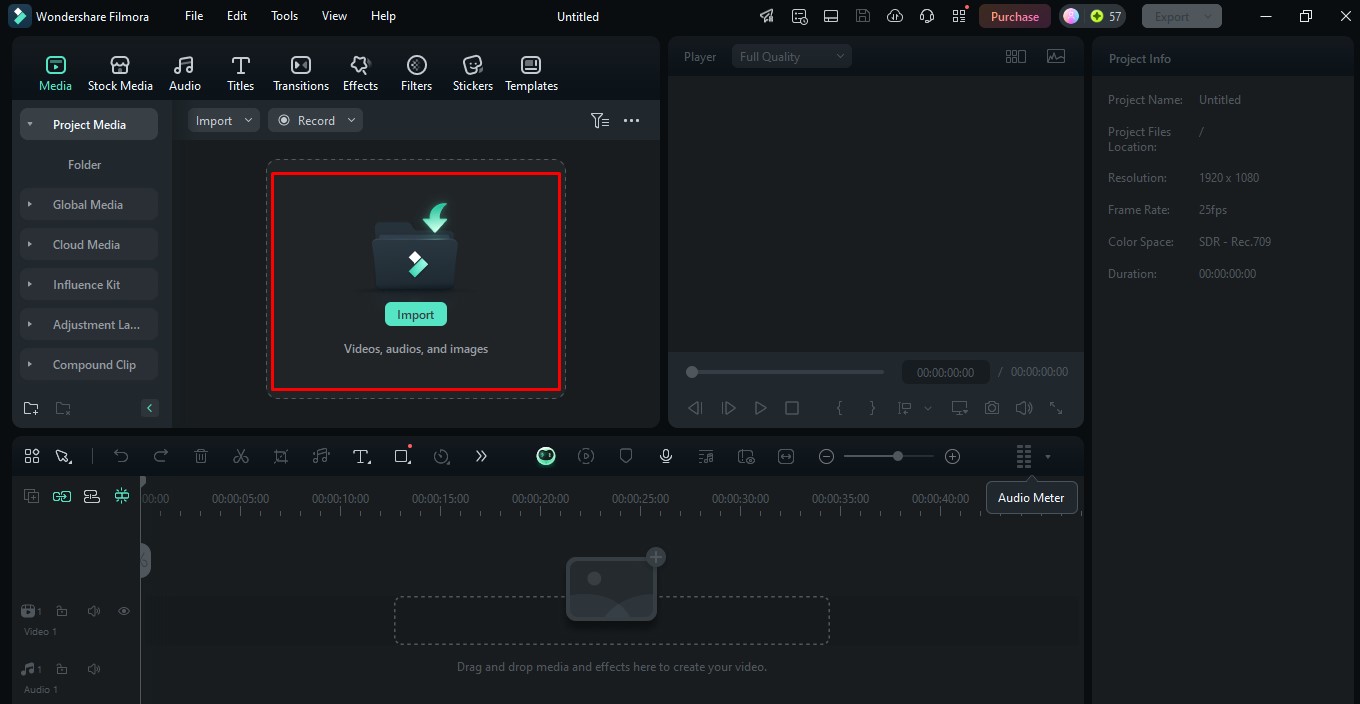
Step 2: Click on the Import option to get the video for making changes.
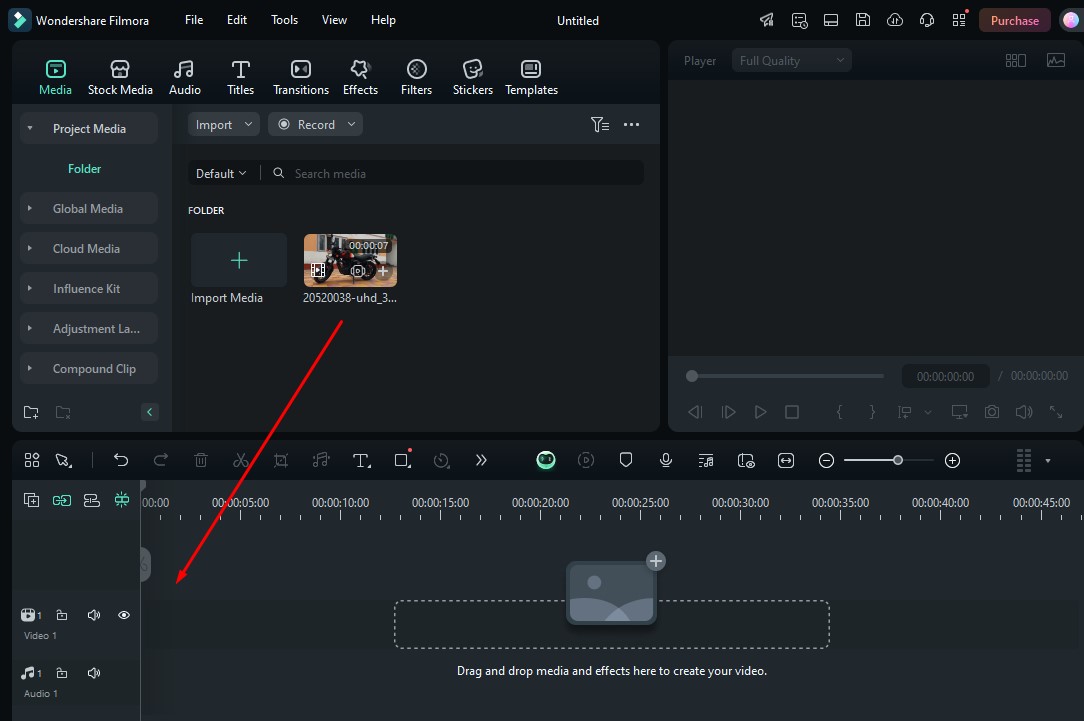
Step 3: Place the video in the timeline to make edits to it.
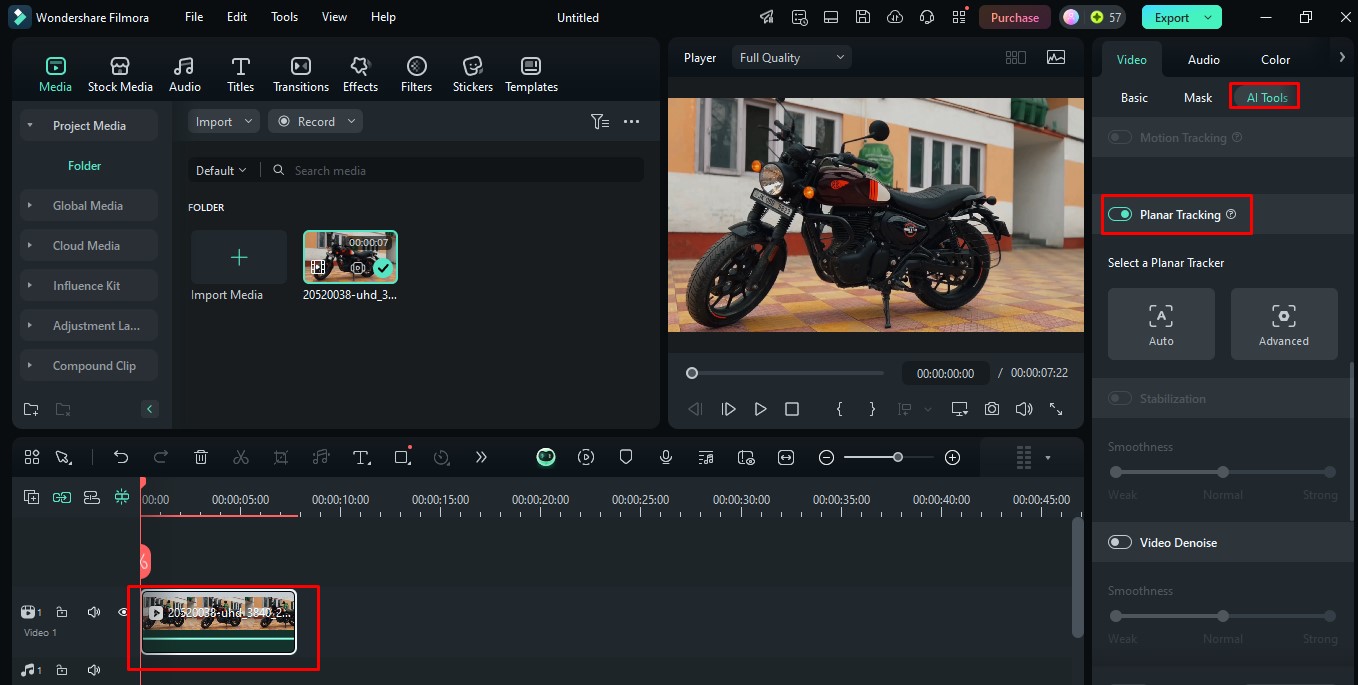
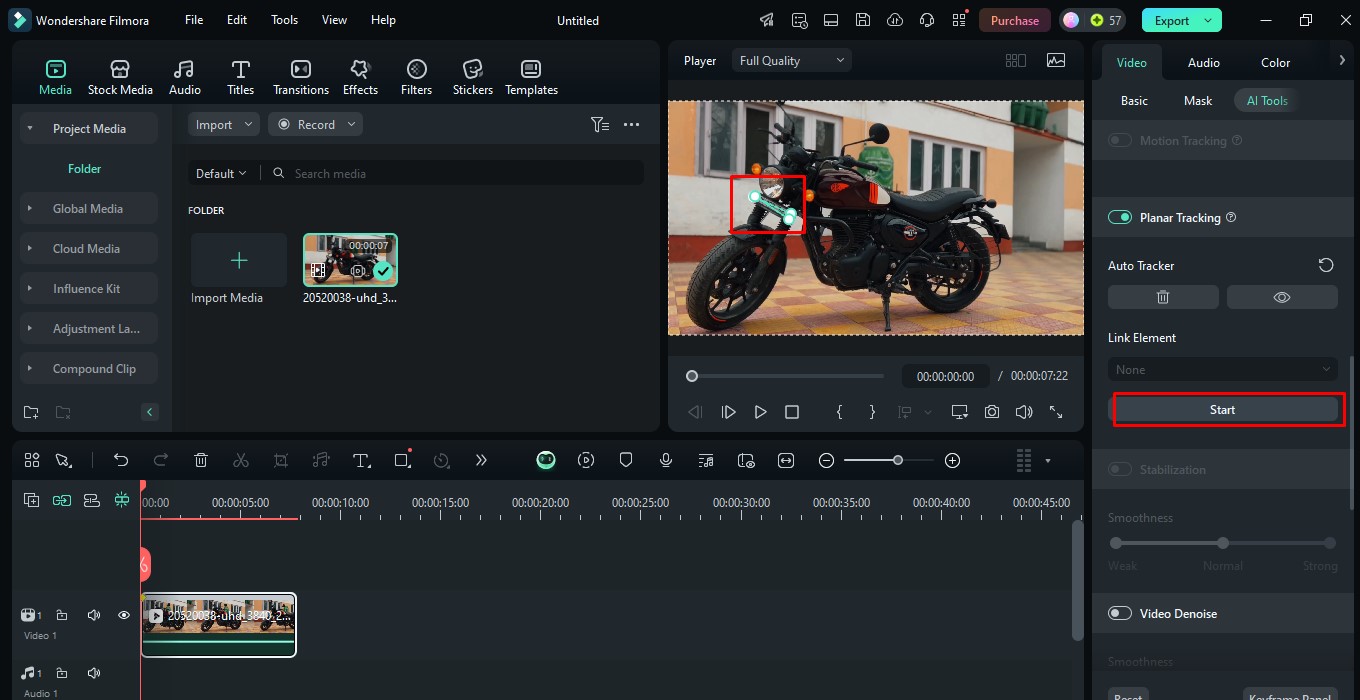
Step 4: Once you drop the video into the timeline, click on the video. Then navigate to AI Tools > Planar Tracking > Auto.
Step 5: After that, adjust the points in the area you want the changes in the preview section, and click on the Start option.
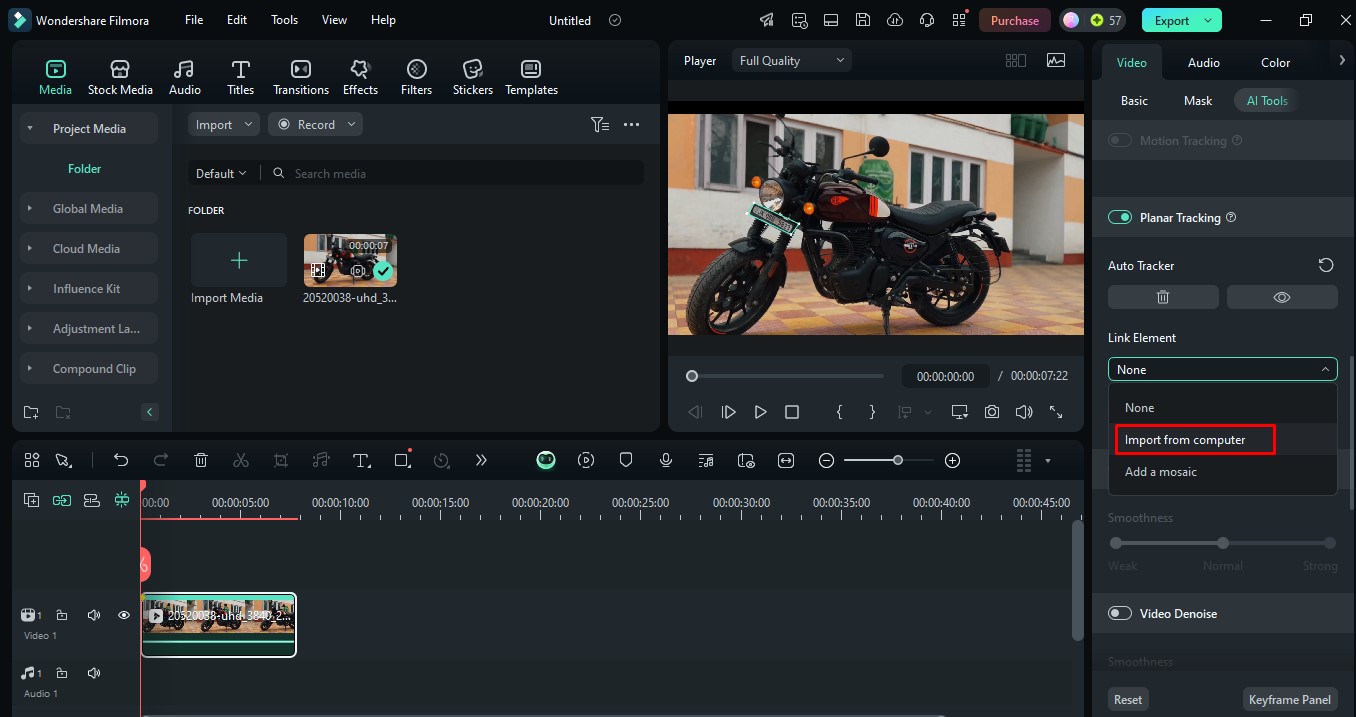
Step 6: Here you can add a mosaic as well. But if you want to add an image, then click on the Import from Computer option and select the image of your choice.
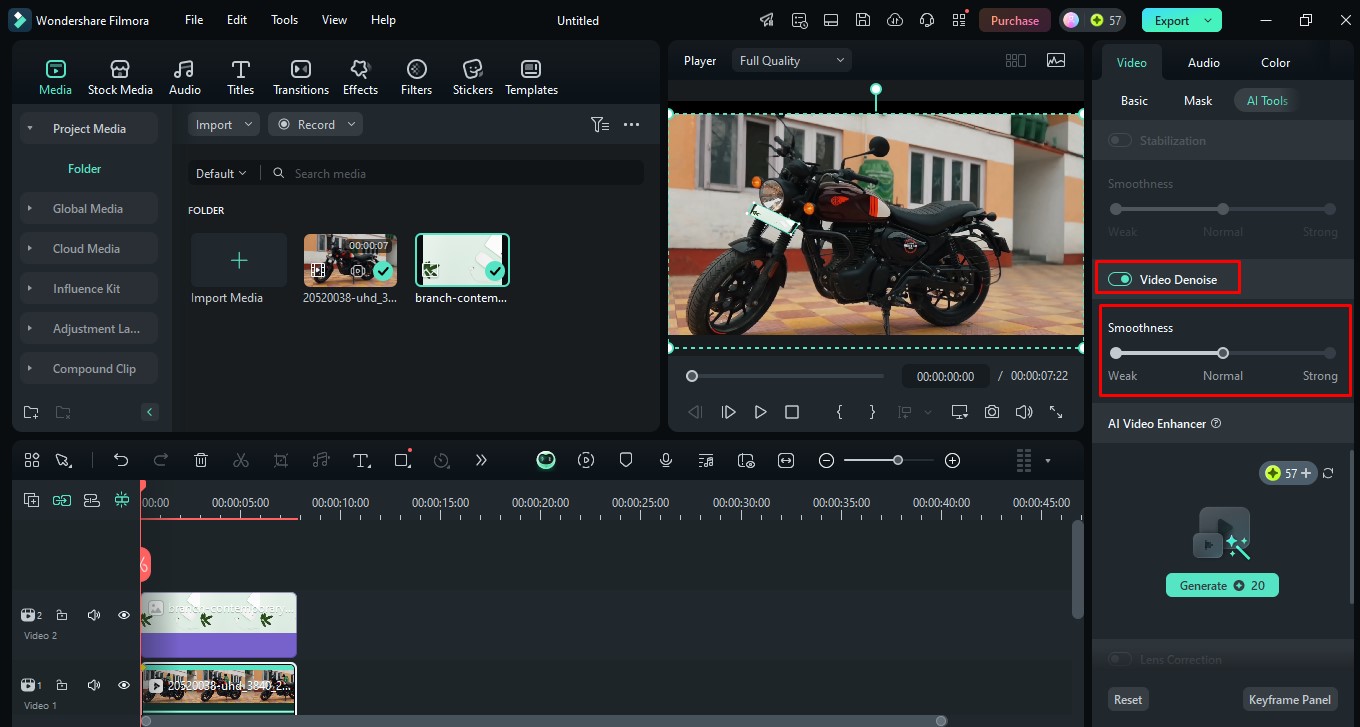
Step 7: To denoise your video, click on the Video Denoise option and make changes according to your preference.
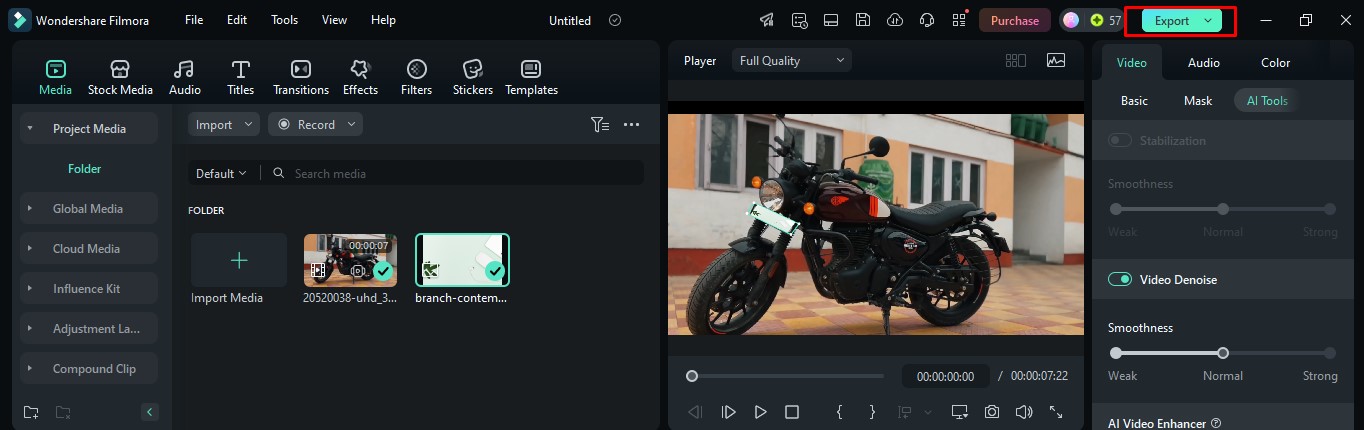
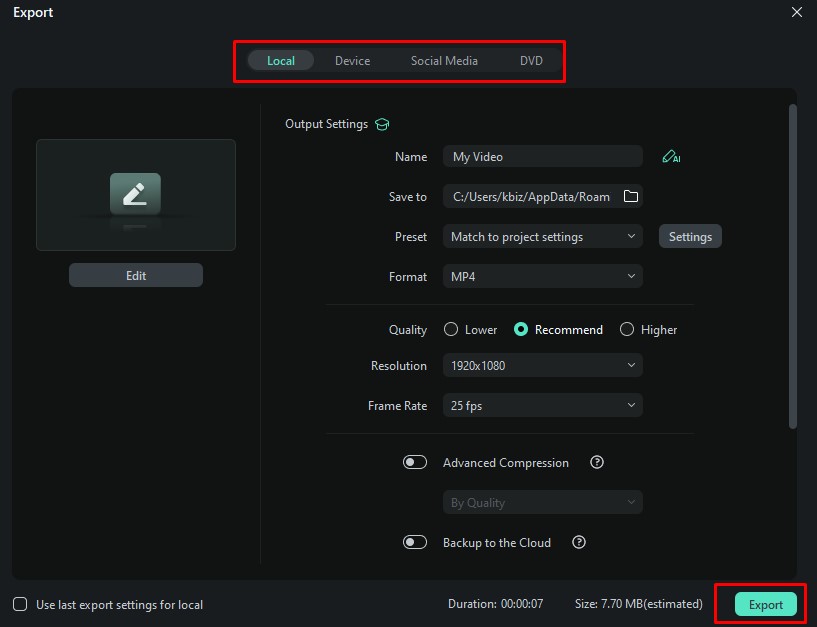
Step 8: Once your editing is done, to save the changes, click on the Export option.
Step 9: Here, a pop-up window will appear, where you can change resolution, quality, frame rate, and format as per your preference. After this, click on the Export option again to finalize the changes.
Moreover, you can directly share this video on social media platforms like YouTube, Vimeo, and TikTok while clicking on the Social Media option.
Conclusion
Hope this article helps you understand the planar tracker meaning and its purpose to add amazing visual effects to your video. But while choosing this feature to replace or add objects such as logos or screens on flat surfaces in your video, it is quite important to choose a tool that is easy to use. Here, you can use Wondershare Filmora, which gives you the desired results in a matter of minutes.
Moreover, you can try its free version before getting its subscription. So what are you waiting for? Visit its official site and explore everything!
FAQs
Is planar tracking suitable for beginners?
Well, planar tracking is quite suitable for beginners because many tools offer user-friendly interfaces and easy navigation.
Can I use Wondershare Filmora for free for the planar tracker?
Yes, you can use its free version to track the plane surfaces to add or replace the objects with ease.
What types of video editing projects can benefit from planar tracking?
It is beneficial for various video editing projects, including visual effects (VFX), motion graphics, and composing work. However, it is particularly useful for integrating graphics with live-action videos, enhancing storytelling, and creating amazing visuals in music videos and promotional content.
In today’s digital age, cyber attacks are a constant threat. With more personal and sensitive information being stored online, it’s crucial to know how to protect your data. Whether you’re shopping online, working remotely, or enjoying some downtime to play some online games, maintaining robust cybersecurity practices is key. This article provides A related repair…
Gaming on PC with a PS4 controller offers a more immersive and comfortable gaming experience. While the keyboard-mouse combo is reliable, many players prefer the familiarity of their PS4 controller. This guide will walk you through the process of connecting your PS4 controller to your PC. You can connect your PS4 controller via USB or…
Stepping into a car should be an experience of calm and readiness, not a confrontation with stale air, sticky surfaces, and forgotten crumbs. While many view car cleaning as a mere aesthetic chore, the truth is that why a clean car matters more than you think for health and comfort extends far beyond superficial appearances….
Enhance your PC gaming experience by using your familiar PS4 controller. This comprehensive guide will walk you through the process of establishing a seamless connection between your PS4 controller and PC. We’ll explore both wired and wireless options, providing detailed instructions to ensure a smooth setup process. Understanding the compatibility between PlayStation controllers and PC…
To create a video that looks professional, an ordinary person has to spend several hours editing, using complicated tools, and applying their technical skills. But now, that limitation is going away due to the popularity of AI-powered creativity. AI is changing the entire process of storytelling, starting from the scripts to the visuals. One of…
Crystallization is a fundamental process used in various industries, including pharmaceuticals, food production, and water purification. It involves the transformation of a liquid or gas into solid crystals, allowing for purification and separation of substances. Crystallization process is essential for manufacturing high-purity materials and has been refined over the years with technological advancements. One company…