MacBook Pro Retina Display Color Calibration
Welcome to our guide on MacBook Pro Retina display color calibration. MacBook Pro is renowned for its stunning Retina display, which offers vibrant colors and sharp visuals. However, to ensure accurate color representation, it’s essential to calibrate your display. In this article, we will explore the process of color calibration for your MacBook Pro Retina display, enabling you to optimize your visual experience and meet the needs of professionals like designers and photographers.
Did you know that factors such as ambient light and display angle can affect how you perceive colors on your MacBook Pro Retina display? By calibrating your display, you can compensate for these factors and achieve color accuracy. Whether you’re editing photos or designing graphics, a properly calibrated display is vital for accurate color representation. Let’s delve into the world of color calibration and discover how to make the most of your MacBook Pro Retina display.
The Display Calibrator Assistant is a valuable tool provided by Apple that walks you through the process of adjusting your display settings and creating a calibrated color profile. This ensures that the colors you see on your screen accurately match real-world colors. In the next section, we will explore how to access and use this Assistant to customize your display’s color profile.
Adjusting Display Settings on Your MacBook
When it comes to optimizing the display settings on your MacBook, there are a few key steps you can take to ensure the best possible color profile and visual experience. By adjusting the display settings, you can fine-tune the color accuracy and contrast to suit your preference and needs.
Accessing Display Settings
To access the display settings on your MacBook, follow these steps:
Related:


- Click on the Apple menu at the top-left corner of your screen.
- Select “System Preferences” from the drop-down menu.
- In the System Preferences window, click on “Displays”.
Customizing Color Profiles with Display Calibrator Assistant
Within the Displays settings, you’ll find the “Color profile” option. By selecting “Customize”, you can open the Display Calibrator Assistant. This Assistant will guide you through the calibration process to create a calibrated color profile specific to your display.
“The Display Calibrator Assistant plays a vital role in creating a color profile that accurately represents the colors on your MacBook display. It ensures that the colors you see on your screen are faithful to the original content. Whether you’re a photographer editing images or a designer working with precise hues, calibrating your display is an essential step.”
During the calibration process, the Assistant will prompt you to adjust various settings, such as brightness, contrast, and gamma. By following these instructions, you can achieve a color profile that delivers accurate and vibrant colors suited to your specific requirements.
Calibration Considerations
It’s important to note that calibrating your display may not be necessary in a typical home or office environment with consistent lighting conditions. However, for professionals in fields such as graphic design, photography, or video editing, accurate color representation is paramount. Taking the time to calibrate your display with the help of the Display Calibrator Assistant can make a significant difference in ensuring accurate and reliable color reproduction.
| Benefits of Adjusting Display Settings | Benefits of Using Display Calibrator Assistant |
|---|---|
|
|
Additional Calibration Options for Macs with Retina Display
Macs equipped with Retina display, such as the MacBook Pro, offer users a range of advanced built-in color accuracy and calibration features. These features provide enhanced calibration options that ensure precise and faithful color reproduction. If you own a Mac with Retina display, it is highly recommended to consult the documentation provided with your device, as it will outline the various calibration options and features available to you.
With the built-in color accuracy and calibration features, Mac users with Retina displays have greater control over the visual representation of their content. Whether you are a professional designer, photographer, or simply someone who values impeccable color reproduction, these additional calibration options can significantly enhance your visual experience.
In particular, these calibration options allow you to fine-tune the color accuracy and display settings to match your specific needs. By customizing the color profile of your Retina display, you can ensure that the colors on your screen are reproduced as accurately as possible, resulting in vibrant and lifelike visuals.
Furthermore, these built-in calibration features take into account the unique characteristics of Retina displays, which offer incredibly high pixel density and exceptional image quality. By leveraging these features, you can optimize your Mac’s display to deliver stunning visuals with utmost precision.
Comparison of Additional Calibration Options for Macs with Retina Display
| Calibration Feature | Description |
|---|---|
| Built-in Color Accuracy | MacBooks with Retina display come with advanced color calibration capabilities that ensure accurate color reproduction. |
| Calibration Presets | The calibration options provide preconfigured profiles for different usage scenarios, such as graphic design, photography, or video editing. |
| Custom Color Profiles | Users can create their own custom color profiles, allowing them to fine-tune the display settings based on their specific requirements. |
| Color Gamut Adjustment | Mac users can adjust the color gamut of their Retina display to ensure consistency across different devices and platforms. |
As seen in the table above, macs with Retina display offer a variety of calibration features that cater to different user preferences and professional needs. By utilizing these options, you can truly unlock the full potential of your Mac’s Retina display and enjoy unparalleled color accuracy and visual optimization.
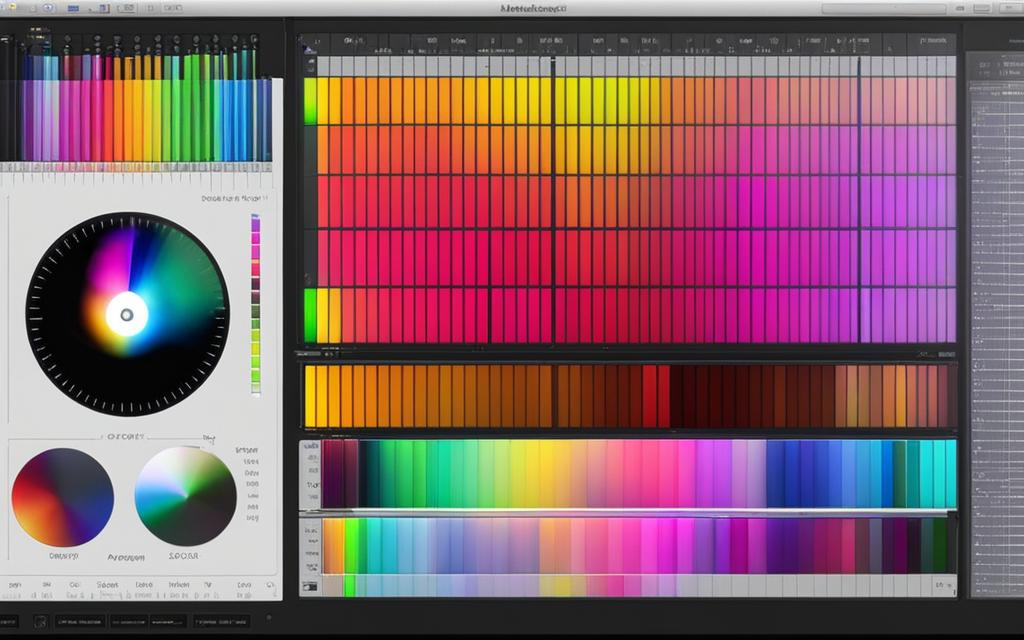
Using QuickTime Movie Test Patterns for Display Calibration
To evaluate the calibration of your MacBook display, you can use QuickTime movie test patterns provided by Apple. These test patterns, specifically designed for display calibration, serve as color-reference points, allowing you to measure and verify the color primaries, secondaries, and luminance of your display. By comparing the measured values from these test patterns with reference values, you can identify any deviations and make the necessary adjustments for accurate calibration.
The QuickTime movie test patterns offer a comprehensive range of calibration tools, including grayscale, color ramps, and color bars. These patterns enable you to assess various aspects of color accuracy and performance, such as gamma and white point. By carefully analyzing the measurements taken from these test patterns, you can gain valuable insights into the strengths and weaknesses of your display’s color reproduction capabilities.
For precise and accurate measurements, it is recommended to use a reliable third-party spectroradiometer. This device allows you to capture detailed color information, providing you with a quantitative analysis of your display’s performance. By utilizing the QuickTime movie test patterns in conjunction with a spectroradiometer, you can fine-tune your calibration settings and achieve optimal color accuracy.
Visual representation of QuickTime movie test patterns for display calibration.
Tips for Accurate Display Measurement and Calibration
When measuring and calibrating your MacBook display, it’s important to follow certain tips for accurate results. These tips will help ensure that your display measurements are reliable and that your calibration process is precise and effective.
Align the Spectroradiometer to the Center of the Display
When using a spectroradiometer for display measurement, it’s crucial to align it properly. Place the spectroradiometer at the center of the MacBook display to obtain accurate readings. This ensures that the measurements are representative of the entire screen and minimizes the risk of skewed results.
Ensure a Dim or Dark Ambient Environment
To achieve accurate display measurement and calibration, it’s important to control the ambient environment. Ideally, work in a dim or dark room to minimize external light interference. This helps maintain consistent lighting conditions during the measurement and calibration process, resulting in more reliable and accurate results.
Check the Exposure and Integration Time Settings of the Meter
Before conducting display measurements, double-check the exposure and integration time settings of your meter. Ensuring that these settings are properly configured helps capture accurate data and prevents overexposure or underexposure. Adjust the settings based on the ambient lighting conditions and the specifications of your spectroradiometer for precise measurements.
Control the Ambient Temperature
The ambient temperature can affect the performance of the display and the accuracy of the measurement and calibration process. It’s important to maintain a stable ambient temperature throughout the calibration process. Avoid extreme temperature fluctuations that could impact the display’s color accuracy. Monitor the temperature and make adjustments as necessary for optimal results.
By following these tips, you can achieve accurate display measurement and calibration for your MacBook. These measures ensure that your display accurately represents colors and provides optimal visual performance, which is crucial for professionals who rely on precise color reproduction.
The image above illustrates a spectroradiometer in action, capturing precise measurements for display calibration. The use of a spectroradiometer helps to ensure accurate color reproduction and consistent results.
Color Profiles and Display Calibration on Macs
Macs store color profiles, which are settings files that adjust the color and contrast of the display. These profiles can be accessed in the System Settings > Displays section. While default color profiles are available, professional users can install specific color profiles for their workflow needs.
Having the right color profile is crucial for accurate color representation, especially for designers, photographers, and visual creators. It ensures that the colors on the screen are true to life and match the intended output across different devices and mediums. By utilizing custom color profiles, professionals can fine-tune their Mac display to meet their specific requirements and maintain consistency in their work.
One of the key tools available for display calibration on Macs is the Display Calibrator Assistant in macOS. This user-friendly tool guides users through the calibration process, making it easy to create custom color profiles tailored to their preferences. By adjusting parameters such as white point, gamma, and color temperature, users can achieve the desired color accuracy and visual optimization.
When calibrating your Mac display, it’s essential to consider the ambient lighting conditions in your workspace. Factors such as natural light, artificial lighting, and screen reflections can affect the perception of colors. Taking these into account during the calibration process ensures that the displayed colors are accurate and consistent under different lighting conditions.
Creating Custom Color Profiles
To create a custom color profile for your Mac display, follow these steps:
- Go to System Settings > Displays.
- Click on the “Color” tab.
- Choose the “Open Display Calibrator” option.
- Follow the step-by-step instructions provided by the Display Calibrator Assistant.
- Save the custom color profile once the calibration process is complete.
By following these steps, you can create a personalized color profile that suits your specific needs and ensures accurate color reproduction on your Mac display.
Customizing the color profile allows you to tailor the display settings to your liking and achieve the desired visual experience. Whether you work with vibrant graphics or detailed photographs, calibrating your Mac display ensures that every color is accurately represented.
The Display Calibrator Assistant in macOS provides a visual interface that makes the calibration process straightforward even for users who are new to display calibration. Its step-by-step instructions, along with real-time adjustments, help users achieve optimal color accuracy and enhance their overall visual experience on Macs.
The Calibration Process for Mac Displays
The calibration process for Mac displays is essential to ensure accurate colors and contrast. By adjusting various settings, users can optimize their display’s performance for their specific needs. The key adjustments include:
- Changing the intensity of the main colors (red, blue, and green)
- Setting the white point
- Selecting a target gamma
The Display Calibrator Assistant in macOS simplifies this process by guiding users through the necessary adjustments. With this tool, users can customize their Mac display’s color profile, tailoring it to their preferences and intended use.
Accurate Mac display calibration is crucial, particularly for professionals who rely on precise color representation, such as graphic designers and photographers. By calibrating their Mac display, users can ensure that their work is displayed as intended, with accurate colors and contrast.
To further illustrate the calibration process, consider the following visual representation:
| Colour adjustment | White point | Gamma |
|---|---|---|
| Adjust the intensity of the main colors (red, blue, and green) to achieve the desired color accuracy. | Set the white point to determine the color temperature of white displayed on the screen, ranging from warm to cool tones. | Select a target gamma value to control the brightness and contrast of your display. |
Proper calibration of Mac displays not only ensures accurate color reproduction but also enhances the overall visual experience. It allows users to view images, videos, and other visual content with optimal clarity and detail.
Conclusion
Calibrating the display of your MacBook Pro Retina is essential to achieve accurate color reproduction and optimize your visual experience. This is particularly important for professionals such as designers and photographers who rely on precise color accuracy. By adjusting the display settings and utilizing tools like the Display Calibrator Assistant, you can ensure that your MacBook’s Retina display accurately represents colors and delivers crisp visuals.
By following the calibration process outlined in this article, you can significantly enhance your workflow and the overall quality of your visual content. Whether you’re editing photos, designing graphics, or watching movies, a calibrated MacBook display will provide the color accuracy you need to achieve your desired results. Visual optimization is key, and calibration plays a crucial role in achieving it.
Take the time to adjust your display settings, explore the calibration options available, and use the recommended tools for measurement and calibration. By doing so, you’ll unlock the full potential of your MacBook Pro Retina’s display and have confidence in the accuracy of the colors you see, delivering the best visual experience possible.
FAQ
How can I optimize the color calibration of my MacBook Pro Retina display?
You can use the Display Calibrator Assistant to adjust your display settings and create a calibrated color profile. This helps optimize the color calibration of your MacBook Pro Retina display.
Where can I find the Display Calibrator Assistant?
To access the Display Calibrator Assistant, go to Apple menu > System Settings > Displays. In the Displays settings, select the “Color profile” option and choose “Customize” to open the Display Calibrator Assistant.
Are there additional calibration options for Macs with Retina display?
Yes, Macs with Retina display often have built-in color accuracy and calibration features. Consult the documentation that came with your device to explore the available calibration options and features.
How can I evaluate the calibration of my MacBook display?
You can use QuickTime movie test patterns provided by Apple to measure and verify the color primaries, secondaries, and luminance of your display. By comparing these measurements to reference values, you can make necessary adjustments for accurate calibration.
What tips should I follow for accurate display measurement and calibration?
Ensure that your spectroradiometer is aligned to the center of the display, create a dim or dark ambient environment, check the exposure and integration time settings of the meter, and control the ambient temperature. These measures help minimize stray light interference and ensure consistent and reliable display measurements and calibration.
Can I install specific color profiles for my workflow needs?
Yes, while default color profiles are available, professional users can install specific color profiles that suit their workflow requirements. The System Settings > Displays section allows you to access and manage these color profiles.
What is involved in the calibration process for Mac displays?
The calibration process includes adjusting the intensity of the main colors (red, blue, and green), setting the white point, and selecting a target gamma. The Display Calibrator Assistant guides users through these adjustments, enabling them to create a customized color profile for their display.
Why is calibrating the display of my MacBook Pro Retina important?
Calibrating the display is crucial for achieving accurate color reproduction and an optimal visual experience, especially for designers and photographers. It ensures that your MacBook Pro Retina accurately represents colors and provides crisp visuals, greatly enhancing your workflow and the quality of your visual content.