How to Replace a Faulty Laptop Keyboard
If you’re experiencing issues with your laptop keyboard, such as keys not working or sticking, replacing it yourself can be a cost-effective solution. Follow these step-by-step instructions to replace your faulty laptop keyboard and restore it to full functionality.
Before you start the replacement process, it’s important to find the service/repair manual for your specific laptop model. This manual will provide you with detailed instructions on how to disassemble and replace the keyboard properly. You can often find the manual on the manufacturer’s website in a PDF format, or you can use online resources like Archive.org or ManualsLib. Make sure to have the manual accessible during the replacement process.
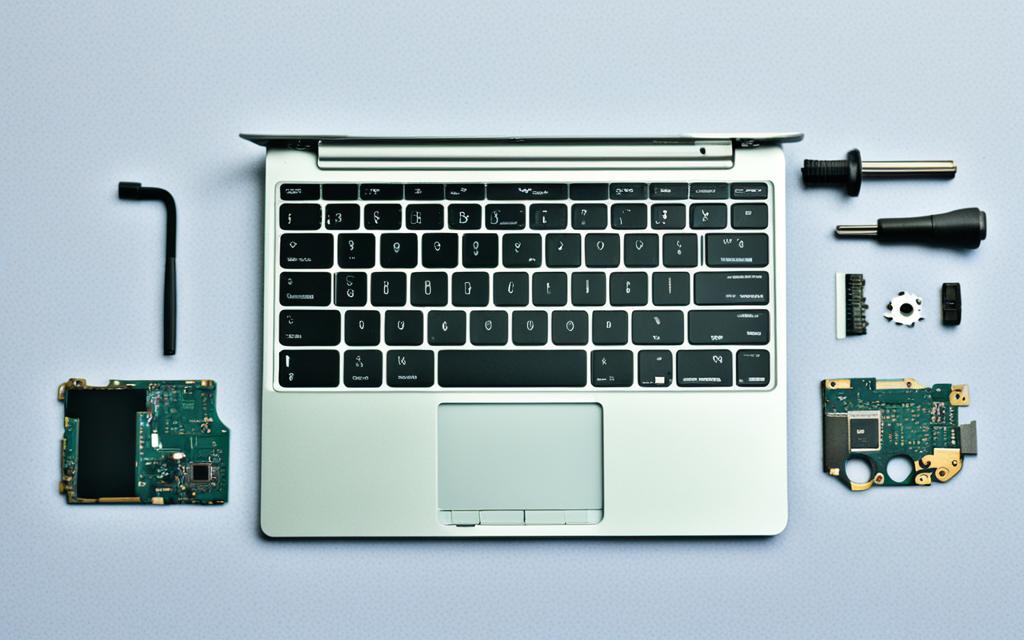
To replace your laptop keyboard, you’ll need to gather the necessary parts. Check with the manufacturer to see if they sell the specific keyboard for your laptop model. If not, you can search for the keyboard, screws, and ribbons online through computer parts retailers or platforms like eBay. Make sure to select the parts that are compatible with your laptop’s exact model number. If you’re unable to find a new keyboard, you may consider salvaging a keyboard from a broken laptop. Just make sure the keyboard and other components are intact and undamaged.
Before you begin the replacement process, set up a clean and flat workspace, ideally on a desk or countertop. Gather the necessary tools, including a Phillips screwdriver, a flat-head screwdriver, and a container for loose pieces. Turn off your laptop and disconnect it from any power source. Remove the screws on the laptop’s underside to gain access to the internal components. Take out the battery and locate the locking latches that hold the keyboard in place. Release the latches, disconnect the ribbon cables, and carefully remove the keyboard from the laptop.
Once you have your new keyboard, align it with the old keyboard’s positioning and attach the data cable to the laptop’s connector. Set the keyboard in place and secure it with the screws. Screw the underside of the laptop back into place, reinsert the battery, and reboot your laptop. After the reboot, check if the new keyboard works properly. If not, you may need to update the driver or seek professional help. With these steps, you can successfully replace a faulty laptop keyboard and save on repair costs.
Finding the Right Service/Repair Manual
Before you start the replacement process, it’s important to find the service/repair manual for your specific laptop model. This manual will provide you with detailed instructions on how to disassemble and replace the keyboard properly. You can often find the manual on the manufacturer’s website in a PDF format, or you can use online resources like Archive.org or ManualsLib. Make sure to have the manual accessible during the replacement process.
Related:


")
Why is the Service/Repair Manual Important?
The service/repair manual is a valuable resource that guides you through the steps of keyboard replacement for your laptop model. It contains comprehensive instructions, diagrams, and troubleshooting tips specific to your laptop, ensuring you perform the replacement accurately and safely.
“Having the right service/repair manual is like having a knowledgeable technician guiding you every step of the way. It eliminates guesswork, reduces the risk of damaging delicate components, and helps you save time and money.”
Where to Find the Service/Repair Manual?
There are several avenues to find the service/repair manual for your laptop model:
- Manufacturer’s Website: Visit the official website of the laptop manufacturer and search for the support or downloads section. Look for the manual by entering your laptop’s model number or navigating through the product support pages. Download the manual in PDF format for easy access.
- Online Resources: Archive.org and ManualsLib are popular online platforms that host a vast collection of user manuals, including laptop service/repair manuals. Use the search function with your laptop’s model number to find the relevant manual. Ensure you are selecting the manual from a reliable source.
Keeping the Manual Accessible
During the replacement process, it’s crucial to keep the service/repair manual easily accessible. Consider these tips:
- If using a printed manual, organize the pages in a binder or folder.
- If using a PDF manual, open it on a separate device or split the screen on your computer for convenient reference.
- Bookmark important sections or use sticky notes to mark pages with relevant instructions.
Having the manual within reach eliminates the need to search for instructions repeatedly, ensuring a smooth and efficient replacement process.
| Advantages of Using a Service/Repair Manual | Disadvantages of Not Having a Service/Repair Manual |
|---|---|
|
|
By following the instructions in the service/repair manual, you can confidently proceed with the keyboard replacement, knowing that you have the necessary knowledge and guidance for a successful outcome.
Gathering the Necessary Parts
To replace your laptop keyboard, you’ll need to gather the necessary parts. It’s important to ensure that you have the right components to ensure a successful replacement. Here are the key items you’ll need:
Laptop Keyboard Replacement Parts
To begin, check with the manufacturer of your laptop to see if they sell the specific keyboard replacement for your laptop model. They may have the exact part you need, ensuring compatibility and ease of installation. If the manufacturer doesn’t have the part available, don’t worry. There are alternative options to explore.
You can search for laptop keyboard replacement parts online through computer parts retailers or platforms like eBay. These online sources have a wide range of options for various laptop models, allowing you to find the perfect fit for your specific laptop.
When searching for replacement parts, be sure to enter your laptop model number along with the keywords “laptop keyboard replacement” to narrow down the search results and find the most suitable options.
Laptop Keyboard Screws
Along with the replacement keyboard, you may also need laptop keyboard screws. These screws are essential for securely attaching the new keyboard to your laptop. Sometimes, the replacement keyboard may come with its own set of screws. However, if they are not included, you can often find compatible keyboard screws online or at computer parts retailers. Make sure to select the appropriate size and type of screws for your laptop model to ensure a proper fit.
Laptop Keyboard Ribbons
In addition to the replacement keyboard and screws, you’ll need laptop keyboard ribbons. These ribbons connect the keyboard to the laptop’s internal components, allowing for the transmission of keystrokes. If your old keyboard ribbons are still in good condition, you can reuse them with the replacement keyboard. However, if they are damaged or worn out, it’s advisable to replace them along with the keyboard to ensure optimal performance.
Again, when sourcing replacement ribbons, make sure they are compatible with your laptop’s specific model. Online computer parts retailers or platforms like eBay are good places to find laptop keyboard ribbons, ensuring you have everything you need for a successful replacement.
Salvaging Keyboard from a Broken Laptop
If you’re unable to find a new keyboard or prefer a cost-effective option, you may consider salvaging a keyboard from a broken laptop. This option is suitable if you have access to a laptop with a similar model or compatible keyboard.
However, it’s important to ensure that the salvaged keyboard and other components are intact and undamaged. Carefully inspect the salvaged keyboard for any signs of wear, missing keys, or other defects. If the salvaged keyboard meets your requirements, you can use it as a replacement for your faulty laptop keyboard.
Remember, whether you choose to purchase a new replacement keyboard or salvage one from a broken laptop, always ensure compatibility with your laptop’s model number to prevent any compatibility issues during the replacement process.
With the necessary parts gathered, you’re now ready to proceed with the laptop keyboard replacement process. The next section will guide you through the setup of your workspace and the disassembly of your laptop.
Setting Up Your Workspace and Disassembling the Laptop
Before you begin the keyboard replacement process, it’s essential to create a suitable workspace and gather the necessary tools. Follow these steps to ensure a smooth disassembly:
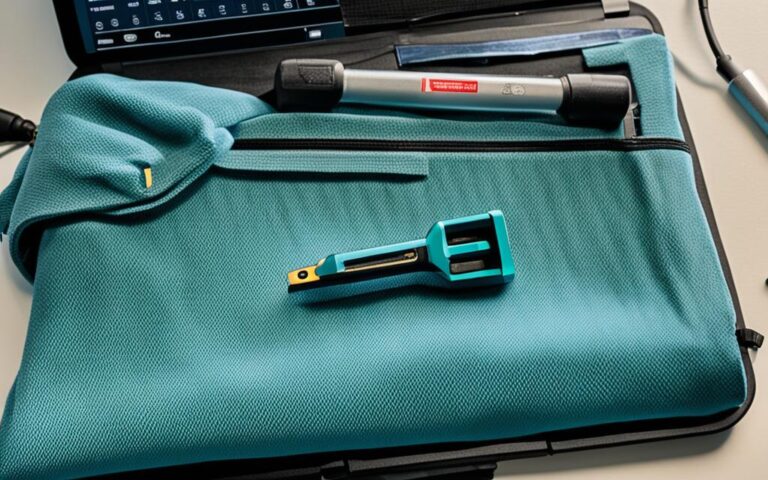
- Find a clean and flat surface, such as a desk or countertop, to set up your laptop repair workspace. This will provide the stability and organization you need for a successful repair.
- Gather the required laptop repair tools, including a Phillips screwdriver, a flat-head screwdriver, and a container for loose screws and components. Having the right tools on hand will make the disassembly process easier and prevent damage to your laptop.
- Power off your laptop and make sure it is disconnected from any power source. This is crucial to avoid any electrical accidents during the repair.
- Flip your laptop over and carefully remove the screws on the underside using the appropriate screwdriver. Keep these screws in a safe place as they will be needed for reassembly. Removing the screws will grant you access to the internal components of your laptop.
- Locate the laptop’s battery and remove it. This step is necessary to prevent any electrical charge from remaining in the laptop and ensures your safety.
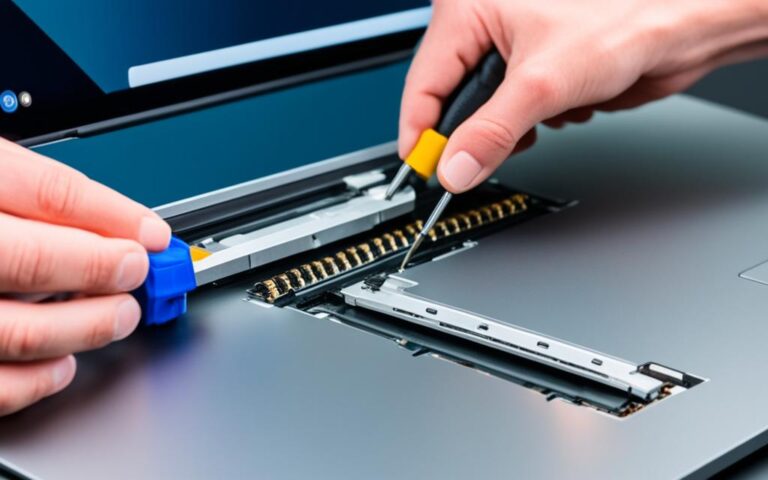
- Next, identify the locking latches that secure the keyboard in place. These latches are usually located at the top of the keyboard, near the screen. Release the latches using a flat-head screwdriver or a plastic pry tool, being careful not to damage any surrounding components.
- Once the latches are released, gently disconnect the ribbon cables that connect the keyboard to the laptop’s motherboard. Take your time to avoid any undue stress on the cables.
- Now, you can carefully remove the faulty keyboard from the laptop. Handle it with care to prevent any damage to the keyboard or the laptop’s internal components.
This image depicts a well-organized laptop repair workspace, showcasing the appropriate tools and components for a successful repair.
| Tool | Description |
|---|---|
| Phillips screwdriver | A screwdriver with a cross-shaped tip, used for removing screws with a corresponding cross-shaped indentation. |
| Flat-head screwdriver | A screwdriver with a flat, single-bladed tip, used for prying and separating components. |
| Container for loose screws and components | A small box or container to keep track of the screws and small components you remove during the disassembly process. |
Reassembling with the New Keyboard
Now that you have your brand new laptop keyboard replacement, it’s time to reassemble your laptop. Start by carefully aligning the new keyboard with the old keyboard’s positioning. Ensure that the data cable is securely connected to the laptop’s connector. This step is crucial for proper functionality.
Once you have aligned the keyboard and attached the data cable, gently set the keyboard in place. To secure it, use the screws provided with your replacement keyboard. Tighten the screws firmly but not excessively, ensuring that the keyboard is firmly in position.
Now, it’s time to reattach the laptop’s underside. Retrieve the screws you removed during disassembly and screw the underside of the laptop back into place. Once the underside is secure, reinsert the laptop’s battery.
Finally, it’s time to reboot your laptop. Power it on and wait for the operating system to load. After the reboot, test the keys on your newly replaced keyboard to ensure proper functionality. If any keys are still not working or behaving irregularly, you may need to update the keyboard driver or seek professional assistance.
By following these reassembly steps, you can effectively replace a faulty laptop keyboard and save on repair costs. Enjoy the renewed functionality of your laptop with a brand-new keyboard!