If you’re a tech-savvy user in the UK and you’re looking to increase the storage or performance of your tablet, replacing the hard drive can be a great solution. In this section, we’ll provide you with DIY tips on how to successfully replace a tablet hard drive. Whether you’re looking to upgrade your primary hard drive or fix a hardware failure, these tips will guide you through the process.
Replacing a tablet hard drive may sound daunting, but with the right information and tools, it can be a straightforward task. By following these step-by-step instructions, you’ll be well on your way to having a new hard drive in your tablet.
Before we dive into the details, it’s important to mention that backing up your data is a crucial step before replacing a tablet hard drive. You don’t want to risk losing any important files in the process. Make sure to copy your files to an external storage device or use a reliable cloud backup service.
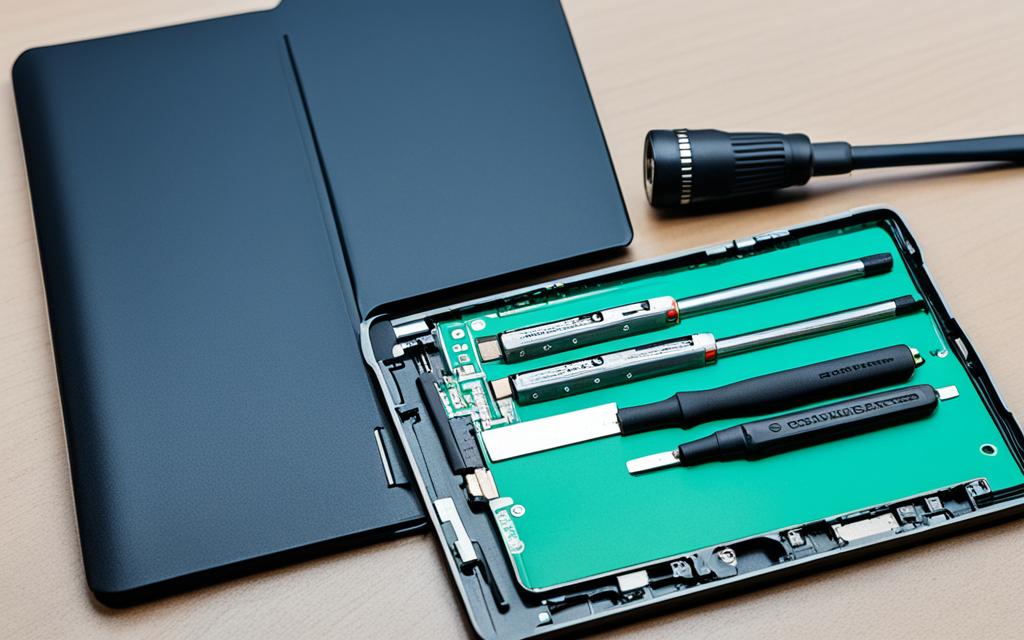
Once your data is safely backed up, you can proceed to uninstall the old hard drive from your tablet. This involves disconnecting the data and power cables and physically removing the hard drive from its bay. The specific steps may vary depending on the type of tablet you have, but the general process remains the same.
After removing the old hard drive, it’s time to install the new one. You’ll need to secure the new hard drive in the same location, reconnect the data and power cables, and ensure it is properly installed. Once the new hard drive is in place, it needs to be formatted and prepared for data storage.
Once the new hard drive is installed and formatted, you can restore your data from the backup device or service. This will ensure that all your important files are accessible on the new hard drive.
While replacing a tablet hard drive is generally a straightforward process, there can be potential issues that arise. Compatibility issues with the new hard drive, software-related problems, or physical damage to the tablet are all possible challenges. If you encounter any issues, it’s recommended to seek professional help or consult the tablet manufacturer for assistance.
In conclusion, replacing a tablet hard drive is a manageable task for tech-savvy users in the UK. By following the DIY tips provided in this section, you’ll be able to successfully replace your tablet’s hard drive and enjoy increased storage or performance. Remember to take the necessary precautions, back up your data, and seek professional help if needed. Happy upgrading!
When it comes to tablet hard drives, there are two main reasons why you might need to consider a replacement. The first reason is if your current hard drive has experienced a hardware failure. Over time, hard drives can become worn out or damaged, resulting in errors and data loss. In such cases, replacing the hard drive becomes necessary to restore the tablet’s functionality.
The second reason to replace a tablet hard drive is if you want to upgrade your device’s primary storage for better performance. Tablets often come with limited storage capacity, which can quickly fill up with apps, photos, videos, and other files. By replacing the hard drive with a larger one, you can enjoy increased speed and ample storage space for all your digital needs.
While it may sound daunting, replacing a tablet hard drive can be a relatively straightforward task. With the right tools and a little guidance, even those with limited technical expertise can successfully complete the replacement process and breathe new life into their tablets.
A related repair case also appears in broken screen tablet diy, where the same fault patterns can change the best fix path.
“Upgrading the hard drive of your tablet is an excellent way to extend its lifespan and ensure it meets your evolving needs.” – Tablet Tech Expert
Reasons to Replace
Benefits
Hardware failure
– Restoring tablet functionality
– Preventing data loss
Upgrade for better performance
– Increased speed
– Ample storage space
Backing up Your Data
Before replacing a tablet hard drive, it is important to back up any data that you want to keep. This step is crucial as the hard drive itself is not as valuable as the data stored on it. You never know when a hardware failure or accidental loss can occur, so it’s better to be safe than sorry.
There are two popular methods for backing up your data before replacing the tablet hard drive: copying files to an external storage device or using a cloud backup service. Let’s take a closer look at each of these options:
Copying files to an external storage device
One way to back up your data is by copying files to an external storage device such as a USB flash drive or an external hard drive. Simply connect the device to your tablet and copy and paste the files you want to keep onto the external storage. Make sure you have enough space on the external device to accommodate all the files.
Using a cloud backup service
If you prefer a more convenient and secure option, you can use a cloud backup service to store your data. Cloud backup services like Google Drive or Dropbox allow you to upload your files to the cloud, where they are stored securely and can be accessed from any device with an internet connection.
Both methods have their advantages and it’s up to you to decide which one suits your needs better. Remember, the goal is to make sure your important files are safely backed up before proceeding with the tablet hard drive replacement.
Now that you know how to back up your data, you can proceed with confidence knowing that your files are protected. In the next section, we will guide you through the process of uninstalling the old hard drive from your tablet.
Uninstalling the Old Hard Drive
Once your data is backed up, it’s time to uninstall the old hard drive from your tablet. This process involves disconnecting the data and power cables and physically removing the hard drive from its bay. While the specific steps may vary depending on the type of tablet you have, the general process is relatively straightforward.
Here’s a step-by-step guide to help you uninstall the old hard drive:
Power off your tablet: Before you begin, make sure your tablet is turned off to avoid any potential damage during the uninstallation process.
Remove the back cover: Most tablets have a removable back cover that allows access to internal components. Refer to your tablet’s user manual or manufacturer’s website to determine the specific method for removing the back cover.
Locate the hard drive: Once the back cover is removed, carefully locate the hard drive. It is usually a small rectangular or square-shaped component.
Disconnect the data and power cables: The hard drive will be connected to the tablet’s motherboard via data and power cables. Gently unplug these cables from their respective ports, ensuring not to pull too hard to avoid damaging any connectors.
Remove the hard drive: After disconnecting the cables, you can now remove the old hard drive from its bay. Depending on your tablet’s design, it may be held in place by screws or clips. Use the appropriate tools to safely remove and detach the hard drive.
Remember, it’s essential to handle the old hard drive with care to avoid any accidental damage. Once the old hard drive is safely uninstalled, you can proceed to the next step of installing the new one.
Installing the New Hard Drive
Now that you have successfully removed the old hard drive, it’s time to install the new one. This step involves reversing the process you followed to uninstall the old hard drive. Make sure to follow these simple steps to ensure a smooth and effective installation:
Secure the new hard drive: Place the new hard drive into the same location where the old one was removed. Ensure that it fits securely and is properly aligned in the bay.
Reconnect the data and power cables: Locate the data and power connectors on the new hard drive. Connect the corresponding cables firmly and securely. Check that the connections are tight but not too tight to avoid damaging the cables or connectors.
Properly install the hard drive: Double-check that the hard drive is correctly installed and properly seated in the bay. Ensure that it is firmly in place and does not wobble or shift when the tablet is moved or shaken.
It is important to take your time during the installation process and handle the new hard drive with care. The new hard drive should be installed securely to prevent any damage or malfunction.
Once the new hard drive is properly installed, it will need to be formatted and prepared for data storage and retrieval. This will ensure that the tablet recognizes and utilizes the new hard drive effectively.
Note: It is recommended to refer to the tablet manufacturer’s documentation or online resources for specific instructions on installing a new hard drive for your particular tablet model. Different tablets may have variations in the installation process, so it’s always best to consult the official documentation.
Formatting and Restoring Data
Once you have successfully installed the new hard drive in your tablet, the next step is to format it before you can start storing files. Formatting the hard drive involves preparing it by creating a file system that the tablet can recognize.
To format the hard drive, follow these steps:
Access the settings menu on your tablet and navigate to the storage or storage settings option.
Find the newly installed hard drive and select it.
Choose the option to format the hard drive. This may be labeled as “format” or “erase” depending on your tablet’s operating system.
Confirm the formatting process and wait for it to complete.
Once the formatting is finished, the tablet’s hard drive will be ready for data storage.
It is important to note that formatting the hard drive will erase all existing data on it. Therefore, it is crucial to ensure that you have backed up your data and completed the restoration process before formatting.
Restoring Data
After formatting the newly installed hard drive, you can restore the data that you previously backed up.
To restore data to the hard drive, follow these steps:
Connect the external storage device or access the cloud backup service where you stored your data.
Copy the files you want to restore from the backup location.
Paste the files into the newly formatted hard drive on your tablet.
Ensure that all files are transferred successfully and are accessible on the tablet.
Once the data restoration process is complete, you can start using your tablet with the newly installed and formatted hard drive. Your files will be accessible and ready for use.
Troubleshooting Tips:
If you encounter any issues during the formatting or data restoration process, here are a few troubleshooting tips:
Double-check that you have completed the formatting and restoration steps correctly.
Ensure that the files you are trying to restore are compatible with your tablet’s operating system.
If you continue to experience issues, consult the user manual or contact the tablet manufacturer’s support for further assistance.
Issue
Possible Solution
Formatting takes too long
Restart the tablet and try formatting again. If the issue persists, you may need to seek professional help.
Restored files are corrupted or inaccessible
Double-check that the files were properly backed up and ensure they are not encrypted or damaged. If necessary, try restoring from a different backup source.
New hard drive is not recognized by the tablet
Check the physical connections of the hard drive and ensure it is properly installed. If the issue persists, consult the tablet manufacturer for support.
Potential Issues and Troubleshooting
While replacing a tablet hard drive is generally straightforward, it’s important to be aware of potential issues that may arise during the process. Here are some common problems and troubleshooting tips to help you overcome them:
1. Compatibility Issues
One potential issue you may encounter when replacing a tablet hard drive is compatibility with the new drive. Different tablets may have specific requirements for the type and size of the hard drive they support. Before purchasing a replacement drive, check your tablet’s specifications or consult the manufacturer’s website to ensure compatibility.
2. Software-Related Problems
Another potential issue is software-related problems after replacing the hard drive. In some cases, you may need to reinstall the operating system or drivers for the tablet to recognize the new drive. Make sure you have the necessary installation files or recovery tools and follow the instructions provided by the tablet manufacturer to avoid any software-related issues.
3. Physical Damage to the Tablet
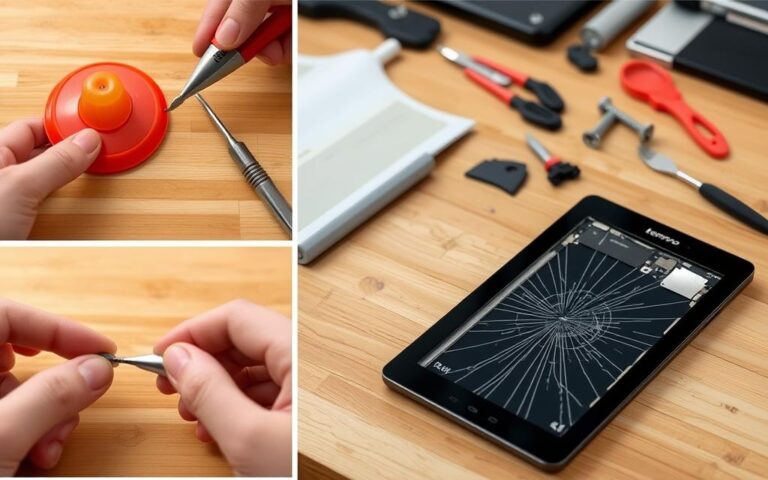
During the hard drive replacement process, there’s a possibility of causing physical damage to the tablet if not done correctly. It’s important to handle the tablet with care, use the appropriate tools, and follow the manufacturer’s instructions or a reliable guide. If you’re not confident in your abilities, it’s recommended to seek professional assistance to avoid any accidental damage.
If you encounter any of these potential issues or any other problems during the tablet hard drive replacement process, it’s best to seek professional help or consult the tablet manufacturer for specific troubleshooting steps. They will have the expertise and resources to assist you in resolving any issues and ensure a successful hard drive replacement.
Conclusion
In conclusion, replacing a tablet hard drive can be a straightforward DIY project for tech-savvy users in the UK. By following the proper steps and taking the necessary precautions, you can successfully replace a tablet hard drive at home, saving time and expenses.
However, it is crucial to be aware of potential issues that may arise during the process. Compatibility issues with the new hard drive, software-related problems, or physical damage to the tablet can all affect the success of the replacement. In such cases, it is recommended to seek professional help or consult the tablet manufacturer for assistance.
With the right tools, knowledge, and attention to detail, you can upgrade your tablet’s hard drive, improving its storage capacity and overall performance. Remember to always back up your data before starting the replacement process to avoid any loss. By following these guidelines, you can confidently embark on the journey of replacing your tablet’s hard drive and enjoy a smoother and more efficient user experience.
FAQ
What are the reasons to replace a tablet hard drive?
There are two main reasons to replace a tablet hard drive. The first reason is if the current hard drive has experienced a hardware failure and needs to be replaced. The second reason is if you want to upgrade your primary hard drive for increased speed or capacity.
Why is it important to back up data before replacing a tablet hard drive?
It is important to back up any data that you want to keep before replacing a tablet hard drive. The hard drive itself is not as valuable as the data stored on it. You can back up your data by copying files to an external storage device or using a cloud backup service.
How do I uninstall the old hard drive from my tablet?
To uninstall the old hard drive from your tablet, you need to disconnect the data and power cables and physically remove the hard drive from its bay. The specific steps may vary depending on the type of tablet you have, but the general process is relatively straightforward.
How do I install the new hard drive in my tablet?
To install the new hard drive in your tablet, you need to secure it in the same location as the old one, reconnect the data and power cables, and ensure it is properly installed. The specific steps may vary depending on the type of tablet you have.
How do I format and restore data on the new hard drive?
Once the new hard drive is installed, it needs to be formatted so that it can store files. After formatting, you can restore the data that you previously backed up to the new hard drive. This ensures that your files are accessible and ready for use.
What potential issues can arise during the tablet hard drive replacement process?
Potential issues during the tablet hard drive replacement process can include compatibility issues with the new hard drive, software-related problems, or physical damage to the tablet. If you encounter any issues, it is recommended to seek professional help or consult the tablet manufacturer for assistance.
Lenovo tablet screen repairs are becoming more common. Devices often break, making this skill a money saver. By learning to repair your screen, you extend your gadget’s life. This guide will show you how to replace a tablet screen. It’s useful for both tech fans and beginners. You’ll find it an invaluable skill. This guide…
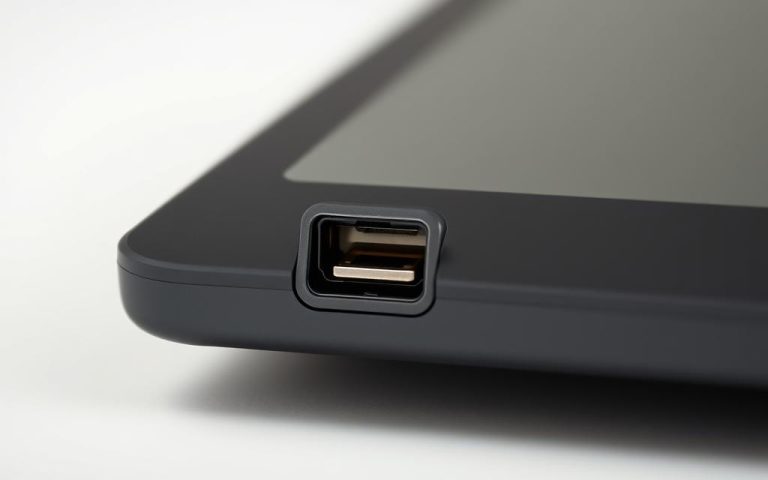
Amazon Fire tablets often face charging port problems. These can stem from a loose connection or damage to the port. About 25% of users struggle with charging issues. It’s key to know how to fix these problems. This way, you can tackle common charging issues effectively. Many Kindle Fire devices have a design flaw in…
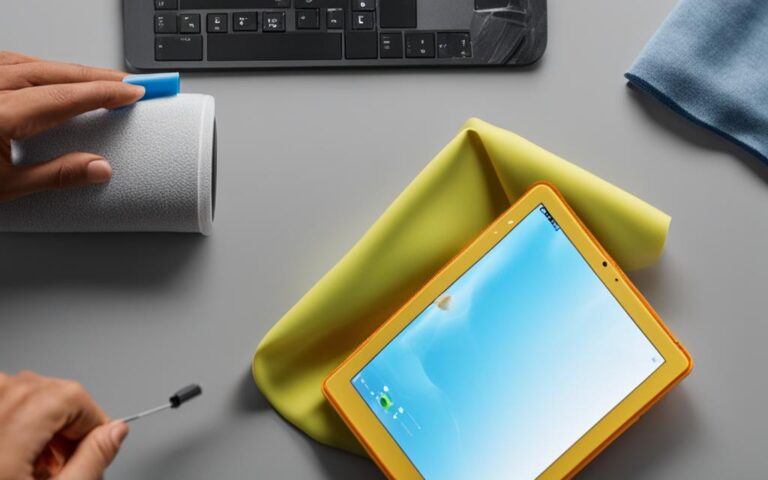
Welcome to our guide on cleaning your tablet for optimal performance. Tablets have become essential tools in our daily lives, allowing us to stay connected, work, and entertain ourselves. But over time, tablets can accumulate dust, dirt, and clutter that can hinder their performance. By regularly cleaning your tablet, you can ensure that it operates…
When you decide to sell or dispose of your old tablet, it’s important to securely erase all the personal data from the device to protect your privacy. Basic file deletion and factory reset are not enough to completely wipe the data. A recent study found that it’s still possible to recover photos, emails, text, and…
A non-responsive power button can turn your tablet into a frustrating brick. Whether it’s due to accidental drops, wear and tear, or software glitches, this issue disrupts daily use. Without quick action, you risk permanent lockouts or data loss. This guide covers practical solutions—from temporary workarounds to professional repairs. Learn how to wake your device…
Technology has its ups and downs. Onn tablets are popular but can face issues. Problems include power failures and slow response times. Troubleshooting is key. We’ll cover how to fix issues like the tablet not starting, connection problems, and screen errors. The aim is to help users fix problems on their own. By learning Onn…