Welcome to our comprehensive guide on upgrading the SSD in your tablet. If you’re looking to improve your tablet’s storage capacity and overall performance, this step-by-step guide is for you. We’ll walk you through the process and provide valuable tips to ensure a successful upgrade. However, please keep in mind that performing this upgrade is done at your own risk, and we cannot be held responsible for any potential damages. So, let’s dive into the world of tablet SSD upgrades and unleash the full potential of your device.
Before we begin, let’s understand the importance of precautions. It’s crucial to follow the instructions carefully and take necessary safety measures, such as shutting down your tablet, removing the power cord, working in an ESD safe environment, and making a backup of your disk before proceeding with the upgrade. A similar Apple troubleshooting case also appears in upgrading ssd imac how-to, where software checks and hardware symptoms often overlap.
In the next section, we will guide you on how to choose a suitable replacement SSD for your tablet. Stay tuned!
Before you begin the tablet SSD upgrade process, it’s crucial to find a compatible replacement SSD for your device. Take the time to research and choose a suitable mSATA SSD that matches your tablet’s interface.
One popular option is the MyDigitalSSD 128GB (mSATA SSD). This SSD is known for its reliable performance and reasonable price. Ensure that the SSD you choose is specifically mSATA and not mini PCI Express, as they are not compatible with tablet devices.
Purchase your replacement SSD from trusted resellers such as Amazon, My Digital Discount, or My Digital SSD to ensure product authenticity and quality.
Please note: The image above represents a suitable replacement SSD for your tablet.
Step 2: Get your tools
To perform the Tablet SSD Upgrade, you will need several necessary tools to ensure a smooth and successful process. Make sure to gather all the tools mentioned below before starting the upgrade:
Gather an old towel: Having an old towel is essential as it provides a soft and clean surface to work on while protecting your tablet from scratches or damage.
Pry tools: These tools are crucial for opening the tablet’s case without causing any harm. Use them carefully to avoid breaking any clips or components.
mSATA to USB adapter: This adapter allows you to clone the content from the original SSD to the new one. It is a vital tool for data migration during the upgrade process.
Disk imaging software: You’ll need disk imaging software like Paragon Disk Manager Suite to clone the contents of the original SSD to the new SSD. Make sure to have this software ready before starting the upgrade.
Philips #1 screwdriver: The tablet’s case is usually held together with screws, and a Philips #1 screwdriver is commonly used to remove them. Ensure you have the appropriate screwdriver to avoid any damage.
USB DVD drive: In case you require recovery or OS installation, having a USB DVD drive allows you to easily access the necessary media for your tablet.
Patience: Upgrading the SSD in your tablet requires time and patience. Ensure you have a good amount of patience to follow the step-by-step process without rushing it.
By acquiring these necessary tools in advance, you can fully prepare yourself for the Tablet SSD Upgrade and ensure a successful and hassle-free experience.
Step 3: Clone the original SSD to the new SSD
The next step in your tablet SSD upgrade is to clone the data from the original SSD to the new SSD. This process ensures that all your files, settings, and operating system are transferred seamlessly to the new drive.
To clone the drives, you will need to use disk imaging software like Paragon Disk Manager Suite. This software allows you to create an exact replica of your original SSD on the new SSD.
Here’s how to clone the SSD:
Connect the new SSD to the mSATA to USB adapter.
Plug the adapter into your tablet, ensuring a secure connection.
Boot your tablet from the Paragon Disk Manager Suite CD or USB drive.
Once the software is loaded, select the “Migration” option to start the cloning process.
Follow the on-screen instructions provided by the software to clone the internal SSD.
Once the cloning process is complete, close the windows and shut down your tablet.
Cloning the original SSD is a crucial step as it ensures that all the necessary files and configurations are transferred to the new SSD. This helps avoid any boot issues and ensures a smooth transition to the upgraded drive.
Remember to handle the SSD and other components with care throughout the cloning process to avoid any damage.
Things to remember:
Use reliable disk imaging software like Paragon Disk Manager Suite to clone the drives.
Connect the new SSD via the mSATA to USB adapter to your tablet.
Boot your tablet from the Paragon Disk Manager Suite CD or USB drive.
Follow the software’s instructions to complete the cloning process.
Shut down your tablet once the cloning is complete.
Benefits:
Considerations:
Transfer all files and settings to the new SSD.
Ensure a smooth transition to the upgraded drive.
Retain your operating system and software configurations.
Cloning process may take some time.
Ensure that the new SSD has enough storage capacity.
Handle the SSD and other components with care to avoid damage.
Step 4: Opening your tablet
Opening the case of your tablet can be a delicate process, so it’s important to proceed with caution to avoid any damage. Most tablet cases are designed to click together, with small hooks that hold the case firmly in place. To open your tablet, follow these steps:
Start by using pry tools to gently push between the front and backside of the tablet.
Slide the tool to the right while maintaining pressure between the two sides.
Repeat this process for all four sides of the tablet, carefully separating them.
Once all sides are separated, you can safely remove the back cover and gain access to the internal components of your tablet.
Take your time and be gentle when opening the case, making sure to avoid any excessive force that could cause damage. Remember, patience is key during this step of the tablet SSD upgrade process.
Step 5: Replacing the SSD
Now that you have access to the internals of the tablet, it’s time to replace the SSD. Follow these steps carefully to ensure a successful upgrade.
Locate the original SSD: Identify the current SSD in your tablet. It is typically a small rectangular component.
Remove the screw: Locate the screw holding the SSD in place and use a suitable screwdriver to remove it.
Take off the silver sticker: Gently peel off the silver sticker that covers the SSD. Be careful not to damage it as you will need to place it back later.
Replace the old SSD: Carefully remove the old SSD from its slot and replace it with the new SSD. Ensure that the connectors align properly.
Secure with the screw and replace the sticker: Insert and tighten the screw to secure the new SSD in place. Then, place the silver sticker back onto the new SSD, ensuring it is properly adhered.
Reassemble the tablet: Close the back cover of the tablet, making sure it fits snugly. Take extra care not to trap any cables or components during the reassembly process.
It is crucial to handle the SSD and other internal components with care to avoid any damage. Take your time and be gentle throughout the replacement process.
Once you have successfully replaced the SSD, your tablet is now equipped with improved storage capacity and performance.
Advantages of SSD Replacement
Increased storage capacity
Faster data transfer speeds
Improved overall system performance
Enhanced multitasking capabilities
Reduced power consumption
Conclusion
Upgrading the SSD in your tablet can be a game-changer when it comes to performance and storage capacity. By following the step-by-step guide and using the right tools, you can successfully perform the upgrade yourself. However, it’s important to proceed with caution and take necessary precautions throughout the process.
One crucial step is to choose a compatible replacement SSD that matches the interface of your tablet. Brands like MyDigitalSSD offer reliable and reasonably priced options such as the 128GB mSATA SSD, which can provide a significant boost in performance.
Another important aspect is cloning the data from the original SSD to the new one. This ensures that you don’t lose any important files or settings during the upgrade process. Software tools like Paragon Disk Manager Suite can streamline this task and make it easier for you.
If you are unsure about performing the upgrade yourself or feel uncomfortable with the technical aspects, it’s always a good idea to seek assistance from a professional technician. They have the expertise to handle the upgrade safely and efficiently.
Once you have successfully upgraded your tablet’s SSD, you can enjoy faster performance and increased storage space. Whether you use your tablet for work, entertainment, or both, this upgrade can give you a more seamless and enjoyable experience. So, go ahead and take your tablet to the next level!
FAQ
Is upgrading the SSD in my tablet risky?
Yes, performing the SSD upgrade is done at your own risk. It’s important to take necessary precautions and follow the instructions carefully to avoid any damages.
How do I find a compatible replacement SSD for my tablet?
Research and choose a suitable mSATA SSD that matches the interface of your tablet. Popular options include the MyDigitalSSD 128GB (mSATA SSD), which is well-performing and reasonably priced.
Where can I purchase the replacement SSD?
You can purchase the SSD from reliable resellers like Amazon, My Digital Discount, or My Digital SSD.
What tools do I need to perform the SSD upgrade?
You will need an old towel to work on, pry tools to open the tablet’s case, an mSATA to USB adapter for cloning, disk imaging software like Paragon Disk Manager Suite, a Philips #1 screwdriver, a USB DVD drive for recovery or OS installation, and patience.
How do I clone the data from the original SSD to the new one?
Use disk imaging software like Paragon Disk Manager Suite to clone the drives. Connect the new SSD to the mSATA to USB adapter and plug it into your tablet. Boot from the Paragon Disk Manager Suite CD and use the “Migration” option to clone the internal SSD.
How do I open the case of my tablet?
Use pry tools to gently push between the front and backside of the tablet. Slide the tool to the right while keeping pressure between the two sides. Repeat this process for all four sides of the tablet. Once all sides are separated, remove the back cover to access the internals of the tablet.
How do I replace the SSD in my tablet?
Locate the original SSD, remove the screw holding it in place, and carefully remove the silver sticker covering the SSD. Take out the old SSD and replace it with the new one. Put the silver sticker back in place, secure it with the screw, and reassemble the tablet by closing the back cover.
Will upgrading the SSD improve the performance of my tablet?
Yes, upgrading the SSD can significantly enhance the performance and storage capacity of your tablet.
Having trouble with pen pressure on your Wacom tablet can be annoying. This is true for both pro artists and hobbyists. Pen pressure problems can disrupt your art and design work. Here, we’ll look at common issues with Wacom tablets. We’ll also share tips to fix pen pressure problems quickly. We’ll explore various tips for…
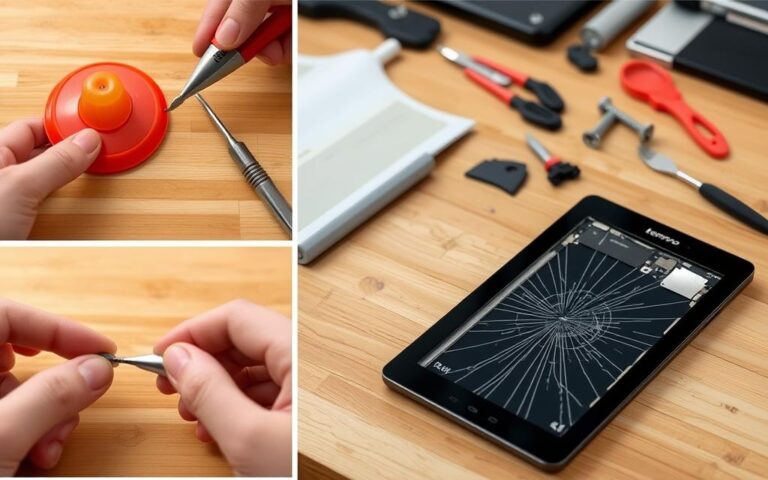
A broken tablet screen can be really frustrating. But, with the right help, you can fix it yourself. The right-to-repair movement has made it easier. Now, you can choose DIY fixes, third-party shops, or mail-in programs from the maker. Did you know 80% of tablets get dropped in the first two years? This can cause…
It’s really tough when your tablet won’t charge. This can happen with any tablet, like a Samsung Galaxy Tab or an Amazon Fire. Often, the problem is with the charger, broken cables, or a dirty charging port. If your tablet won’t show it’s charging or the battery level seems wrong, it’s time to find a…
A stuck pixel on your tablet screen can be frustrating, impacting your viewing experience. Fortunately, there are effective methods to fix this issue and restore your tablet’s display quality. In this article, we will explore the steps you can take to fix a stuck pixel on your tablet screen, ensuring optimal performance. If you are…
Lenovo tablet screen repairs are becoming more common. Devices often break, making this skill a money saver. By learning to repair your screen, you extend your gadget’s life. This guide will show you how to replace a tablet screen. It’s useful for both tech fans and beginners. You’ll find it an invaluable skill. This guide…
When you decide to sell or dispose of your old tablet, it’s important to securely erase all the personal data from the device to protect your privacy. Basic file deletion and factory reset are not enough to completely wipe the data. A recent study found that it’s still possible to recover photos, emails, text, and…