Troubleshooting Wi-Fi Connectivity Problems in Laptops
If you’re experiencing issues with your laptop’s Wi-Fi connection, you’re not alone. Wi-Fi connectivity problems can be frustrating and can hinder your productivity and online experience. Fortunately, there are a few troubleshooting steps you can take to resolve these issues and get your Wi-Fi working smoothly again.
In this comprehensive troubleshooting guide, we will cover the most common Wi-Fi connectivity problems that laptop users encounter and provide practical solutions. Whether you’re unable to connect to your Wi-Fi network, experiencing slow internet speeds, or facing frequent disconnections, we’ve got you covered.
Before we dive into the troubleshooting steps, it’s important to note that Wi-Fi connectivity problems can be caused by various factors, including software settings, network configurations, and physical obstructions. By following the steps outlined in this guide, you can effectively diagnose and resolve these issues, enhancing the connectivity and performance of your laptop’s Wi-Fi.
Throughout this guide, we will cover important areas such as checking Wi-Fi settings and network connections, verifying Wi-Fi passwords and network compatibility, troubleshooting software and drivers, minimizing wireless interference and signal strength, and much more. By addressing these areas systematically, you’ll be able to identify the root cause of your Wi-Fi connectivity problems and implement the appropriate solutions.
So, if you’re ready to tackle your laptop’s Wi-Fi connectivity issues, let’s get started with the first section: Checking Wi-Fi Settings and Network Connections.
Checking Wi-Fi Settings and Network Connections
Before diving into more complex troubleshooting steps, it’s important to check the basic settings and network connections on your laptop. By ensuring that your Wi-Fi settings are correctly configured and your network connections are stable, you can resolve common Wi-Fi connectivity problems and improve your laptop’s performance.
Here are some key steps to follow when checking Wi-Fi settings and network connections:
- Turn on Wi-Fi: Make sure that Wi-Fi is enabled on your laptop. Look for the Wi-Fi icon in the taskbar or system tray and ensure it is turned on.
- Check network availability: Ensure that your laptop is within range of your Wi-Fi network. If you are experiencing a weak signal, try moving closer to the router or positioning your laptop in a different location.
- Physical switches or buttons: Some laptops have physical switches or buttons that control Wi-Fi connectivity. Check if your laptop has any switches or buttons dedicated to Wi-Fi and ensure that they are in the “on” position.
- Restart modem and wireless router: Restarting your modem and wireless router can help establish a fresh connection with your internet service provider. Simply unplug both devices from their power source, wait for a few seconds, and plug them back in.
Ensuring that these Wi-Fi settings and network connections are properly configured can often resolve basic connectivity issues on your laptop. However, if you continue to experience Wi-Fi problems, it may be necessary to proceed to more advanced troubleshooting steps.
Verifying Wi-Fi Password and Network Compatibility
When facing connectivity problems with your laptop’s Wi-Fi, it’s essential to ensure that the Wi-Fi password you’re entering is correct and that your laptop is compatible with the network you’re trying to connect to.
Incorrect Wi-Fi passwords can often lead to connectivity issues, so double-check that you’re entering the right password for your Wi-Fi network. It’s easy to make a small typo or forget to update the password after it has been changed, causing authentication problems and preventing your laptop from establishing a connection.
Additionally, it’s crucial to verify the network compatibility of your laptop. Different networks operate on different frequency bands, such as 2.4 GHz or 5 GHz. Some laptops may not be compatible with certain frequency bands, leading to connectivity problems or limited performance. Consult your laptop’s manual or specifications to determine its network compatibility.
If you’re using a dual-band router, try connecting to the alternative frequency band to see if it improves the connection. This allows you to troubleshoot any potential issues with a specific frequency band, ensuring you can connect and enjoy uninterrupted Wi-Fi connectivity.
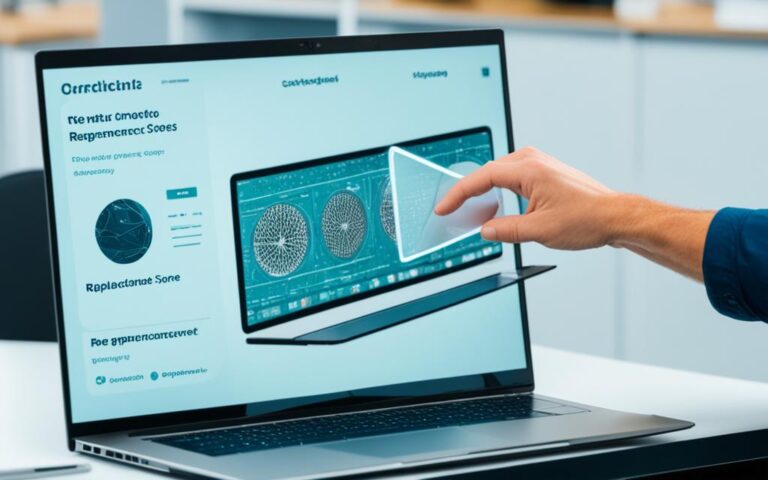
Note: The image below illustrates the process of verifying the Wi-Fi password and network compatibility on your laptop.
By verifying your Wi-Fi password and network compatibility, you can eliminate common factors that may hinder your laptop connectivity. This simple step can help ensure a seamless and efficient Wi-Fi experience, allowing you to stay connected without interruption.
Troubleshooting Software and Drivers
Software-related issues and outdated drivers can also contribute to Wi-Fi connectivity problems on laptops. It is essential to check and configure your laptop’s software settings, including Wi-Fi toggles and airplane mode, to ensure they are properly set up. This step helps to eliminate any software-related conflicts that may be affecting your Wi-Fi connection.
If you are experiencing persistent Wi-Fi issues, it is recommended to run the network troubleshooter built into your operating system. This tool can automatically diagnose and resolve common Wi-Fi problems, providing a convenient solution to connectivity issues.
Note: Make sure you have the latest software updates installed on your laptop to optimize its performance and address any known software-related bugs that may impact Wi-Fi connectivity. Keeping your software up to date is crucial in preventing and resolving these issues.
If troubleshooting your laptop’s software settings and running the network troubleshooter do not resolve the Wi-Fi problems, the next step is to check your network adapter driver. The network adapter driver facilitates the communication between your laptop and the Wi-Fi network. Outdated or incompatible drivers can disrupt the connection and cause issues with Wi-Fi connectivity.
To address driver-related problems, follow these steps:
- Identify the network adapter driver by accessing the Device Manager on your laptop. The Device Manager can be found in the Control Panel or by right-clicking on the Windows Start button and selecting Device Manager.
- Locate the network adapter category and expand it to view the installed drivers.
- Right-click on the network adapter driver and select “Uninstall” to remove it from your system.
- Restart your laptop to complete the driver removal process.
- After the restart, your operating system will automatically reinstall the default network adapter driver.
- If the default driver does not resolve the issue, visit the manufacturer’s website to download and install the latest driver for your specific laptop model.
By uninstalling and reinstalling the network adapter driver, you can address any compatibility issues and ensure that you have the most up-to-date driver version, optimizing the Wi-Fi connectivity on your laptop.
| Software Troubleshooting Checklist | Driver Troubleshooting Checklist |
|---|---|
| Check Wi-Fi toggles and airplane mode settings | Identify the network adapter driver in the Device Manager |
| Run the network troubleshooter | Locate the network adapter category in Device Manager |
| Install software updates | Uninstall the network adapter driver |
| Restart your laptop to complete the driver removal process | |
| Download and install the latest driver version (if necessary) | |
Note: If you are uncomfortable or unsure about uninstalling and reinstalling drivers, consider seeking assistance from a professional technician or contacting the laptop manufacturer’s support team for further guidance.
Helpful Tips
Here are some additional tips to optimize your laptop’s software and drivers for improved Wi-Fi connectivity:
- Regularly check for software updates and install them to ensure your laptop has the latest bug fixes and security patches.
- Use reputable driver update tools to automate the process of finding and installing the latest compatible drivers for your laptop.
- Disable unnecessary background applications and services that may consume network resources, potentially affecting Wi-Fi performance.
- Disable power-saving features that can limit the Wi-Fi functionality on your laptop, particularly when running on battery power.
By following these troubleshooting steps and implementing the tips provided, you can effectively address software-related issues and outdated drivers that may be causing Wi-Fi connectivity problems on your laptop.
Minimizing Wireless Interference and Signal Strength
Wireless interference and weak signal strength can significantly affect the quality of your Wi-Fi connection. To ensure a stable and reliable connection, it’s important to minimize interference and improve signal strength. Here are some strategies to enhance your Wi-Fi connection:
Avoiding Interference
One of the main causes of wireless interference is the proximity of devices that operate on similar frequency bands. Avoid placing your laptop near appliances such as microwaves, cordless phones, or baby monitors, as they can interfere with your Wi-Fi signal. These devices use the same frequency bands as Wi-Fi, leading to potential signal disruption. It’s best to keep a considerable distance between your laptop and these devices to minimize interference.
Optimizing Signal Strength
Improving the signal strength of your Wi-Fi connection can help overcome weak or unstable connections. There are a few ways you can optimize signal strength:
- Position your laptop closer to the router: The further you are from the router, the weaker the Wi-Fi signal becomes. Moving your laptop closer to the router can improve the signal strength and overall connection stability.
- Use a wireless mesh network: If your home or workspace has multiple rooms or floors, a wireless mesh network can help extend your Wi-Fi coverage. Mesh systems consist of multiple interconnected routers or access points that create a seamless network throughout the entire space. This can enhance signal strength and eliminate dead zones.
By implementing these strategies, you can minimize wireless interference and improve the signal strength of your Wi-Fi connection, ensuring a smoother browsing and streaming experience.
| Signal Strength | Quality | Recommended Usage |
|---|---|---|
| Excellent | Strong and stable | HD video streaming, online gaming |
| Good | Reliable | General web browsing, video conferencing |
| Fair | Occasional disruptions | Downloading files, basic web browsing |
| Poor | Unstable | Emails, light web browsing |
| Weak | Very weak and prone to disconnection | Minimal web browsing, messaging apps |
Conclusion
Troubleshooting Wi-Fi connectivity problems on laptops can be a complex process, but by following the steps outlined in this guide, you can overcome common issues that may arise. First, check your laptop’s Wi-Fi settings and network connections. Ensure that Wi-Fi is turned on and that you are within range of your Wi-Fi network. Restarting your modem and wireless router can also help establish a fresh connection with your internet service provider.
Next, verify your Wi-Fi password and network compatibility. Incorrect passwords and network compatibility issues can hinder connectivity. Double-check that you are entering the correct password and consider connecting to an alternative frequency band if you have a dual-band router.
Troubleshooting software and drivers is another critical step. Check your laptop’s software settings, such as Wi-Fi toggles and airplane mode, and run the network troubleshooter built into your operating system. If needed, uninstall and reinstall your network adapter driver.
Lastly, minimize wireless interference and optimize signal strength. Avoid placing your laptop near devices that operate on similar frequency bands and consider relocating your laptop closer to the router or using a wireless mesh network. These steps can help improve the quality of your Wi-Fi connection.
If, despite your efforts, you continue to experience persistent connectivity problems, it may be necessary to seek professional assistance or contact your internet service provider for further support. Remember, a reliable Wi-Fi connection is essential for maximizing productivity and enjoying a seamless online experience.
