iPad Pro Screen Replacement Techniques
When it comes to your iPad Pro, a cracked or damaged screen can be a frustrating and costly issue. However, with the right techniques and knowledge, you can replace the screen yourself, saving both time and money. In this article, we will explore the proper procedures and steps to follow for a successful iPad Pro screen replacement.
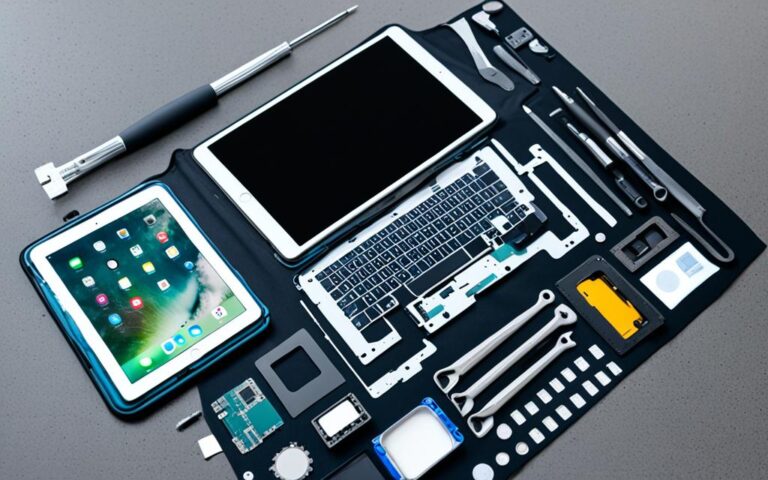
Before beginning the screen replacement process, it’s essential to gather the necessary tools and materials. Some of the items you’ll need include a screwdriver set, a small pry tool, a suction cup, a heat gun or hair dryer, a soft cloth, a replacement screen, and adhesive tape. By having these items on hand, you’ll be well-prepared for a smooth and efficient repair.
Now, let’s dive into the step-by-step instructions on how to remove the broken screen and install the replacement screen. It is crucial to follow these techniques carefully to avoid causing further damage to your device.
Preparing for the Repair
Before embarking on the screen replacement process for your iPad Pro, it is crucial to adequately prepare. Gathering the necessary tools and materials in advance will ensure a smooth and successful repair. Here are the essential items you will need:
Tools and Materials:
- A screwdriver set
- A small pry tool
- A suction cup
- A heat gun or hair dryer
- A soft cloth
- A replacement screen
- Adhesive tape
Once you have assembled the required tools, it is important to take a few precautionary steps before proceeding with the repair. These steps will help protect your iPad and facilitate the replacement process:
- Back up your iPad: Before you begin, ensure that all your important data is backed up. This will safeguard your files and settings in case of any unforeseen issues during the repair.
- Power off completely: Make sure your iPad is completely powered off before starting the repair process. This will prevent any accidental damage while handling the device.
- Tape over broken glass: If your iPad’s screen is cracked, it is advisable to tape over the broken glass. This will prevent any injuries from sharp edges during the repair.
- Charge your iPad: Ensure that your iPad is adequately charged before starting the repair. This will allow you to continue using the device even if the repair process takes some time.
- Gather important information: Take note of your iPad’s model and serial number. This information will be useful if you need to order a specific replacement screen or seek assistance from a repair professional.
- Consider repair options: Depending on your level of expertise and confidence, you can choose between repairing the screen yourself or seeking help from a reputable repair shop. Research different options and weigh the pros and cons of each before making a decision.
Tools and Materials for iPad Pro Screen Replacement
| Tool/Material | Description |
|---|---|
| Screwdriver Set | A set of screwdrivers with various sizes to facilitate the removal of screws. |
| Small Pry Tool | A specialized tool used for prying open the iPad’s casing without causing damage. |
| Suction Cup | A device that creates a vacuum seal to lift and remove the broken screen. |
| Heat Gun or Hair Dryer | Used to soften the adhesive between the screen and the device for easy removal. |
| Soft Cloth | To clean the surface and ensure a clear view during the repair process. |
| Replacement Screen | A new screen that matches the specifications of your iPad Pro model for replacement. |
| Adhesive Tape | Used to secure the replacement screen in place. |
By adequately preparing for the iPad Pro screen replacement, you can ensure a smoother repair process and increase the chances of a successful outcome. Let’s move on to the next section, where we will discuss the step-by-step process of removing the broken screen.
Related:


Removing the Broken Screen
When it comes to replacing the screen of your iPad Pro, the first step is removing the broken screen. This process requires careful handling and following specific instructions to avoid causing further damage to delicate components. Here’s a step-by-step guide to safely remove the screen.
Tools and Preparation:
Before getting started, gather the following tools and materials:
- A heat gun or hair dryer to soften the adhesive
- An opening pick or halberd spudger to separate the screen from the frame
- Safety glasses to protect your eyes
- The specific instructions provided by reliable sources
Now, let’s dive into the process:
Step 1: Soften the Adhesive
Using a heat gun or hair dryer set to a low temperature, carefully apply heat to the edges of the screen. Be cautious not to overheat the screen and damage it or the internal battery. The heat will soften the adhesive, making it easier to separate the screen from the frame.
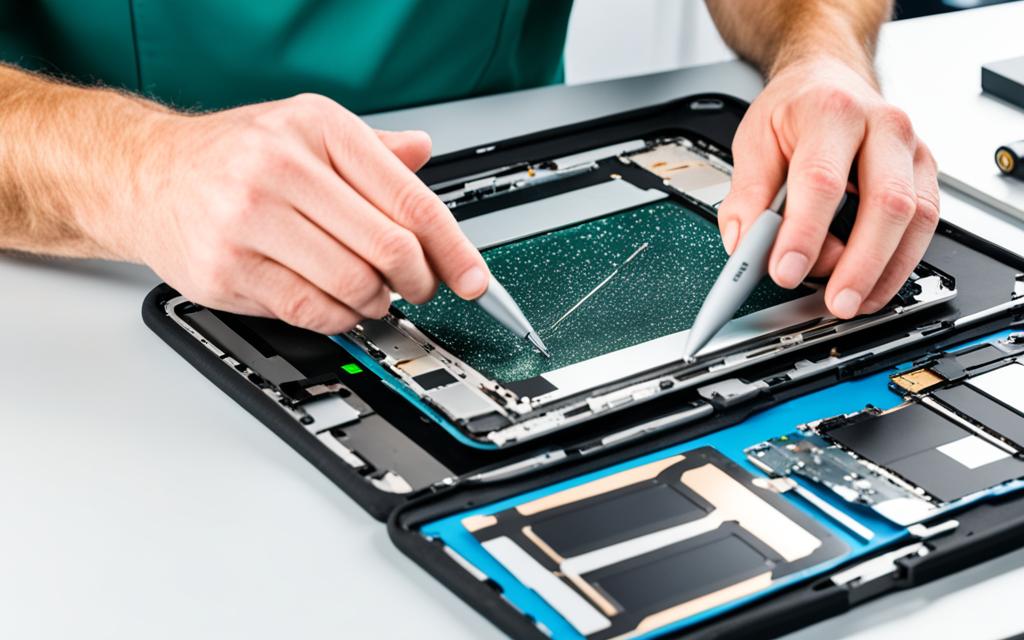
Step 2: Separate the Screen
To separate the screen from the frame, use an opening pick or a halberd spudger. Follow the specific instructions provided by reliable sources to prevent damage to delicate components such as the camera module, ambient light sensors, and display cables. Take extra caution around the edges and corners, as these areas are prone to cracking or breaking.
Step 3: Further Soften the Adhesive
For additional adhesive softening, carefully apply a heated iOpener to the back of the iPad Pro. This will help loosen the adhesive and make it easier to separate the screen.
Step 4: Create an Opening Gap
Using an Anti-Clamp or an alternate method, create a small gap between the screen and the frame. This gap will allow you to insert opening picks and gradually separate the screen from the frame. Be mindful of the delicate components and proceed with caution to avoid causing any damage.
Step 5: Gradually Separate the Screen
Insert opening picks into the opening gap and gently slide them along the edges of the screen. Take your time and exercise caution, as the adhesive may still be partially attached. Gradually work your way around the screen, carefully separating it from the frame. Pay close attention to the corners and edges, as they tend to have the most adhesive.
| Tip | Caution |
|---|---|
| Follow specific instructions to avoid damaging delicate components | Avoid applying excessive force, as it may cause further damage |
| Use safety glasses to protect your eyes | Avoid excessive heating, as it may damage the screen or battery |
| Take extra caution around the corners and edges | Do not rush the process; carefulness is key |
Once the screen is successfully removed, you can proceed to the next step of the screen replacement process.
Installing the Replacement Screen
Once the old screen is removed, carefully remove any protective film from the replacement screen and align it with the frame of the iPad Pro. Apply new adhesive tape around the edges of the screen for a secure fit.
Press the screen firmly into place, ensuring that it sits flush with the frame. To ensure proper adhesion, use a heat gun or hair dryer to gently heat the adhesive. This helps the adhesive bond securely with the screen and prevents any detachment issues in the future.
Remember, proper alignment and securing of the replacement screen are crucial for ensuring a successful iPad Pro screen replacement.
After installing the replacement screen, it’s essential to test its functionality before reassembling the device. Make sure the screen responds accurately to touch and displays content without any glitches. This ensures that the new screen is fully functional and ready for use.
Testing and Reassembling the iPad
After installing the replacement screen, it is important to test its functionality before fully reassembling the iPad. Ensure the iPad Pro’s touch response, display quality, and button functionality are all working properly. Testing is crucial to ensure a successful screen replacement and a fully functional device.
To test the touch response, open a few different apps and navigate through them using different gestures. Pay attention to any delay or unresponsiveness in touch input. If everything is working smoothly, it indicates a successful screen replacement.
Next, check the display quality by viewing various types of content, such as images, videos, and websites. Look for any abnormalities such as pixelation, color distortion, or uneven brightness. A properly installed replacement screen should display content accurately and evenly.
Lastly, test the button functionality. Press all physical buttons, including the home button and volume buttons, to ensure they respond correctly. The power button should also function properly, allowing you to turn the device on and off as needed. If any of the buttons are unresponsive or don’t work as intended, further troubleshooting may be required.
Once both the touch response, display quality, and button functionality have been verified, you can proceed to reassembling the iPad. Start by carefully screwing the back panel of the device back on. Use the appropriate screwdriver to ensure a secure fit. Take note of the proper screw placement to avoid any damage or misalignment.
After reassembling the iPad, it is important to take necessary precautions for the new screen’s maintenance. Regular cleaning using a microfiber cloth will help keep the screen free of smudges and fingerprints. Avoid using harsh chemicals or abrasive materials that could scratch or damage the screen.
Avoid exposing the device to extreme temperatures, as it can affect the performance and longevity of the screen. It is recommended to keep the iPad Pro within the manufacturer’s specified temperature range for optimal functionality.
For further resources and tips on iPad screen repair, there are many online guides and forums dedicated to assisting users with DIY repairs and offering valuable insights into the process. These resources can provide additional guidance and troubleshooting steps if needed.
Conclusion
Replacing the screen of your iPad Pro can be a complex process, but by following proper techniques and taking necessary precautions, you can successfully repair your device. Whether you choose to do the repair yourself or seek professional help, it is important to gather the right tools, properly prepare for the repair, and test the new screen before reassembling the iPad.
With the right knowledge and techniques, you can restore your iPad Pro’s screen to its original functionality and enjoy a seamless repair. Remember to power down your device and cover the cracked screen with clear packing tape to prevent further damage.
Use caution when prying and lifting the screen, and wear safety glasses to protect your eyes. Follow the step-by-step instructions provided in the sources below to safely remove the screen and replace it with a new one. By following these guidelines, you can confidently replace the screen of your iPad Pro and enjoy a fully restored device.