DIY Screen Repair Techniques for Samsung Galaxy Note 20 Ultra
Welcome to our comprehensive guide on DIY screen repair techniques for the Samsung Galaxy Note 20 Ultra. If you’ve accidentally damaged your phone’s screen, don’t worry. With the right instructions and tools, you can successfully replace the screen on your own and save time and money.
In this article, we will provide you with step-by-step instructions for disassembling the device, removing the broken screen, and replacing it with a new one. It’s important to follow each technique carefully to avoid causing any further damage to your Samsung Galaxy Note 20 Ultra.
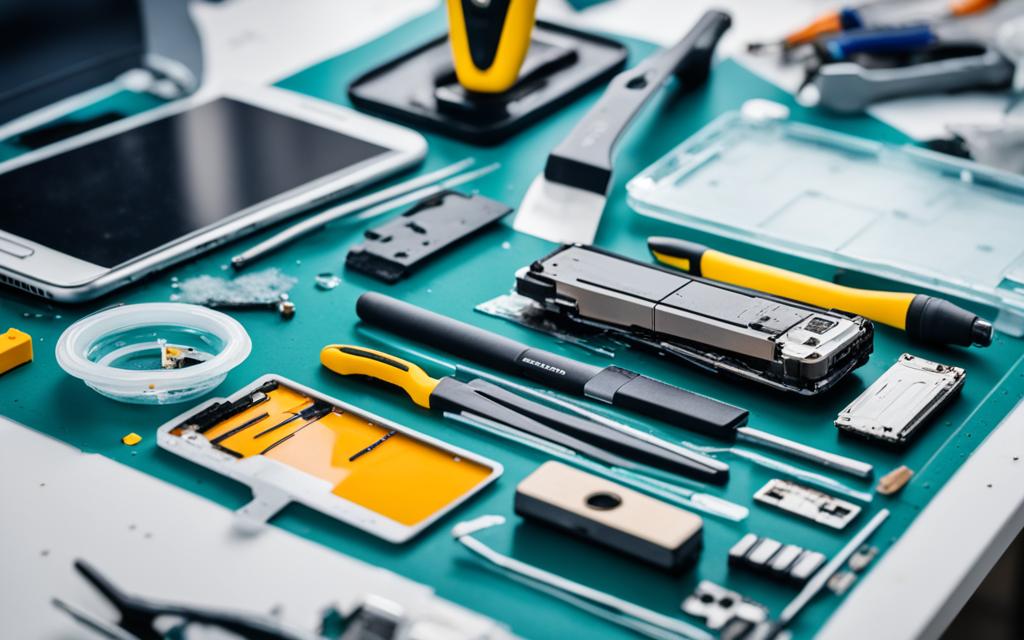
To get started, let’s gather all the necessary tools for the repair process. You will need a heating bag, suction cup, opening picks, ESD-safe tweezers, screwdriver, and isopropyl alcohol. These tools will help you safely remove the back glass and disassemble the device without any issues.
Before you begin the repair, make sure to power off your phone completely and remove the SIM card tray. Additionally, keep in mind that the fingerprint sensor is embedded in the screen, so it should be handled with care to avoid any damage.
Stay tuned for the upcoming sections where we will dive into the detailed steps for disassembling the device, replacing the screen, and concluding the DIY screen repair process for the Samsung Galaxy Note 20 Ultra.
Preparing for the Repair
Before you embark on the DIY screen repair process for your Samsung Galaxy Note 20 Ultra, it’s crucial to adequately prepare yourself and gather the necessary tools. Taking these steps ensures a smooth and successful repair experience.
First and foremost, gather the following tools:
- Heating bag: This will be used to heat the back glass and prepare it for removal.
- Suction cup: Necessary for creating a secure grip on the back glass.
- Opening picks: These tools help create a gap between the back glass and screen module.
- ESD-safe tweezers: Essential for safely handling sensitive internal components.
- Screwdriver: Required for removing screws and other fasteners during the repair.
- Isopropyl alcohol: Helps weaken the adhesive holding the screen in place.
In addition to the tools, there are a few preparatory steps you need to take:
- Power off your phone: It is essential to completely power off your Samsung Galaxy Note 20 Ultra before beginning the repair process. This ensures safety during disassembly.
- Remove the SIM card tray: Locate the SIM card tray on the side of the device and use a SIM ejector tool or a paperclip to remove it. This step allows for the safe removal of the back glass later on.
- Take caution with the fingerprint sensor: The fingerprint sensor is embedded in the screen and should not be damaged during the repair. Handle the device carefully to avoid any accidental damage.
Remember, successfully removing the back glass without breakage is crucial for a seamless repair process. Applying heat using the heating bag can significantly enhance your chances of achieving this.
| Tools | Preparatory Steps |
|---|---|
|
|
Disassembling the Device
To successfully repair the screen of your Samsung Galaxy Note 20 Ultra, disassembling the device is a crucial step. Follow these instructions carefully to avoid damaging any internal components.
Step 1: Heating the Back Glass
The disassembly process begins by carefully heating the back glass using a heating bag. This softens the adhesive, making it easier to remove the glass without causing cracks or breaks. Properly heat the back glass to avoid any damage to the device.
Step 2: Creating a Gap
Once the back glass is heated, attach a suction cup to the heated edge. Gently pull the suction cup to create a small gap between the back glass and the screen module. Use opening picks to widen the gap, working your way around all four edges of the device.
Note: Take caution not to apply excessive force during this step to prevent any damage to the internal components.
Step 3: Removing the Back Glass
Continue using the opening picks to gradually lift and remove the back glass. Be careful not to force the glass if it’s not moving smoothly, as this may indicate that the adhesive hasn’t been sufficiently loosened. Take your time to ensure a clean removal without any unnecessary strain on the device.
Step 4: Accessing Internal Components
With the back glass successfully removed, you can now access and disconnect various internal components of your Samsung Galaxy Note 20 Ultra. These components include the internal metal plate, back glass adhesive tape, wireless charging module, charging port, top piece, main board, and front camera.
Table: Components to Disconnect
| Components | Action |
|---|---|
| Internal metal plate | Disconnect |
| Back glass adhesive tape | Disconnect |
| Wireless charging module | Disconnect |
| Charging port | Disconnect |
| Top piece | Disconnect |
| Main board | Disconnect |
| Front camera | Disconnect |
With the disassembly process complete, you can proceed to the next section to learn how to replace the screen of your Samsung Galaxy Note 20 Ultra.
Replacing the Screen
After successfully disassembling the device, it’s time to move on to replacing the screen of your Samsung Galaxy Note 20 Ultra. This crucial step requires careful handling and attention to detail to ensure a successful DIY screen repair.
Firstly, you’ll need to weaken the adhesive around the perimeter of the screen. Use isopropyl alcohol to gently loosen the adhesive, making it easier to remove. Take caution not to apply excessive force or damage the fragile components.
Next, utilize opening picks to carefully cut through the adhesive and create separation between the screen and the device. Slowly and steadily work your way around the edges, ensuring that the adhesive is completely loosened.
Once the adhesive is sufficiently weakened, you can begin lifting the screen away from the device. However, be cautious not to lift it too high as the display and touch layer cables are still connected.
With the old screen removed, it’s time to prepare the new one for installation.
Preparing the New Screen
- Inspect the new screen for any defects or damages before installation.
- Clean the surface of the new screen with a microfiber cloth to remove any smudges or dirt.
- Ensure all the necessary components, such as the display and touch layer cables, are properly aligned and intact.
Once the new screen is ready, carefully thread it through the frame, ensuring that it fits securely. Take your time to align the screen properly before moving on to the next step.
Now that the new screen is in place, it’s time to reverse the repair process and reassemble the device. Follow the disassembly steps in reverse order, making sure to reconnect all the internal components securely.
Once the device is reassembled, carefully test the functionality of the new screen. Check for any display abnormalities, touch sensitivity issues, or other potential problems.
Troubleshooting Tips:
If you encounter any issues with the new screen, double-check the connections of the display and touch layer cables. Disconnect and reconnect them if necessary.
Ensure that all components are properly seated and aligned during reassembly.
If the screen remains unresponsive or exhibits persistent issues, consider seeking professional assistance.
| Benefits of DIY Screen Repair | Professional Screen Repair |
|---|---|
| Cost-effective | More expensive |
| Satisfaction of fixing your own device | Convenience of leaving the repair to experts |
| Faster turnaround time | Possible waiting period for repair |
| Opportunity to learn new skills | No risk of damaging the device during repair |
By following these guidelines and taking the necessary precautions, you can successfully replace the screen of your Samsung Galaxy Note 20 Ultra and enjoy a fully functional device once again.
Conclusion
Repairing the screen of your Samsung Galaxy Note 20 Ultra on your own can be a cost-effective and rewarding experience. By following the step-by-step guide provided in this article, you can successfully replace the screen and save time and money.
It is important to gather the necessary tools, follow each step carefully, and be cautious not to damage any internal components. DIY screen repair allows you to take control of your device’s maintenance and avoid the inconvenience of sending it for professional repair.
However, if you are unsure or uncomfortable with the repair process, it is recommended to seek professional assistance. A skilled technician can ensure the screen replacement is done accurately and efficiently, minimizing the risk of further damage to your Samsung Galaxy Note 20 Ultra.
In conclusion, whether you choose to embark on a DIY screen repair or opt for professional help, the goal remains the same – to have a perfectly functioning device. Assess your own abilities, weigh the pros and cons, and make an informed decision that suits your needs and preferences.
