Replacing Faulty Capacitors on Desktop Motherboards
Capacitor replacement is a common issue faced by UK users of desktop computers. Faulty capacitors can cause various problems, such as system instability, random shutdowns, and even complete motherboard failure. However, with the right tools and knowledge, it is possible to replace these faulty capacitors and restore the functionality of the desktop motherboard.
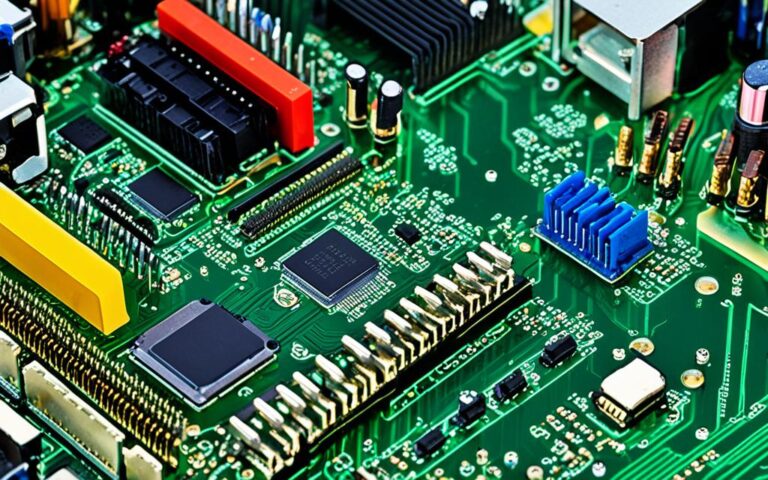
When it comes to replacing faulty capacitors, the first step is to identify the capacitors that need to be replaced. Most faulty capacitors show visible damage or leakage, making it easier to spot the problematic components. Once identified, the next step is to find suitable replacement capacitors.
When sourcing replacement capacitors, it is important to ensure they have the same voltage rating as the faulty capacitors. Additionally, they should have the same or larger capacity and be of the appropriate size to fit the motherboard. Opting for low ESR (low internal resistance) capacitors is recommended for desktop motherboards as they offer improved performance and longevity.
Prior to starting the replacement process, it is crucial to remove the battery from the motherboard to avoid any electrical mishaps. Once the necessary precautions have been taken, the faulty capacitors can be removed using a sharp soldering tool and gentle pulling. Care should be taken to avoid damaging the motherboard or adjacent components.
After removing the faulty capacitors, clean the holes by heating the leftover solder and using a solder sucker or desoldering wick to remove any excess solder. Then, insert the legs of the new capacitors into the corresponding holes, ensuring the correct polarity. Trim off the excess wiring from each leg and apply a small drop of solder to secure the legs at each junction point.
Related:


Once the replacement process is complete, it is essential to test the motherboard to ensure it is functioning properly. Reinstall the components and power up the computer, checking for any signs of the replaced capacitors heating up excessively. If the computer runs smoothly without any issues, the capacitor replacement process has been successful.
By following these steps, UK users can effectively replace faulty capacitors on their desktop motherboards, saving both time and money. Remember to exercise caution during the replacement process and ensure compatibility between the replacement capacitors and the motherboard. With the right knowledge and tools, desktop motherboard repair can be a straightforward task.
Tools and Preparation for Capacitor Replacement
When it comes to capacitor replacement on desktop motherboards, having the right tools and preparation is essential. By following a proper procedure and using the correct tools, you can ensure a successful replacement process. Here are the necessary tools and preparation steps:
Gather the Tools
Before you start the capacitor replacement process, make sure you have the following tools:
| Tools |
|---|
| New low ESR capacitor |
| Sharp soldering tool (30 W recommended) |
| Soldering supplies |
| Pin |
Having these tools at hand will make the replacement process smoother and more efficient.
Preparation Steps
Prior to starting the capacitor replacement, it is crucial to take some preparatory measures. Follow these steps:
- Remove the battery: To ensure safety during the replacement process, begin by removing the battery from the motherboard.
- Familiarize yourself: Get acquainted with the appearance of faulty capacitors. Look for visible damage or leakage as indicators of a faulty capacitor.
- Find the right replacement: When selecting a replacement capacitor, confirm that it has the same voltage rating, the same or higher capacity, and is the appropriate size for your motherboard.
- Consider low ESR capacitors: Low ESR (Internal Equivalent Series Resistance) capacitors are highly recommended for computer motherboards due to their improved performance and reliability.
Remember, preparation is key to a successful capacitor replacement process. By ensuring you have the necessary tools and understanding what to look for in faulty capacitors, you can approach the replacement with confidence and increase the chances of a positive outcome.
Removing and Replacing Faulty Capacitors
When it comes to motherboard repair, one common issue that often arises is faulty capacitors. These small components can cause significant problems, such as system instability and power failures. However, the good news is that removing and replacing capacitors is a relatively straightforward process that can be done with the right tools and techniques.
To begin, you’ll need a soldering tool with a sharp tip, along with a new capacitor that matches the specifications of the faulty one. Start by heating one of the solder points connected to the capacitor with the soldering tool. Once the solder has melted, gently pull the capacitor away from the leg on the top side of the motherboard. Repeat this process for the other solder point, ensuring that the capacitor is completely detached.
If you encounter difficulty in melting the solder, try adding a small amount of fresh solder and heat the joint once again. This additional solder can help the old solder melt more easily, allowing for a smoother removal process.
After successfully removing the faulty capacitor, it’s important to clean the holes on the motherboard where the legs of the old capacitor were located. To do this, heat the leftover solder with your soldering tool and use a solder sucker or a desoldering wick to extract any excess solder from the holes. This ensures a clean and clear space for the new capacitor.
Now, it’s time to install the replacement capacitor. Insert the legs of the new capacitor into the corresponding holes on the motherboard, making sure to align the polarity correctly. Once the capacitor is in place, clip off any excess wiring from each leg. To secure the legs firmly, apply a small drop of solder at each junction point. This will ensure a strong and reliable connection.
By following these steps, you can effectively remove and replace faulty capacitors on your desktop motherboard, restoring its functionality and resolving common issues associated with power and stability. Just remember to exercise caution throughout the process and take the necessary safety precautions to protect yourself and your equipment.
Testing and Final Steps
After replacing the faulty capacitors and securing them with solder, it’s time to move on to the final steps of motherboard repair. Reinstall all the components on the motherboard, ensuring that everything is properly connected and in its correct position. Take extra care when handling delicate components to prevent any accidental damage.
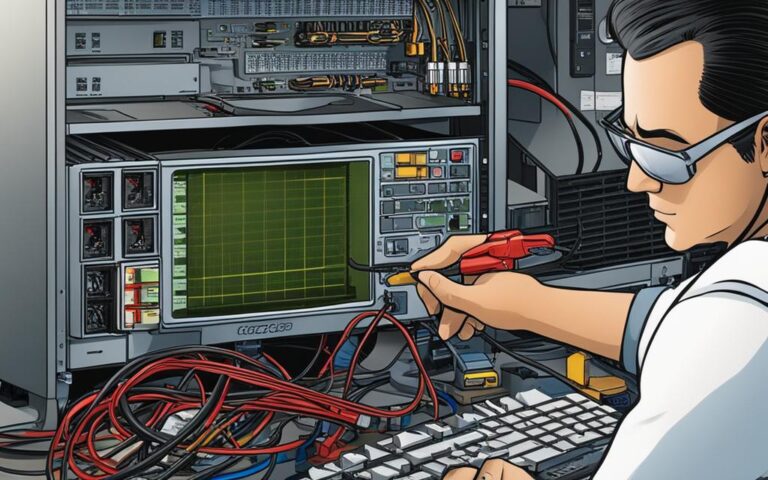
Before fully assembling the computer, it is crucial to test the motherboard to ensure it is functioning correctly. Testing will help identify any potential issues or further repairs that may be required. Here’s what you need to do:
- Connect the power supply to the motherboard and ensure all other necessary connections, such as the CPU, RAM, and storage devices, are properly installed.
- Power on the computer and observe the motherboard closely. Check for any signs of the replaced capacitors heating up excessively, such as bulging or leaking.
- Monitor the computer’s performance during operation. Run some stress tests or resource-intensive tasks to put a load on the system.
If the computer runs smoothly without any issues, it indicates that the capacitor replacement process has been successful. Congratulations! You have successfully repaired your motherboard. However, if you notice any abnormalities or encounter problems, it may be necessary to revisit the repair process or seek professional assistance.
Once you have completed the testing phase, it’s time to clean any solder residue from the motherboard. Use a soldering iron and solder wick or solder sucker to remove any excess solder, ensuring that the motherboard’s delicate circuitry is not damaged during the process. Take extra care when cleaning near the replaced capacitors to avoid dislodging or damaging them.
Remember to handle the motherboard with caution, keeping it free from dust and other contaminants. Any remaining solder residue or dust can potentially cause electrical issues and affect the overall performance of the motherboard.
Note: As a final tip, always refer to the manufacturer’s instructions and guidelines for your specific motherboard model during the repair process. These instructions may provide valuable insights or additional steps to ensure a successful repair.
Testing the motherboard and completing the final steps are crucial in ensuring a successful motherboard repair. By following these steps and carefully checking for any issues, you can have confidence in the functionality and reliability of your repaired motherboard.
Conclusion
Capacitor replacement is a tried and tested solution for repairing desktop motherboards plagued by faulty capacitors. By diligently following the proper steps and utilizing the appropriate tools, it is possible to replace these problematic components and restore the full functionality of the motherboard. However, caution must be taken to ensure that the replacement capacitors are carefully selected based on their voltage, capacity, and size. This ensures compatibility and optimal performance.
After the rigorous replacement process, it is absolutely crucial to test the motherboard thoroughly. This step enables the identification of any remaining issues and ensures that the repaired motherboard is functioning seamlessly. Pay special attention to the replaced capacitors, looking out for any signs of excessive heat buildup, which may indicate further problems. A successful replacement process is evidenced when the computer runs smoothly, displaying no issues or abnormal behavior.
Capacitor replacement, when executed with the right knowledge and precautions, can be an effective and cost-friendly solution for repairing faulty desktop motherboards. Not only does it offer a way to avoid costly replacements or repairs, but it also allows users to extend the lifespan of their valuable computing equipment. With the correct tools and precision, users can confidently undertake the task of replacing faulty capacitors, saving both time and money in the process.