PlayStation 5 SSD Expansion and Repair Guide
Welcome to our comprehensive PlayStation 5 (PS5) SSD expansion and repair guide. In this guide, we will provide step-by-step instructions on how to expand the storage of your PS5 console using an M.2 SSD. We will also cover essential information on repairing certain components of the PS5. Whether you want to increase your PS5’s storage capacity or fix any issues, this guide is here to help.
A related repair case also appears in upgrading ssd tablet how-to, where the same fault patterns can change the best fix path.
Over time, the limited storage capacity of the PS5 console can become a challenge for avid gamers. However, with the PS5 SSD expansion, you can overcome this hurdle and enjoy a seamless gaming experience with more space for your favorite games and apps. Additionally, if you encounter any hardware issues with your PS5, our repair guide will provide you with the necessary steps to address them.
PS5 Repair Guide and More
Expanding your PS5 storage and resolving any repair needs can be done with careful planning and execution. We will guide you through every stage, ensuring you have all the information you need to successfully install an M.2 SSD and troubleshoot potential issues. Our guide is designed to help you maximize your gaming experience, making the most of your PS5 console.
Stay tuned for the next section, where we will delve into the specifics of what an M.2 SSD is and why you should consider adding it to your PS5 console.
Related:


What is an M.2 SSD and Why Add It to Your PS5?
An M.2 SSD is a high-speed solid state drive that can significantly increase the storage capacity of your PS5 console. By adding an M.2 SSD, you can enhance your gaming experience by downloading, copying, and launching a larger number of PS5 and PS4 games, as well as media apps. This enables you to free up valuable space on your PS5 console and expand the overall storage available to you.
An M.2 SSD offers faster loading times and improved performance compared to traditional hard drives. With its compact form factor, it provides a sleek and efficient solution for expanding your PS5 storage capacity.
Whether you need more room for your growing game library or want to store additional multimedia content, an M.2 SSD allows you to enjoy the full potential of your PS5 console without compromising on speed or performance.
With the increasing size of game files and updates, the standard storage capacity provided by the PS5 may not be sufficient for many gamers. The addition of an M.2 SSD provides an easy and effective way to address this limitation, ensuring you have ample space for all your gaming and multimedia needs.
Benefits of Adding an M.2 SSD to Your PS5:
- Increased Storage Capacity: A larger storage capacity allows you to store more games, apps, and media on your PS5 console.
- Faster Loading Times: The high-speed performance of an M.2 SSD reduces loading times, allowing you to jump into your games faster.
- Improved Game Performance: With quicker data access and transfer speeds, an M.2 SSD enhances game performance, reducing lag and ensuring smooth gameplay.
- Enhanced User Experience: By expanding your PS5 storage capacity, you can have a seamless gaming experience with more options and flexibility.
Adding an M.2 SSD to your PS5 console is a worthwhile investment that unlocks the full potential of your gaming system, providing you with additional space and improved performance.
Supported M.2 SSDs for PS5 Console Expansion
Expanding the storage capacity of your PS5 console with an M.2 SSD is a great way to ensure you have enough space to store your games and media. However, it’s important to choose a supported M.2 SSD that meets the specific requirements set by Sony. Here’s what you need to know:
PS5 Storage Requirements
The PS5 console has certain requirements for the M.2 SSD to ensure optimal performance and compatibility. It must support PCI-Express Gen4x4 and be an M.2 NVMe SSD. Additionally, it should have a storage capacity between 250GB and 8TB, providing ample room for all your games and applications. It’s important to note that the PS5 console does not support traditional SATA-based SSDs, so make sure you choose the right type of SSD.
PS5 Supported M.2 SSDs
Sony has provided a list of supported M.2 SSDs that have been tested and approved for use with the PS5 console. These SSDs have met the performance and compatibility requirements set by Sony. While the list is subject to updates, it currently includes popular brands such as Samsung, Western Digital, and Seagate. It’s recommended to check Sony’s official website or consult the PS5 user manual for the most up-to-date list of supported SSDs.
| Brand | Model | Capacity |
|---|---|---|
| Samsung | 980 PRO | 500GB, 1TB, 2TB |
| Western Digital | WD_BLACK SN850 | 500GB, 1TB, 2TB |
| Seagate | FireCuda 530 | 500GB, 1TB, 2TB, 4TB |
These are just a few examples of the supported M.2 SSDs for the PS5 console. The table above showcases their respective brands, models, and available capacities. When selecting an M.2 SSD, ensure it matches the specifications provided by Sony and consult the official documentation for any additional requirements or recommendations.
By choosing a supported M.2 SSD for expanding your PS5 console’s storage, you can be confident that it will work seamlessly with your gaming system. This ensures you have the necessary space to enjoy all your favorite games and media without worrying about storage limitations.
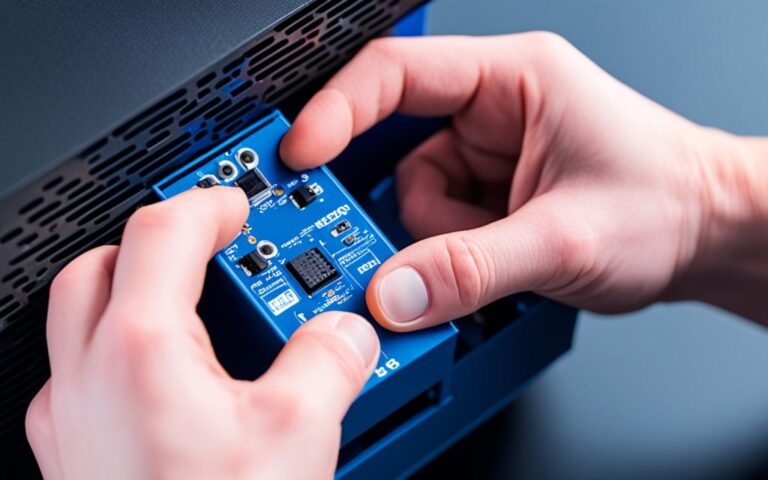
How to Install an M.2 SSD in Your PS5 Console
Before installing an M.2 SSD in your PS5 console, ensure that you have the necessary tools and a well-lit work space. You’ll need a #1 Phillips screwdriver and a small flashlight (optional). Make sure to follow the step-by-step instructions provided by Sony, which include removing the covers, attaching the M.2 SSD with the appropriate spacer, and securing it with screws.
To install an M.2 SSD in your PS5 console, follow these steps:
- Prepare the necessary tools and workspace.
- Power off your PS5 console and unplug all cables.
- Remove the console covers by gently sliding or lifting them off.
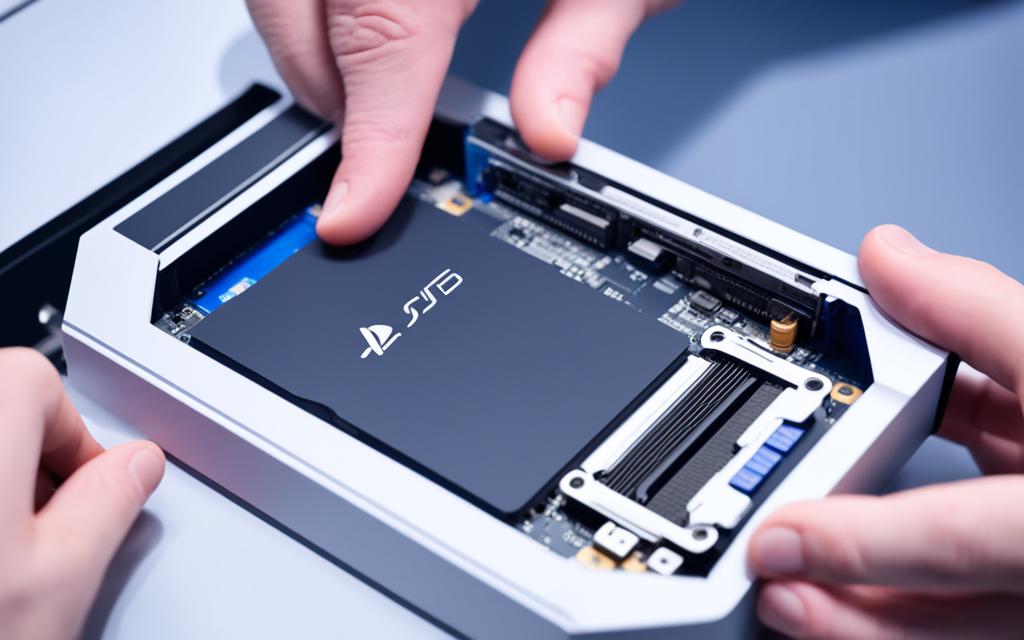
- Locate the M.2 SSD slot on the motherboard.
- Carefully insert the M.2 SSD into the slot, ensuring that it is properly aligned.
- If required, attach the spacer to the M.2 SSD before inserting it into the slot.
- Secure the M.2 SSD in place with the screws provided.
- Replace the console covers by sliding or snapping them back into position.
- Plug in all cables and power on your PS5 console.
It is important to follow these instructions carefully to ensure a successful installation of the M.2 SSD in your PS5 console. Following these steps will help you take full advantage of the increased storage capacity and improved performance offered by the SSD.
Tools Needed for M.2 SSD Installation
| Tool | Description |
|---|---|
| #1 Phillips screwdriver | A screwdriver with a cross-shaped tip, suitable for removing and securing screws. |
| Small flashlight (optional) | A handheld light source that can help illuminate the workspace during installation. |
How to Move Games to an M.2 SSD
If you’re running out of storage space on your PlayStation 5 (PS5) console and have recently installed an M.2 SSD, you can easily transfer your games and apps to the new storage device. This allows you to free up space on your console’s internal storage and take advantage of the added capacity provided by the M.2 SSD.
To move games and apps to your M.2 SSD, follow these simple steps:
- Go to the game library on your PS5 console.
- Highlight the game or app that you want to move.
- Press the Options button on your controller.
- Select “Move” from the options menu.
- Choose the M.2 SSD as the destination for the game or app.
- Confirm the move.
- Wait for the transfer process to complete.
By moving games and apps to the M.2 SSD, you’ll be able to enjoy faster loading times and seamless gameplay, as the SSD provides improved performance compared to the console’s internal storage. Additionally, you’ll have more room for new games and applications, ensuring that you can continue expanding your PS5 library without worrying about running out of space.
How to Remove an M.2 SSD from Your PS5 Console
If you no longer need or want to use the M.2 SSD in your PS5 console, follow the provided instructions to safely remove it. It’s important to follow these steps carefully to avoid any damage to the console or the SSD.
Removing the M.2 SSD:
- Power off your PS5 console and unplug it from any power source.
- Remove the plastic covers on the sides of the console. These covers may be held in place with clips or screws.
- Locate the M.2 SSD, which is typically located near the bottom of the console. It may be covered by a metal plate or shield.
- Carefully unscrew and remove the screws that secure the M.2 SSD in place.
- Gently disconnect the M.2 SSD from its slot by carefully pulling it out.
Once you have successfully removed the M.2 SSD, it is important to store it properly to prevent any damage. Place the SSD in an anti-static bag or wrap it in an anti-static material to protect it from static electricity.
Reattaching the Covers:
After removing the M.2 SSD, you need to reattach the plastic covers to ensure the console remains protected.
- Align the covers with the corresponding slots on the console.
- Carefully press the covers into place until they are secure.
- If necessary, use the clips or screws to further secure the covers.
By following these instructions, you can safely remove an M.2 SSD from your PS5 console when needed. Remember to handle the SSD with care and store it properly to maintain its functionality.
Tips for a Successful PS5 SSD Expansion
When expanding the storage of your PS5 console with an M.2 SSD, following these tips will ensure a smooth and successful installation process. Remember to power off your console and disconnect it from any power source before starting the installation. Use the recommended tools and carefully follow the instructions provided by Sony. In case you encounter any issues or need troubleshooting assistance, consult the troubleshooting guide or seek help from PlayStation support.
Tip 1: Power Off and Disconnect
Before installing the M.2 SSD, make sure your console is completely powered off and disconnected from any power source. This is crucial to avoid any potential electrical hazards or damage to the console.
Tip 2: Use Recommended Tools
Using the recommended tools will help ensure a proper and secure installation of the M.2 SSD. Have a #1 Phillips screwdriver ready for removing the covers and securing the SSD in place. Additionally, a small flashlight may come in handy to provide better visibility during the installation process.
Tip 3: Follow Instructions Carefully
It’s important to carefully follow the step-by-step instructions provided by Sony for installing the M.2 SSD. These instructions will guide you through the process, including removing the covers, attaching the SSD with the appropriate spacer, and securing it firmly with screws. Deviating from the instructions may lead to compatibility issues or damage to the console.
“Following the proper installation procedures and using a supported M.2 SSD will ensure optimal performance and compatibility with your PS5 console.”
Tip 4: Troubleshooting Assistance
If you encounter any issues during the installation or have concerns about the compatibility of your chosen M.2 SSD, consult the troubleshooting guide provided by Sony. This guide may help you identify and resolve common issues. If you require further assistance, reach out to PlayStation support for expert guidance and support.
With these tips in mind, you’ll be well-prepared to expand the storage of your PS5 console using an M.2 SSD. Achieve optimal performance and storage capacity by following the proper installation procedures and seeking assistance when needed. Enjoy a seamless gaming experience with ample storage for your games and apps!
Conclusion
Expanding the storage of your PS5 console with an M.2 SSD can significantly enhance your gaming experience. By increasing your storage capacity, you’ll have more room for games, apps, and media, allowing you to enjoy a wider variety of entertainment options on your PS5.
To ensure a successful and smooth installation process, it’s crucial to carefully follow the proper procedures provided by Sony. This includes using a supported M.2 SSD that meets the specified requirements, such as the appropriate form factors and sequential read speeds.
Always consult the official documentation and guidelines, as they provide valuable information and instructions specifically tailored to your PS5 console. If you have any questions or encounter difficulties during the installation process, don’t hesitate to seek assistance from PlayStation support or refer to the troubleshooting guide.
Once your M.2 SSD is successfully installed, you can enjoy the benefits of expanded storage and improved gameplay on your PS5. With more space available, you can install and store a larger collection of games, ensuring that you never run out of options for your next gaming adventure. Take full advantage of the enhanced capabilities of your PS5 by optimizing your storage with an M.2 SSD.
FAQ
What is an M.2 SSD and why should I add it to my PS5?
An M.2 SSD is a high-speed solid state drive that can be used to increase the storage capacity of your PS5 console. By adding an M.2 SSD, you can download, copy, and launch PS5 and PS4 games, as well as media apps. This allows you to free up space on your PS5 console and increase the overall storage available to you.
What are the requirements for expanding my PS5 console with an M.2 SSD?
It’s important to use a supported M.2 SSD that meets the specified requirements for expanding your PS5 console’s storage. The requirements include having a PCI-Express Gen4x4 supported M.2 NVMe SSD with a storage space between 250GB and 8TB. The M.2 SSD must also have specific form factors and sequential read speeds.
How do I install an M.2 SSD in my PS5 console?
Before installing an M.2 SSD in your PS5 console, ensure that you have the necessary tools and a well-lit work space. You’ll need a #1 Phillips screwdriver and a small flashlight (optional). Make sure to follow the step-by-step instructions provided by Sony, which include removing the covers, attaching the M.2 SSD with the appropriate spacer, and securing it with screws.
How can I move games to an M.2 SSD?
If you want to move games and apps from your console storage to the newly installed M.2 SSD, you can do so by going to the game library, highlighting the data you want to move, and selecting the option to move games and apps. This allows you to easily free up space on your console’s internal storage and utilize the added storage capacity of the M.2 SSD.
How do I remove an M.2 SSD from my PS5 console?
If you no longer need or want to use the M.2 SSD in your PS5 console, you can remove it by following the provided instructions. This involves removing the covers, unscrewing and removing the SSD, and reattaching the covers. Make sure to follow the steps carefully to avoid any damage to the console or the SSD.
What tips should I keep in mind for a successful PS5 SSD expansion?
When expanding the storage of your PS5 console with an M.2 SSD, there are a few tips you should keep in mind. Ensure that your console is powered off and disconnected from any power source before starting the installation process. Use the recommended tools and follow the instructions provided by Sony. If you encounter any issues, consult the troubleshooting guide or seek assistance from PlayStation support.