For music lovers, headphones are an essential accessory for enjoying their favourite tunes. However, many iPhone users face the frustrating issue of their headphone jack not working. This problem becomes even more critical with the newer iPhone models that lack a dedicated headphone jack. In this article, we will explore ten different solutions to fix the iPhone headphone jack not working problem.
Whether you’re an audiophile, a podcast enthusiast, or simply someone who enjoys immersive sound quality, a malfunctioning headphone jack can be a major setback. But fret not, as we delve into various troubleshooting and DIY repair tips to get your headphones back to full functionality.
From ensuring compatibility and cleaning the jack to exploring software settings and seeking professional help, we’ve got you covered. Additionally, we’ll provide step-by-step guidance on repairing cable issues and fixing a broken plug. By the time you finish reading this article, you’ll be equipped with the knowledge and tools to tackle any headphone jack problem that comes your way.
Ten Ways to Fix iPhone Headphone Jack Not Working
Are you frustrated with your iPhone headphone jack not working? Don’t worry, we’ve got you covered. Here are ten effective solutions to get your headphone jack up and running again:
Check headphone compatibility: Ensure that your headphone is compatible with your iPhone model. Try using different headphones to rule out any compatibility issues.
Clean the headphone jack: Remove any lint or dust that may be obstructing the connection by gently cleaning the headphone jack.
Avoid audio interference: Check if there is audio playing elsewhere that may be interfering with the headphone output. Pause or close any other audio sources.
Verify audio settings: Adjust the audio settings on your iPhone and ensure that the ringer and alerts buttons are properly adjusted. This can help resolve any volume-related issues.
Restart your iPhone: Sometimes, a simple restart can fix software glitches or temporary issues. Restart your iPhone and check if the headphone jack starts working.
Check for audio output: Confirm that the audio is being channeled to the headphone jack and not another output like Airplay or Bluetooth speakers. Switch it back to headphones if necessary.
Disable Bluetooth: Turn off Bluetooth on your iPhone and check if the headphone jack starts working. Bluetooth connectivity can sometimes interfere with wired headphones.
Seek Apple support: If none of the above methods work, consider seeking help from Apple support or visiting an Apple service center for professional assistance.
Repair or replace the jack: If the headphone jack is physically broken, it may need to be repaired or replaced. Consult a professional technician for the appropriate solution.
Check volume settings: Double-check the volume settings on your iPhone to ensure they are not muted or set to a very low level, as this can cause sound issues.
By following these ten troubleshooting steps, you can fix the iPhone headphone jack not working problem and resume enjoying your favorite music with ease.
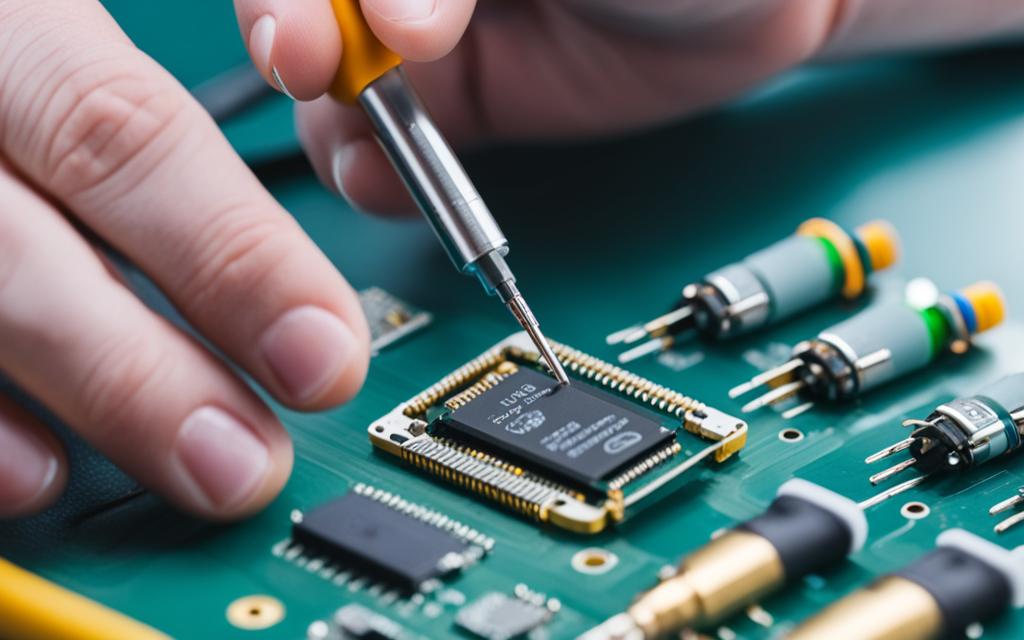
DIY Headphone Jack Repair Tips and Tools
Whether you’re an audiophile or simply someone who enjoys listening to music on your headphones, encountering issues with your headphone jack can be frustrating. From broken wires to faulty connections and damaged speakers, there are various common problems that may arise. Learning how to repair your headphone jack can save you time and money, and ensure you continue to enjoy your favorite tunes.
Before diving into the repair process, it’s important to have the right tools on hand. Here are some essential tools for headphone jack repair:
Tools
Description
Screwdriver set
A set of interchangeable screwdrivers of different sizes to easily open up your headphones.
Multimeter
Used to measure electrical continuity and diagnose issues with wires or connections.
Soldering iron
Essential for soldering broken wires or replacing faulty connections.
Wire strippers
Used to remove the insulation from wires for proper soldering.
Heat shrink tubing
Provides insulation and protection for repaired or replaced wires.
Magnifying tools
Helpful for working with small, intricate headphone components.
Once you have the necessary tools, you can begin the repair process. It’s important to understand specific repair techniques such as soldering broken wires or replacing faulty connections. Patience is key, as repairing your headphone jack may require some trial and error.
In some cases, you may also need to consider speaker replacement as a solution for sound quality issues or speaker failure. By replacing the speakers, you can restore the full audio experience and prolong the lifespan of your headphones.
Aside from the practical benefits of DIY headphone jack repair, it’s worth highlighting the positive environmental impact. By repairing your headphones instead of discarding them, you contribute to reducing electronic waste and embracing a more sustainable approach to consumer electronics.
Troubleshooting Cable Issues in Headphones
When it comes to enjoying your favorite music, having a reliable pair of headphones is essential. However, cable issues can often disrupt the audio experience. In this section, we will discuss troubleshooting methods for common cable problems that may arise with headphones.
1. Test the headphones with a different audio input
If you’re experiencing issues with your headphones, the first step is to determine whether the problem lies with the headphones themselves or the audio device. Connect the headphones to a different audio source, such as another device or an audio system, to see if the issue persists. If the problem occurs with multiple devices, it is likely that the headphones are the cause.
2. Bend the cable while listening to audio
Another troubleshooting step involves bending the headphone cable while audio is playing. Gently flex the cable along its length and pay attention to any areas where the sound crackles or cuts out. This can help identify potential cable damage or loose connections that may be affecting the audio quality.
3. Inspect the plug for signs of damage
If the issue seems to be near the plug, carefully examine it for any visible signs of damage, such as bent pins or frayed wires. A damaged plug can result in poor audio or intermittent connection. Consider fixing or replacing the plug if necessary.
4. Strip off insulation to identify broken wires
If the issue appears to be along the cable, you may need to strip off the insulation to expose the wires. Look for any broken or frayed wires that could be causing the problem. It’s essential to identify the specific location of the damage to proceed with the repair.
5. Splice and solder the wire connections
Once the damaged wires have been identified, you can proceed to splice them together. Strip a small section of insulation from each wire end, twist them together, and solder the connections for a secure and reliable repair. Take care to ensure that the wires are properly aligned and that the solder is evenly applied.
6. Provide insulation and durability with shrink tubing
After completing the wire connections, slide shrink tubing over the repaired area. Heat the tubing using a heat gun or a lighter to shrink it and provide insulation and durability to the repaired wires. This will help protect the connections and prevent future issues.
Troubleshooting Steps
Description
Test with different audio input
Determine if the issue is with the headphones or the audio device.
Bend the cable
Identify areas where the sound crackles or cuts out.
Inspect the plug
Look for signs of damage and consider fixing or replacing the plug.
Strip off insulation
Expose broken or frayed wires.
Splice and solder connections
Twist together and solder the wire ends.
Slide shrink tubing
Provide insulation and durability to the repaired area.
By following these troubleshooting steps, you can identify and resolve cable issues in your headphones, ensuring a seamless and uninterrupted audio experience.
Repairing a Broken Plug on Headphones
If you’re experiencing issues with a broken plug on your headphones, don’t worry. With a few simple steps, you can repair it and get back to enjoying your favorite music. Here’s a guide on how to repair a broken plug on headphones:
Purchase a new jack plug that matches the size of the original plug. This ensures compatibility and a secure fit.
Cut off the old plug and carefully remove the shielding from the cable. Take your time to avoid damaging the wires inside.
Strip the ends of the wires and identify the like-colored wires. Twist together the exposed copper ends to create a solid connection.
Using a soldering iron, solder the connections between the wires and the new jack plug. Apply heat evenly and ensure a strong bond.
After soldering, let the connections cool down before proceeding.
Reassemble the headphone jack by sliding the housing back onto the cable. Make sure it fits snugly and securely.
Finally, test the headphones for functionality by plugging them into a device and playing audio. If all is well, you’re good to go!
By following these steps, you can easily repair a broken plug on your headphones and restore their functionality. Remember to take your time and be careful when handling the wires and soldering iron. If you’re unsure or uncomfortable with the repair process, consider seeking assistance from a professional technician.
Conclusion
In conclusion, iPhone headphone jack repairs are essential for audio enthusiasts to continue enjoying their favourite music on their devices. By following the troubleshooting tips and repair techniques mentioned in this article, users can resolve common headphone jack issues and extend the lifespan of their headphones. DIY headphone repairs not only save money but also contribute to reducing electronic waste, promoting a more sustainable approach to consumer electronics.
FAQ
What are some ways to fix the iPhone headphone jack not working?
Make sure your headphone is compatible and try using different headphones to rule out compatibility issues. Clean the headphone jack to remove any lint or dust that may be obstructing the connection. Check if there is audio playing elsewhere that may be interfering with the headphone output. Verify the audio settings on your iPhone and make sure the ringer and alerts buttons are properly adjusted. Restart your iPhone to resolve any software glitches or temporary issues. Check if the audio is being channeled to another output like Airplay or Bluetooth speakers and switch it back to headphones. Disable Bluetooth and check if the headphone jack starts working. If none of the above methods work, consider seeking help from Apple support or visiting an Apple service center. If the jack is physically broken, it may need to be repaired or replaced. Double-check the volume settings and make sure they are not muted or set to a very low level.
What are some DIY headphone jack repair tips and tools?
Understand common headphone issues such as broken wires, faulty connections, damaged speakers, and Bluetooth issues. Gather necessary tools for headphone repair, including a screwdriver set, multimeter, soldering iron, wire strippers, heat shrink tubing, and magnifying tools. Learn specific repair techniques like soldering broken wires or replacing faulty connections. Practice patience and improve your repair skills over time. Explore speaker replacement as a solution for sound quality or speaker failure issues. Emphasize the environmental impact of DIY headphone repair in reducing electronic waste.
How can I troubleshoot cable issues in headphones?
Test the headphones with a different audio input to determine if the issue lies with the headphones or the audio device. Bend the cable while listening to audio to identify any areas where the sound crackles or cuts out. If the issue is near the plug, inspect the plug for any signs of damage and consider fixing or replacing it. If the issue is along the cable, strip off the insulation and identify the broken or frayed wires. Splice the wires together and solder the connections for a secure repair. Slide shrink tubing over the repaired area and heat it to provide insulation and durability.
How do I repair a broken plug on headphones?
Purchase a new jack plug that matches the size of the original plug. Cut off the old plug and remove the shielding from the cable. Strip the ends of the wires and twist together like-colored wires. Solder the connections between the wires and the new jack plug. Reassemble the headphone jack and test the headphones for functionality.
Are you facing Wi-Fi connectivity issues on your iPhone XS Max? You’re not alone. Many users have reported experiencing problems with their Wi-Fi connections…
Many iPhone users have reported experiencing lag, stuttering, and overall slow performance on their devices, specifically on the iPhone 14 Pro and Pro Max…