DIY Gaming Device Repair: A Step-by-Step Guide
Gaming Device Repair
is a common need for UK gamers who want to fix their consoles and get back to their favorite games as quickly as possible. Whether it’s a glitch, hardware issue, or a software problem, being able to fix consoles on your own can save you both time and money. That’s why we’ve created this comprehensive DIY guide to help you navigate the world of console repair.
In this guide, we will explore why DIY repair is a viable option for UK gamers. We’ll explain the satisfaction of fixing consoles yourself, the valuable skills you can acquire along the way, and the significant cost savings that come with DIY repairs. We understand that the idea of fixing your own console may seem intimidating at first, but don’t worry – we’ll provide the knowledge and expertise you need to tackle the job confidently.
Throughout this guide, we will cover everything you need to know about console repair – from understanding the basics of console anatomy and common problems to teaching you essential tools and safety precautions. We’ll walk you through step-by-step console repair techniques, ensuring you have a clear understanding of each stage. By the end of this guide, you’ll have the skills and knowledge to confidently fix your gaming device.
So, if you’re a UK gamer looking to save money, acquire new skills, and fix your consoles without relying on costly professional help, this DIY guide is your ultimate resource. Get ready to take control of your gaming experience and become a master at fixing gaming devices.


Why Repair Your Own Console?
When your gaming console starts experiencing technical issues, you may be tempted to immediately seek professional help. However, repairing your own console can offer a range of benefits that are worth considering. In this section, we’ll explore the reasons why taking on console repair as a DIY project can be a wise choice.
A related repair case also appears in diy samsung galaxy s10 charging, where the same fault patterns can change the best fix path.
Save Money
Console repair services can be costly, especially if your warranty has expired or the issue is not covered. By opting to repair your own console, you can save a significant amount of money. Instead of paying hefty fees for professional repairs, you’ll only need to invest in the necessary tools and replacement components, which are often more affordable in the long run.
Satisfaction and Empowerment
Fixing your gaming console yourself can provide a great sense of satisfaction and empowerment. Rather than relying on others to resolve the issue, you’ll have the opportunity to take matters into your own hands. Overcoming challenges and successfully restoring your console’s functionality can give you a sense of accomplishment and boost your confidence in your abilities.
Acquire New Skills
Tackling console repair allows you to acquire valuable technical skills. Through the repair process, you’ll gain a deeper understanding of the inner workings of your console and develop knowledge of common issues and troubleshooting methods. These skills can be useful not only for future console repairs but also for handling other electronics-related tasks and projects.
“Repairing my own console not only saved me money but also taught me a lot about electronics. It allowed me to explore a new hobby and acquire skills that I can use in other areas of my life.” – Michael Thompson, avid DIY enthusiast.
If you’re unsure about repairing your own console due to lack of experience or concern about making things worse, rest assured that there are ample resources available to guide you through the process. Online tutorials, forums, and instructional videos can provide step-by-step instructions and helpful tips to ensure a successful repair.
By opting to repair your own console, you can save money, experience a sense of satisfaction and empowerment, and acquire valuable new skills. The next section will delve deeper into the basics of console repair, providing insight into the anatomy of gaming consoles, common problems, and safety precautions.
| Benefits of Repairing Your Own Console | Professional Repair Services |
|---|---|
| Save money on repair fees | Costly repair fees, especially without warranty coverage |
| Enjoy the satisfaction of fixing it yourself | Dependency on professionals for repairs |
| Opportunity to acquire new skills and knowledge | No personal growth or skill development |
Understanding the Basics of Console Repair
When it comes to console repair, having a good understanding of the console anatomy is crucial. Different types of gaming consoles have unique architectures that require specific knowledge and techniques for effective repairs. Additionally, being aware of common problems that gamers may encounter and taking safety precautions while working on consoles are essential for a successful repair process.
Gaming Console Anatomy
Each gaming console, whether it’s a PlayStation, Xbox, or Nintendo, has its own distinct internal components that contribute to its functionality. Familiarizing yourself with the various parts and their functions will help you diagnose and fix issues more effectively.
For example, the internal components of a gaming console typically include:
- Power supply
- Central processing unit (CPU)
- Graphics processing unit (GPU)
- Random access memory (RAM)
- Hard drive
- Input/output ports
Understanding the arrangement and interplay of these components will enable you to troubleshoot and resolve mechanical, electrical, or software-related problems. With this knowledge, you’ll have a solid foundation for successful console repair.
Common Console Problems
Gaming consoles can suffer from a range of issues that impede their performance or render them entirely non-functional. Some common problems include:
- Overheating due to poor ventilation
- Hardware malfunctions, such as faulty disc drives or power buttons
- Software glitches, which may cause freezing or crashing
- Connectivity problems, like Wi-Fi or Bluetooth issues
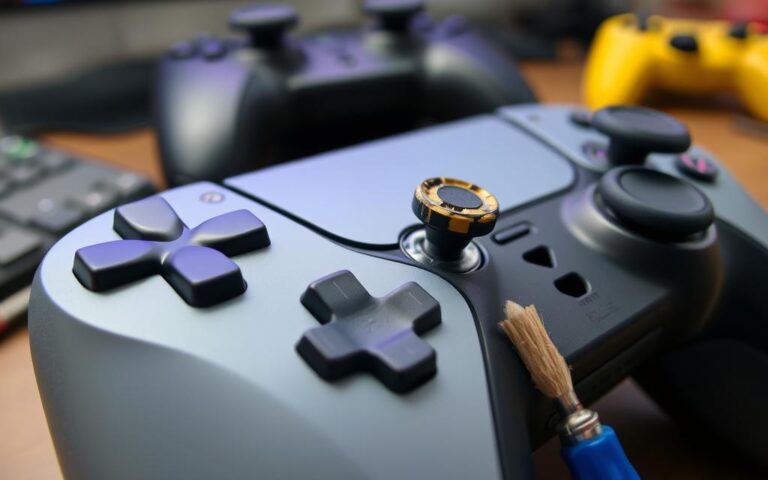
- Controller malfunctions, such as unresponsive buttons or stick drift
Identifying these common problems is a crucial step in the repair process. Once you’ve identified the issue, you can employ the appropriate repair techniques to fix the specific problem.
Safety Precautions
While repairing gaming consoles, it’s important to prioritize safety. Follow these safety precautions to ensure a secure repair process:
- Always unplug the console from the power source before starting any repairs.
- Wear appropriate protective gear, such as gloves and safety glasses, to avoid injuries.
- Work in a well-ventilated area to prevent the accumulation of harmful fumes.
- Avoid static electricity by grounding yourself before handling delicate components.
- Use proper tools and techniques to minimize the risk of further damage to the console.
By adhering to these safety precautions, you can safeguard yourself and the gaming console during the repair process, reducing the likelihood of accidents or additional damage.
Now that you have a good understanding of console anatomy, common problems, and safety precautions, you’re well-equipped to delve into the world of console repair. In the next section, we’ll explore the essential tools you’ll need for successful repairs.
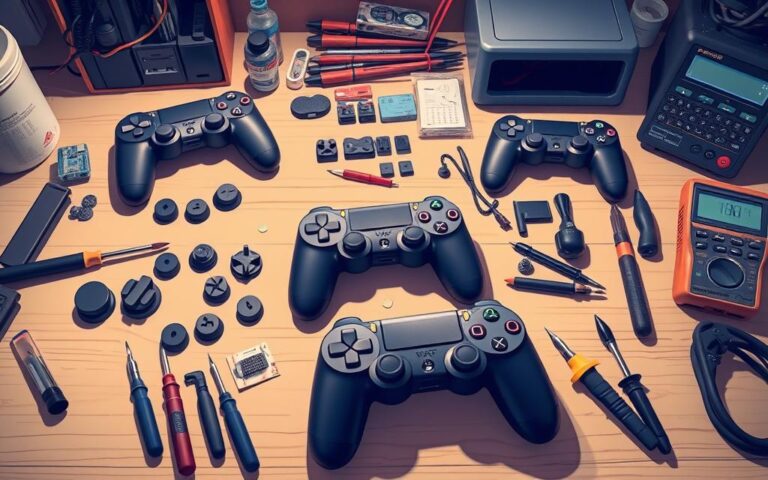
Essential Tools for Console Repair
When it comes to console repair, having the right tools can make all the difference. Whether you’re fixing a glitchy controller or troubleshooting a faulty power supply, these essential tools will ensure you have everything you need to get the job done effectively and safely.
Screwdrivers
One of the first tools you’ll need for console repair is a set of screwdrivers. Different consoles require different screwdriver types, so it’s important to have a variety of sizes and heads in your toolkit. Whether it’s a Phillips head or a Torx screw, having the appropriate screwdriver will make disassembly and reassembly much easier.
Multimeter
A multimeter is an indispensable tool for diagnosing electrical issues in consoles. It can measure voltage, current, and resistance, allowing you to identify faulty components or troubleshooting power problems. With a multimeter in hand, you can quickly and accurately diagnose the root cause of console issues.
Soldering Iron
For advanced console repairs that involve circuit boards and soldering, a soldering iron is essential. This tool allows you to melt and join metal components, making it possible to repair damaged connections or replace faulty elements. Whether you’re fixing broken traces or replacing capacitors, a soldering iron is a must-have for intricate repairs.
Electrical Safety Measures
When working with consoles or any electronic devices, it’s crucial to prioritize electrical safety. Always ensure you have the following safety measures in place:
- Working on a grounded anti-static mat to prevent static discharge
- Using an anti-static wrist strap to ground yourself
- Unplugging the console and allowing it to discharge before working on it
- Avoiding contact with exposed wires or components
- Using insulated tools to minimize the risk of shock
Protective Gear
Protecting yourself while performing console repairs is essential. Be sure to have the following protective gear:
- Safety glasses to protect your eyes from debris or solder splatter
- Heat-resistant gloves to prevent burns while soldering
- Anti-static wrist strap to prevent static electricity buildup
By having the right tools and safety measures in place, you’ll be well-equipped to tackle console repairs with confidence and precision.
Mastering Console Repair Techniques: Step-by-Step Guide
Repairing your gaming console can seem like a daunting task, but with the right guidance, you can become an expert in console repair. This step-by-step guide will walk you through the process of opening the console, identifying the issue, repairing or replacing components, and testing the repairs. By following these instructions, you’ll be able to fix common console problems and get your gaming device up and running again.
1. Opening the Console
The first step in console repair is opening the console to gain access to the internal components. To do this, you’ll need a set of screwdrivers specifically designed for opening gaming consoles. Follow the manufacturer’s instructions or online guides for your specific console model. Remember to handle the console with care and take necessary precautions to avoid damaging any delicate parts.
2. Identifying the Issue
Once you have the console open, it’s time to identify the issue. Look for obvious signs of damage such as loose connections, burnt-out components, or damaged cables. If the issue is not apparent, you may need to use a multimeter to diagnose electrical problems. Refer to the console’s user manual or online resources for troubleshooting tips specific to your console’s make and model.
3. Repairing or Replacing Components
After identifying the issue, you can proceed with repairing or replacing the faulty components. If the problem is minor, such as a loose connection, you can often fix it by reattaching or tightening the affected part. For more complex issues like a faulty power supply or a damaged circuit board, you may need to replace the component entirely. Make sure to use compatible replacement parts and follow proper soldering techniques if necessary.
4. Testing the Repairs
Once you’ve completed the repairs, it’s crucial to test the console to ensure everything is functioning correctly. Plug in the console, power it on, and check if the issue has been resolved. Test all the console’s features, including controllers, audio, video output, and connectivity to ensure everything is working as it should. If the problem persists, you may need to revisit the previous steps or consider seeking professional help.
By following this step-by-step guide, you can become proficient in console repair and save money on costly professional repairs. Remember to always take safety precautions, consult reliable resources, and use quality replacement parts to ensure the best results. With practice and experience, you’ll develop the skills and confidence needed to repair your gaming console like a pro.
Conclusion
In conclusion, this DIY gaming device repair guide has provided a comprehensive overview of console repair for UK gamers. By following this step-by-step DIY guide, gamers can save money and experience the satisfaction of fixing their own consoles.
Throughout the article, we have discussed the benefits of DIY console repair, including the acquisition of new skills and the sense of accomplishment that comes with successfully repairing a gaming device. We have also explored the common issues that gamers may encounter and the safety precautions to take during the repair process.
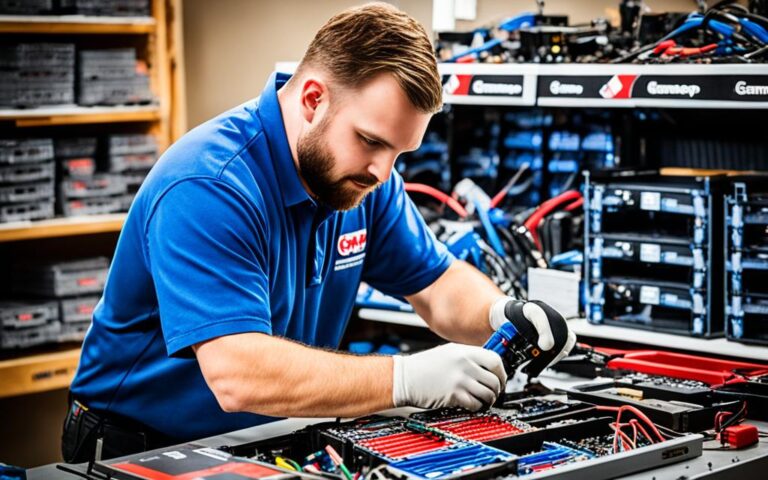
While DIY repair can be a rewarding experience, it’s important to know when it’s best to seek professional help. For complex issues or if you’re unsure of your skills, it’s recommended to consult a professional console repair service. They have the expertise and specialized tools needed to handle intricate repairs.
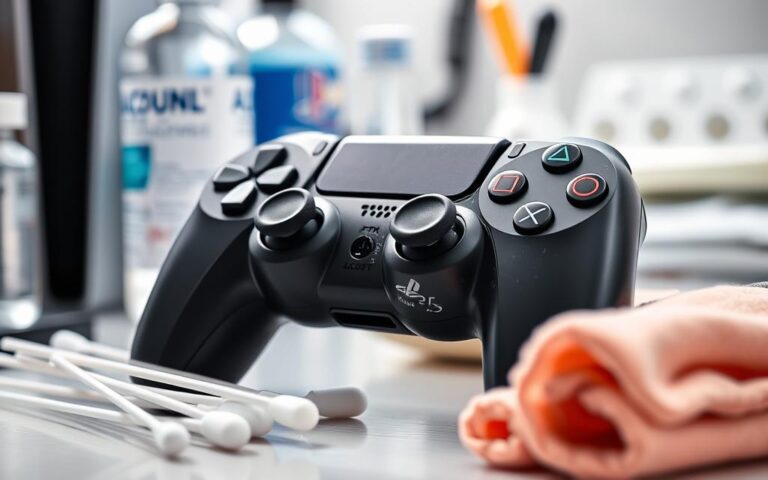
Finally, to ensure the longevity and optimal performance of your console, regular maintenance is crucial. Keep your console clean and dust-free, avoid excessive heat or moisture, and follow manufacturer’s guidelines for storage and usage. By following these maintenance tips, you can extend the lifespan of your gaming device and reduce the likelihood of encountering common console issues in the future.
FAQ
Why should I repair my own console?
Repairing your own console can save you money compared to hiring a professional repair service. It also provides a sense of satisfaction and allows you to acquire new skills.
What are the basics of console repair?
Understanding the basics of console repair involves familiarising yourself with the different types of gaming consoles, their unique architecture, common problems that may occur, and taking necessary safety precautions.
What are the essential tools for console repair?
Essential tools for console repair include various screwdrivers for different types of screws, a multimeter for diagnosing electrical issues, and a soldering iron for advanced repairs. Additionally, it’s important to have electrical safety measures and protective gear.
How do I master console repair techniques?
Mastering console repair involves a step-by-step guide. This includes opening the console, identifying the issue, repairing or replacing components, and testing the repairs. Detailed instructions and tips are provided for each step.
When should I seek professional help for console repair?
It is recommended to seek professional help when facing complex or advanced issues that require specialized knowledge and equipment. Additionally, if you are not confident in your repair skills or if your console is still under warranty, it may be best to consult professionals.
What are some maintenance tips for consoles?
To keep your consoles in good working condition, it is important to clean them regularly, ensure proper ventilation, and avoid exposing them to extreme temperatures or moisture. Regular software updates and avoiding excessive wear and tear can also help prolong their lifespan.