When it comes to repairing your Nintendo Switch, you’ll face the decision of whether to tackle the repairs yourself or seek professional help. It’s essential to consider your skills, knowledge, and the complexity of the repairs before making a decision. While DIY repairs may seem tempting with the abundance of online tutorials, it is crucial to be confident in your abilities and experience in electronics repair. Seeking professional assistance can save you time, money, and potential frustration.
VideoGame911.com is a reputable source for Nintendo Switch repairs, offering expert advice and services to ensure your console is in capable hands. Their team of skilled technicians has the expertise and specialized tools necessary to diagnose and fix a wide range of issues. By opting for professional help, you can have peace of mind knowing that your Nintendo Switch will be repaired correctly and efficiently.
So, before embarking on a DIY repair journey, carefully weigh the risks and benefits and consider reaching out to VideoGame911.com for expert guidance and assistance.
Understanding Nintendo Switch Fan Issues
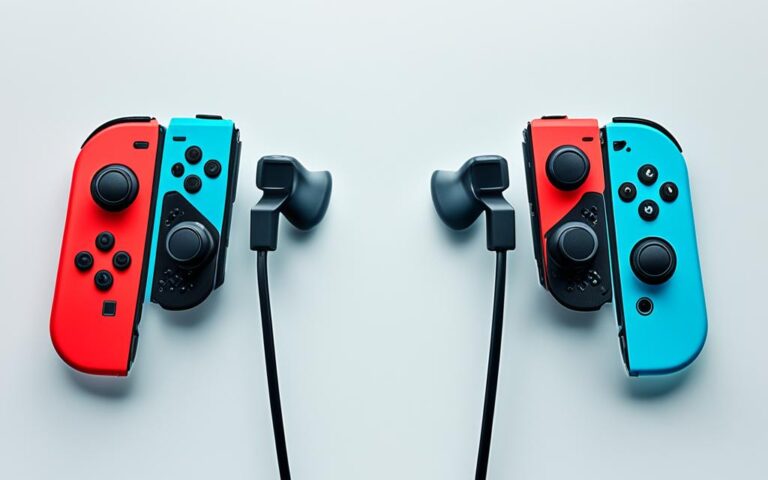
The fan in a Nintendo Switch is a vital component that keeps the system’s CPU cool to prevent overheating. Common issues with the fan include dust accumulation, wear and tear from constant use, and accidental damage from dropping the device.
Regular maintenance is advised to keep the fan operational, such as keeping the device clean and ensuring sufficient air circulation around the system. Signs that the fan may need attention include the Joy-Con controllers feeling warmer than usual or the system showing an overheating message.
“The fan is an integral part of the Nintendo Switch, responsible for preventing overheating and maintaining optimal performance,” explains Mark Thompson, a technician at VideoGame911.com.
Repairing the fan may involve cleaning out dust buildup to improve airflow or replacing the fan if its mechanics fail. Ignoring these issues can lead to further complications and even more costly repairs in the future. Taking proactive measures to address fan issues can help maintain the Nintendo Switch’s performance and extend its lifespan.
If you’re not confident in performing repairs yourself, professional services like VideoGame911.com are available to diagnose and fix fan issues. Their experienced technicians have the necessary expertise and specialized tools to get your Nintendo Switch running smoothly again.
Preventive Measures for Fan Maintenance
Maintaining a well-functioning fan can be as simple as following a few preventive measures:
Regularly clean the device to remove dust and debris that may accumulate on the fan and hinder airflow.
Avoid placing the Nintendo Switch in enclosed spaces or covering the vents, as this can restrict air circulation and lead to overheating.
Consider using a cooling pad or stand to improve airflow and dissipate heat during extended gaming sessions.
Handle the Nintendo Switch with care to minimize the risk of accidental damage, such as dropping or impacting the device.
By implementing these preventive measures, you can help ensure that your Nintendo Switch fan remains in optimal condition, reducing the likelihood of encountering fan-related issues.
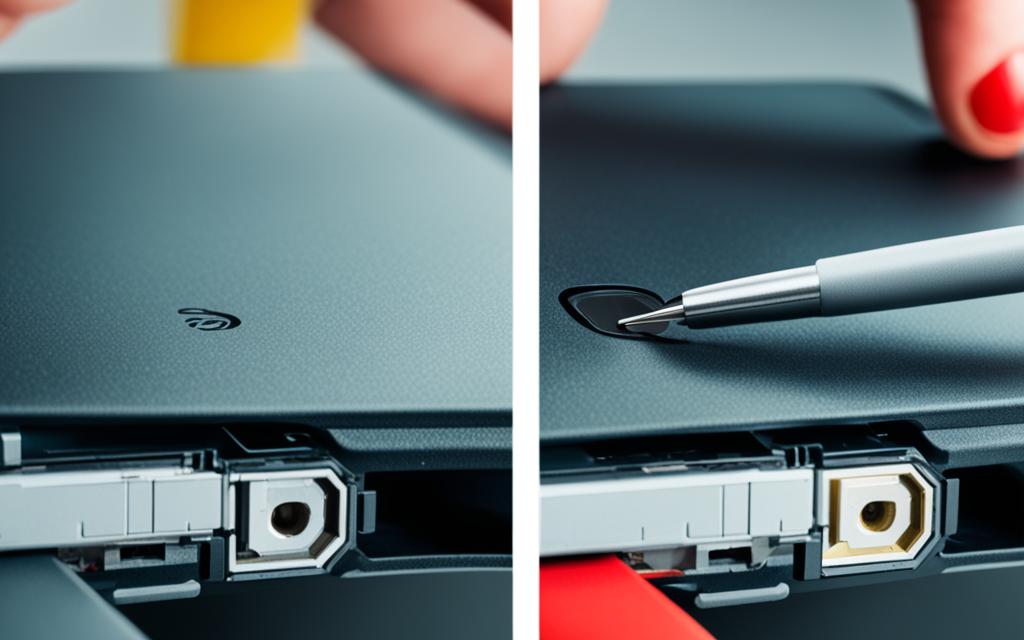
Repair Guide for the Nintendo Switch Fan
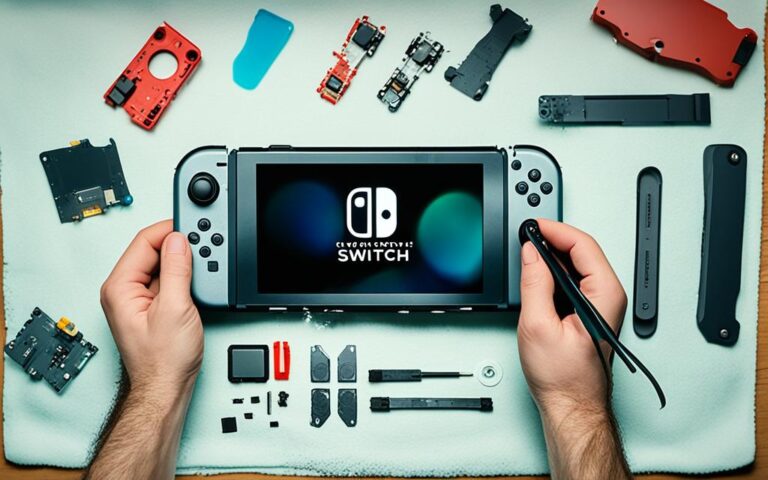
If you decide to repair the fan in your Nintendo Switch yourself, it’s important to have the right tools and materials. You’ll need a Tri-point Y00 screwdriver, PH 000 driver, tweezers, spudger, new replacement fan, and thermal paste.
To successfully repair the fan, follow this step-by-step process:
Power off the console: Begin by turning off your Nintendo Switch to ensure your safety during the repair process.
Remove the rear panel: Use a Tri-point Y00 screwdriver to remove the screws holding the rear panel in place. Keep the screws in a safe place for reassembly later.
Disconnect the battery: Carefully disconnect the battery cable to prevent any electrical issues during the repair.
Locate and remove the fan screws: Identify the screws securing the fan to the console and carefully remove them using a PH 000 driver.
Disconnect the fan cable: Gently detach the cable connecting the fan to the console using a pair of tweezers or a spudger.
Apply thermal paste if necessary: If the thermal paste on the CPU appears dry or insufficient, apply a pea-sized amount of new thermal paste to ensure optimal heat transfer.
Install the new fan: Place the new replacement fan in the designated slot and secure it with the previously removed screws.
Screw everything back in place: Reattach the fan cable, connect the battery, and screw the rear panel back onto the console using the Tri-point Y00 screwdriver.
After completing the repair, it’s important to perform a system check to ensure the fan operates smoothly. Power on your Nintendo Switch and monitor the fan’s functionality. Additionally, it’s crucial to consider the after-repair considerations and verify if your repairs align with Nintendo’s warranty to prevent voiding it.
Required Tools and Materials
Essentials
Alternatives
Tri-point Y00 screwdriver
PH 000 driver
Small Phillips screwdriver
Pair of tweezers
Spudger
Guitar pick
New replacement fan
–
–
Thermal paste
–
–
Ensuring you have the right tools and materials is crucial for a successful Nintendo Switch fan repair. Consider your comfort level with electronics and the time investment required before opting for a DIY repair. If you’re unsure or uncomfortable with the repair process, it’s recommended to seek professional assistance.
After all the repairs have been completed, it’s important to consider the following after-repair considerations:
Perform a thorough system check to ensure proper fan operation and overall console functionality
Review Nintendo’s warranty policy and confirm if your repairs comply to prevent voiding the warranty
Cost Analysis and Repair Options
When it comes to Nintendo Switch repair costs, understanding your options can help you save time and money. DIY repairs can be the most economical option for common issues like fan replacement, but they require a certain level of skill and comfortability with electronics. The cost of a DIY repair includes the price of a new fan and the required tools.
On the other hand, professional repair costs can vary widely, with official Nintendo repair services ensuring the use of genuine parts but potentially incurring higher fees. Third-party repair shops may offer competitive rates and faster services, but the risk of non-genuine parts and voiding warranties should be considered.
It’s important to check your warranty status before seeking repairs, as Nintendo often covers repair costs for devices still under warranty. For out-of-warranty devices or quicker turnaround, third-party repair shops can be a practical option. It’s recommended to read reviews and verify the credentials of the repair technicians to make the best decision for your Nintendo Switch repairs.
Repair Option
Cost
Advantages
Disadvantages
DIY Repair
Cost of replacement fan and tools
– Economical
– Opportunity to learn and develop skills
– Convenience of repairing at home
– Requires skill and comfort with electronics
– Risk of further damage if not done correctly
– Voiding warranty if repairs are unsuccessful
Professional Repair
Varies based on service provider and repair type
– Use of genuine parts
– Expertise and experience
– Potential warranty coverage for repairs
– Potentially higher costs
– Longer turnaround time
– Limited availability in certain locations
Third-Party Repair
Varies based on service provider and repair type
– Competitive rates
– Faster turnaround time
– Convenience of local service
– Risk of non-genuine parts
– Potential warranty voiding
– Varying quality and reliability
How to Find the Serial Number and Check Warranty Status
Before booking a repair for your Nintendo Switch, it’s important to find the serial number and check the warranty status of your console. The serial number can be found on the console itself or on the box it came in. If you’re unsure or if the serial numbers have faded, there is a universal method to find the serial number by accessing the system settings of your Nintendo Switch.
Checking the warranty status is simple once you have the serial number. You can enter the serial number on the official Nintendo Repair Center page to get all the details, including whether your console is under warranty and the warranty expiration date.
Understanding the warranty status will determine if you’ll need to pay for the repair or if it can be covered for free. It’s also worth considering common fixes for Nintendo Switch problems before booking a repair, especially if your console is out of warranty.
Finding the Serial Number
Checking Warranty Status
1. Check the console or box
1. Access the official Nintendo Repair Center page
2. Look for a sticker or engraving
2. Enter the serial number
3. Check for a faded or worn number
3. View warranty details
4. Use the system settings
If you are unsure about finding the serial number or have any difficulties checking the warranty status, it’s recommended to reach out to Nintendo customer support for assistance. This will ensure that you have accurate information before proceeding with any repairs.
Conclusion
When it comes to repairing your Nintendo Switch, making the choice between professional assistance and DIY repairs is dependent on your skills, knowledge, and comfort level with electronics. Professional services offer expertise, genuine parts, and peace of mind, but they may come with higher costs. On the other hand, DIY repairs can be cost-effective, but they require the right tools, skills, and time investment. It is crucial to assess the complexity of the repairs, weigh the risks and benefits, and carefully consider your capabilities before deciding on the best course of action.
Whether you opt for professional repair or DIY, safeguarding the longevity and performance of your Nintendo Switch is paramount. Professional assistance ensures a high standard of workmanship and quality repairs, which can provide greater peace of mind. They have access to specialized tools and knowledge that can help diagnose and fix a wide range of issues effectively. This is particularly advantageous for those who lack experience in electronics repair or for complex problems that require professional attention.
Alternatively, DIY repairs can be a more affordable option, saving you money on labor costs. However, it is important to be confident in your skills and knowledge before attempting any repairs. Using the wrong tools or incorrectly following online tutorials can potentially cause further damage to your console. Additionally, DIY repairs may void any warranties on your Nintendo Switch, so it’s important to assess the risks associated with this approach. If you choose to go down the DIY route, ensure you have the necessary tools, access to reliable repair guides, and take the time to understand the process thoroughly.
In conclusion, when it comes to Nintendo Switch repairs, there are both professional and DIY options available. Professional assistance provides expertise and peace of mind, while DIY repairs can be a cost-effective alternative for those with the necessary skills and knowledge. Carefully weigh the advantages and disadvantages, and consider seeking professional assistance for complex issues or if you are unsure of your abilities. By prioritizing the proper care and maintenance of your Nintendo Switch, you can ensure its longevity and optimal performance in the long run.
FAQ
Should I attempt to repair my Nintendo Switch myself or seek professional help?
It depends on your skills, knowledge, and the complexity of the repairs. While DIY repairs may be tempting, seeking professional assistance can save you time, money, and potential frustration.
What are the common issues with the Nintendo Switch fan?
Common issues with the fan include dust accumulation, wear and tear from constant use, and accidental damage from dropping the device.
How can I repair the fan in my Nintendo Switch?
If you decide to repair the fan yourself, you’ll need specific tools and materials. The step-by-step process involves powering off the console, removing the rear panel, disconnecting the battery, locating and removing the fan screws, disconnecting the fan cable, applying thermal paste if necessary, installing the new fan, and screwing everything back in place.
What are the cost considerations for Nintendo Switch repairs?
DIY repairs can be cost-effective for common issues like fan replacement but require skill and comfortability with electronics. Professional repair costs can vary, and official Nintendo repair services may incur higher fees, while third-party repair shops may offer competitive rates. It’s important to check your warranty status before seeking repairs.
How can I find the serial number and check the warranty status of my Nintendo Switch?
The serial number can be found on the console or its box, or you can access the system settings of your Nintendo Switch to find it. Once you have the serial number, you can enter it on the official Nintendo Repair Center page to check the warranty status, including whether your console is under warranty and the expiration date.
The Nintendo Switch is a popular gaming console that requires proper protection to ensure its longevity. This article will provide you with expert tips…
The Nintendo Switch is a popular gaming system that may require repairs over time. Building a network of Nintendo Switch repair enthusiasts can provide…