Installing or Replacing Desktop Power Units
Are you experiencing issues with your computer’s power supply? Is it time to upgrade or replace your desktop power unit? Look no further! In this comprehensive guide, we will walk you through the process of power unit installation and desktop power supply installation, ensuring a smooth transition and optimal performance for your computer.
Before we dive into the detailed steps, let’s understand the importance of the power supply in a computer and why upgrading or replacing it is crucial. The power supply is like the heart of your computer, providing stable and reliable power to all components. A failing power supply can lead to various issues, from random restarts to insufficient power for your graphics card.
To start this process, it is essential to prepare for the power supply replacement. Gather the necessary tools, such as a Phillips head screwdriver, and consider using gloves for extra safety. Turning off and unplugging your computer is a crucial step before beginning any work on your power supply.
Now that you’ve prepared, let’s move on to the actual process of removing the old power supply. Take note of the cable positions, disconnect them carefully, and remove the old power supply from the computer case. Remember to handle everything with care, ensuring you don’t damage any components or wires in the process.
Once the old power supply is out, it’s time to choose and install the new one. When selecting a new power supply, make sure it has the required wattage for your system, and it’s always a good idea to choose a higher wattage unit to accommodate future upgrades. Position the new power supply in the case and secure it with screws. Connect the necessary cables, practicing proper cable management techniques.
Related:


Before finalizing the installation, it’s crucial to test the new power supply to ensure it’s functioning correctly. Take a moment to inspect all cable connections and make sure they are secure. Finally, close the computer case, plug in all external cables, and turn on your computer to confirm that everything is working smoothly.
In conclusion, replacing or upgrading your desktop power unit is an essential task to maintain your computer’s efficiency and longevity. By following the steps outlined in this guide, you can confidently perform a computer power unit setup or replace your current power supply, ensuring optimal performance for your system.
Why is Power Supply Crucial?
The power supply unit (PSU) is the lifeblood of your computer, providing the necessary power to all components. Without a reliable power supply, your computer’s performance and stability may be compromised.
Importance of Power Supply:
A strong and efficient power supply is crucial for ensuring the smooth operation of your computer. It is responsible for delivering stable and consistent power to the CPU, graphics card, motherboard, and other components. Without a reliable power supply, your computer may experience random restarts, freezes, or unexpected shutdowns.
“A weak or failing PSU has the potential to cause serious damage to your valuable computer components.”
Role of Power Supply in a Computer:
The power supply is responsible for converting the alternating current (AC) from your wall outlet into direct current (DC) that is used by your computer’s components. It ensures that each component receives the right amount of power, protecting them from voltage fluctuations and power surges.
Benefits of a Good Power Supply:
- Stability: A high-quality power supply provides a stable and consistent power output, reducing the risk of hardware failures and system crashes.
- Compatibility: A good power supply ensures compatibility with various components and peripherals, allowing you to upgrade your computer without worrying about power limitations.
- Efficiency: An efficient power supply wastes less energy and generates less heat, resulting in lower electricity bills and a cooler-running system.
- Protection: A reliable power supply offers built-in protection features such as over-voltage, under-voltage, and short-circuit protection, safeguarding your computer from potential damage.
Avoid cutting corners when it comes to your power supply. Investing in a high-quality PSU will not only provide a stable and efficient power supply but also protect your valuable computer components from potential damage.
The Importance of Power Supply in Gaming
In gaming computers, the role of a good power supply becomes even more crucial. Gaming systems require a higher power output to support demanding components such as high-end graphics cards and processors. A reliable power supply designed for gaming can ensure optimal performance and reduce the risk of system crashes during intense gaming sessions.
Preparation for Power Supply Replacement
Before replacing the power supply in your desktop computer, it is crucial to gather the necessary tools and take safety precautions to ensure a smooth and secure installation process.
Gathering Tools for Power Supply Replacement
Here are the essential tools you will need:
- Phillips head screwdriver: You will need this tool to remove screws securing the power supply in place.
- Gloves: Consider wearing gloves to protect yourself from any sharp edges or potential electrical hazards.
Safety Precautions for Power Unit Installation
When working with electronics, safety should always be a top priority. Follow these safety precautions before starting the replacement process:
- Turn off and unplug your computer: Make sure your computer is completely powered down and disconnected from any electrical source.
- Ground yourself: To prevent static electricity discharge, ground yourself by touching a metal object before handling any internal components.
- Open the computer case: Carefully remove the side panel of your computer case to gain access to the internal components.
- Disconnect all cables: Take note of the cable connections from the power supply to ensure proper reassembly. Disconnect all cables, including the power cable, from the power supply.
By gathering the necessary tools and following the safety precautions listed above, you will be well-prepared for the power supply replacement process.
Continue reading to learn how to remove the old power supply from your computer case.
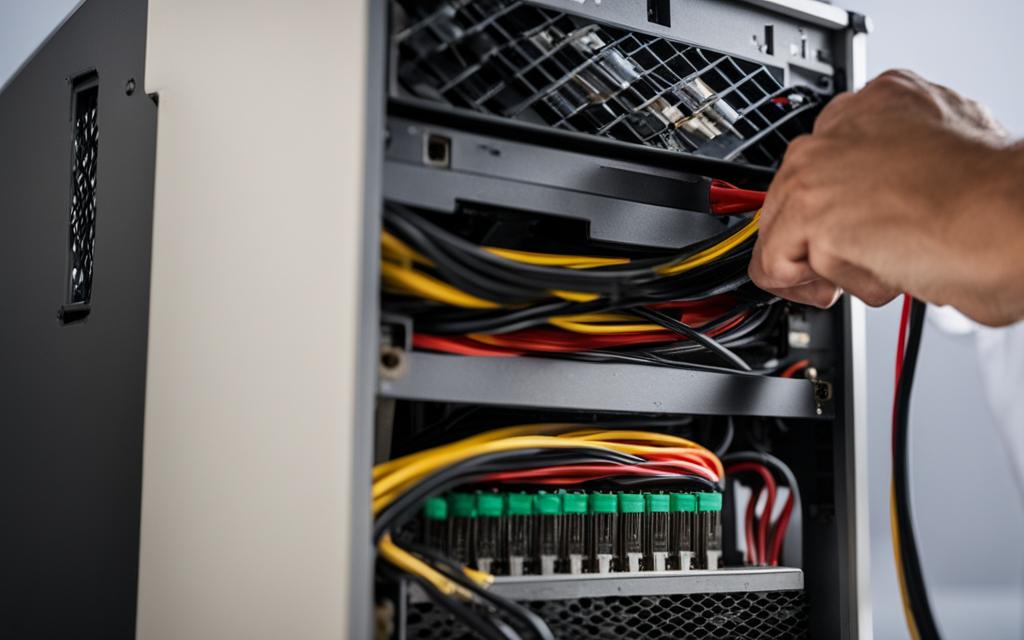
Removing the Old Power Supply
When it comes to upgrading or replacing your desktop computer’s power supply, the first step is removing the old one. This process requires careful attention to ensure the safety of your components and wires.
To begin, locate the old power supply at the back of your computer case. It is usually positioned at the top or bottom and secured with screws. Take note of its position and how it is connected to other components.
If you are unsure about the location or connection of the power supply, refer to your computer’s manual or consult a professional.
Before disconnecting any cables, it is crucial to turn off your computer and unplug it from the power source. This will eliminate the risk of electric shock and protect your computer from potential damages.
To emphasize:
Always remember to prioritize your safety when working with any internal components of your computer.
Once you have taken the necessary safety precautions, carefully disconnect all cables connected to the old power supply. It is essential to handle the cables gently to avoid damaging them. Optionally, you can take pictures or label the cables to ensure a smooth reassembly process.
With the cables disconnected, you can now proceed to unscrew and remove the old power supply from the computer case. Take your time and be cautious not to interfere with any other components or wires.
Quoting:
“Remove the power supply with a gentle pulling motion, making sure to clear any obstructions in its path.”
Once the old power supply is removed, take a moment to inspect the area and ensure no cables or debris are left behind. This will prevent any potential issues when installing the new power supply.
Now that you have successfully removed the old power supply, you are ready to move on to the next step: choosing and installing the new power supply.
| Tools Needed | Precautions |
|---|---|
| Phillips head screwdriver | Turn off and unplug computer |
| Gloves (optional) | Handle cables gently |
Choosing and Installing the New Power Supply
When selecting a new power supply for your desktop computer, it is essential to ensure that it has the required wattage and features to meet your computer’s needs. Additionally, it is recommended to choose a power supply with a higher wattage than what is currently needed, as this will allow for potential future upgrades without the need to replace the power supply again.
Proper installation of the new power supply is crucial for its optimal performance and the overall stability of your computer. Begin by positioning the new power supply in the same location as the old one, aligning it with the screw holes on the computer case.
Next, securely fasten the new power supply to the case using the appropriate screws. Make sure that the power supply is tightly secured to avoid any unnecessary movement or vibrations that could potentially cause damage to the components or disrupt the power flow.
Once the power supply is securely in place, it’s time to connect the necessary cables. Start by identifying the specific cables required for your computer setup. Refer to the documentation provided with the power supply or consult the manufacturer’s website for guidance.
Ensure that all connections are made securely and correctly. Avoid applying excessive force when plugging in the cables to prevent any damage to the connectors or the power supply itself.
Cable Management
Proper cable management is essential for maintaining good airflow and reducing clutter inside your computer case. Neatly route the cables to their respective components, keeping them away from any sharp edges or moving parts. Use cable ties or other organizing tools to secure the cables and minimize tangling.
Expert Tip: Keeping your cables organized not only improves the aesthetics of your computer but also improves airflow, leading to better cooling and overall system performance.
Once all the cables are connected and neatly organized, double-check each connection to ensure they are secure and properly seated. Loose connections can result in intermittent power supply issues or even system failures.
Now that the new power supply is installed and connected, you are one step closer to having a fully functioning computer. The next section will cover the necessary testing and final steps to ensure that everything is working correctly.
Testing and Final Steps
After completing the installation of your new power supply, it is crucial to take the necessary steps to ensure everything is functioning correctly. This section will guide you through the testing process and the final steps of closing the computer case.
Testing the New Power Supply
Before closing the computer case, it’s a good practice to test the new power supply to ensure it is functioning properly. Follow these steps:
- Double-check all cable connections to ensure they are secure. This will help prevent any potential issues during the testing process.
- Once the cables are secure, plug the power cord into a power outlet and turn on your computer.
- Observe the startup process and listen for any unusual noises. The computer should power on smoothly without any problems.
- Check the BIOS or the operating system to ensure that the new power supply is recognized and providing the correct power output.
- If the computer fails to start or you encounter any issues, double-check the connections and consult the documentation that came with your power supply.
If the computer passes the initial test and functions properly, you can proceed with closing the computer case.
Closing the Computer Case
Once you have completed the testing process and confirmed that the new power supply is working correctly, it’s time to close the computer case. Follow these steps:
- Ensure all cable connections are secure and properly organized to prevent any interference with fans, airflow, or other components.
- Replace the side panel of the computer case and secure it with the screws provided.
- Make sure the panel is aligned correctly and flush with the case to maintain proper airflow and aesthetics.
- Plug in all external cables, such as the monitor, keyboard, mouse, and any other peripherals you use.
- Finally, turn on your computer to confirm that everything is working properly. If the computer starts up without any issues, you have successfully installed and tested your new power supply.
Now that you have completed the testing and final steps, your computer is ready to provide stable and reliable power to all its components. You can use your computer with confidence, knowing that you have installed a new power supply that will support its efficiency and longevity for years to come.
Conclusion
Upgrading or replacing the power supply in your desktop computer is a vital task to ensure its efficiency and longevity. By following the steps outlined in this guide, you can confidently install or replace the power unit. The process involves safely removing the old power supply, selecting and installing a new power supply, and testing the system to ensure everything is functioning properly.
To begin, it is essential to safely remove the old power supply by disconnecting all cables and carefully unscrewing it from the computer case. Remember to note the positions of the cables for reassembly. Once the old power supply is removed, you can proceed to select the right replacement power supply. Consider the required wattage and future upgrades, and install the new power supply in the same location as the old one, securing it with screws.
After installing the new power supply, it is crucial to test the system to ensure it is functioning correctly. Double-check all cable connections to ensure they are secure, and consider turning on the computer to confirm that everything is working properly. Finally, close the computer case by replacing the side panel and secure it with screws. Plug in all external cables, and your power unit replacement process is complete!