PS4 Slim: Effective Solutions for Controller Drift
Welcome to our guide on fixing controller drift on your PS4 Slim. This frustrating issue can disrupt your gaming experience, but don’t worry – we’ve got you covered. Whether it’s a dirty analog stick, a damaged stick or potentiometer, or other factors, there are several solutions to get your controller back in top shape. So, let’s dive into the world of PS4 Slim controller drift fixes!
Before we jump into the details, it’s important to understand the potential causes of controller drift. Sometimes, a simple reset or cleaning can solve the problem. Other times, it may require professional repair or even replacing components yourself. Let’s explore each solution and see which one suits your needs best.
Resetting your PS4 Controller
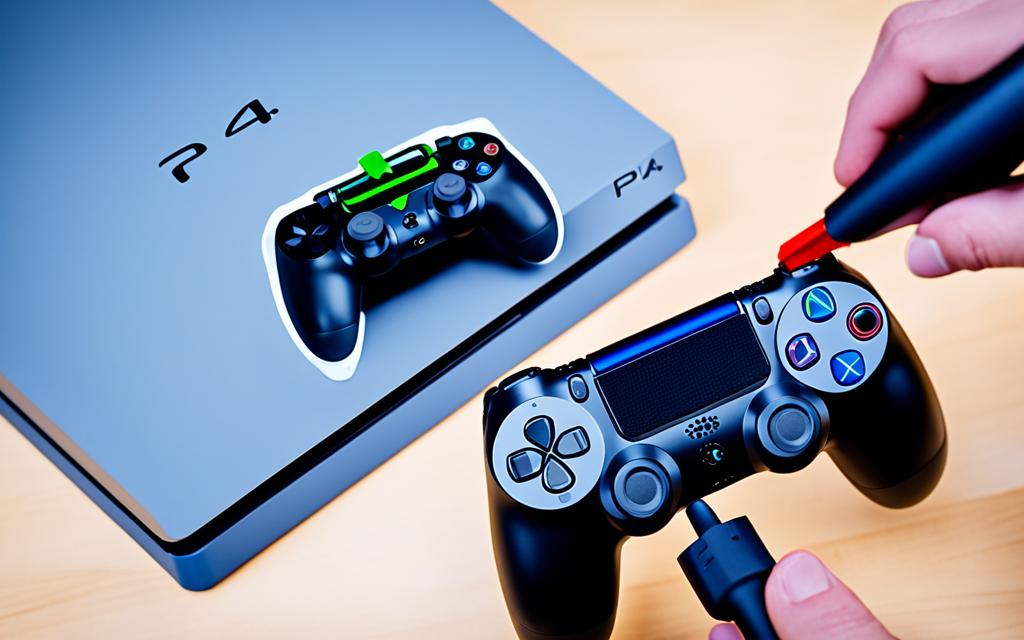
To resolve issues like analog stick drift on your PS4 controller, performing a reset can often be an effective solution. Resetting the controller allows it to recalibrate and refresh its settings, potentially resolving any software-related problems.
Soft Reset:
- Make sure your PS4 controller is turned off.
- Locate the small reset button on the back of the controller.
- Use a small tool, such as a paperclip, to press and hold the reset button for a few seconds.
- Release the reset button and turn on your PS4 console.
If your controller continues to experience analog stick drift after a soft reset, you can try a hard reset as a further troubleshooting step.
Hard Reset:
- Ensure your PS4 controller is turned off.
- Locate the pinhole button on the back of the controller near the L2 trigger.
- Using a small tool, like a paperclip, gently press and hold the pinhole button for a few seconds.
- Release the button and turn on your PS4 console.
A hard reset should reset the controller to its default settings and may help resolve more persistent issues like analog stick drift. It’s important to note that a hard reset will not delete any saved data or settings on your PS4 console.
If the reset doesn’t fix the analog stick drift, there are additional troubleshooting steps you can take, such as cleaning the controller or seeking professional repair.
| Pros | Cons |
|---|---|
| Easy and quick solution | May not fix hardware-related issues |
| No data loss | Requires external tools for hard reset |
| No need for professional assistance |
Cleaning your PS4 Controller
Cleaning your PS4 controller is an essential step in addressing analog stick drift. Dirt, dust, and grime can accumulate over time, leading to erratic movements and unresponsive controls. By regularly cleaning your controller, you can prevent these build-ups and maintain optimal performance. Here’s a step-by-step guide on how to clean your PS4 controller:
Step 1: Gather the necessary materials
Before you begin cleaning your PS4 controller, make sure you have the following items:
- Dry microfiber cloth
- Cotton swabs
- Isopropyl alcohol (70% concentration is recommended)
- Water
Step 2: Wipe the analog stick crevices
Take the dry microfiber cloth and gently wipe around the crevices of the analog stick. This will help remove any visible dirt or dust particles that may be causing the drift. Pay special attention to the gaps between the stick and the controller body.
Step 3: Clean the hard-to-reach areas
Use a cotton swab dipped in a mixture of water and isopropyl alcohol to clean the harder-to-reach areas of the controller. Gently swab around the base of the analog stick and other areas where dirt may have accumulated. Be careful not to saturate the cotton swab with too much liquid, as excess moisture can damage the internals of the controller.
| Steps to Clean Your PS4 Controller | Benefits |
|---|---|
| Gather the necessary materials | Ensures you have everything needed for effective cleaning |
| Wipe the analog stick crevices | Removes visible dirt and dust that may contribute to drift |
| Clean the hard-to-reach areas | Eliminates dirt build-up in areas that are difficult to access |
Note: It’s important to avoid using excessive moisture or cleaning solutions directly on the controller. Always use a microfiber cloth or cotton swabs dampened with the water and isopropyl alcohol mixture to clean.
Step 4: Allow the controller to dry
After cleaning, allow the controller to air dry completely before using it again. This will ensure that no moisture remains inside the controller, which could cause damage or malfunction.
Regular cleaning every few months can prevent dirt build-up and potential issues with your PS4 controller’s analog sticks. By following these steps, you can maintain optimal performance and extend the lifespan of your controller.
Getting your PS4 Controller Repaired or Replaced by Sony
If your PS4 controller is relatively new and still under warranty, you can contact Sony for a free repair or replacement. Sony offers a convenient solution through their PlayStation Hardware & Repairs page. Here’s how you can check if you qualify:
- Visit the PlayStation Hardware & Repairs page on the official Sony website.
- Select “DualShock 4” as the type of controller you need assistance with.
- Follow the prompts provided to check if you qualify for a free repair or replacement.
Getting a professional repair or replacement directly from Sony ensures that your PS4 controller’s analog stick drift issue is properly fixed. It’s always recommended to take advantage of the manufacturer’s expertise and warranty coverage for a seamless resolution.
Don’t miss the opportunity to benefit from Sony’s support. Reach out to them and get your PS4 controller back in optimal condition.
Remember, if your PS4 controller is no longer under warranty or you prefer a faster solution, you can explore local repair shops or consider replacing the controller yourself. However, keep in mind that attempting self-repairs may void any remaining warranty or cause further damage if not done correctly. It’s always best to weigh your options and choose the solution that works best for you.
Disassembling your PS4 Controller for Deep Cleaning
If basic cleaning methods don’t resolve the analog stick drift on your PS4 controller, you may want to consider disassembling it for a more thorough cleaning. This process requires caution to avoid damaging other components, so only attempt it if you are comfortable with electronics. Follow the steps below to disassemble your PS4 controller for deep cleaning:
- Power off your PS4 controller and disconnect it from any power source. Gather the necessary tools, including a small Phillips screwdriver and a plastic opening tool.
- Start by removing the screws on the back of the controller using the Phillips screwdriver. Set the screws aside in a safe place.
- Gently insert the plastic opening tool into the seam between the front and back of the controller. Carefully pry the two halves apart, starting from one corner and working your way around the controller.
- Once the controller is open, be mindful of the delicate ribbon cables connecting the internal components. Avoid pulling or tugging on these cables.
- Identify the analog stick module, which is responsible for the movement of the analog stick. Carefully disconnect the module from the controller’s circuit board by gently lifting the connector with a fingernail or the plastic opening tool.
- Using a cotton swab dipped in a mixture of water and isopropyl alcohol, clean the exposed components of the analog stick module, removing any dirt or debris that may be causing the drift.
- Thoroughly clean the interior of the controller, including the buttons and other components, using the same cleaning solution and cotton swabs. Take care not to saturate the components with liquid.
- Allow the controller and its components to dry completely before reassembling.
- Once dry, reassemble the controller by aligning the two halves and gently pressing them together. Ensure that all the tabs on the front and back of the controller snap into place securely.
- Insert and tighten the screws on the back of the controller to secure the two halves together.
- Power on your controller and test the analog sticks for any remaining drift. If the issue persists, professional repair may be necessary.
By disassembling your PS4 controller for deep cleaning, you can effectively address analog stick drift and restore optimal functionality. Remember to exercise caution throughout the disassembly process and follow the steps diligently. If you’re unsure or uncomfortable with disassembling your controller, it’s always best to seek professional assistance.
| Methods | Advantages | Disadvantages |
|---|---|---|
| Basic Cleaning |
|
|
| Disassembling for Deep Cleaning |
|
|
| Professional Repair |
|
|
Expert Tip: Avoid Using Pressurized Air
When cleaning the interior parts of your disassembled PS4 controller, it’s important to avoid using pressurized air. The force from compressed air can potentially dislodge or damage delicate components, leading to further issues with your controller. Stick to using cotton swabs and a cleaning solution to gently remove any dirt or debris.
Conclusion
Controller drift can be a frustrating issue experienced by PS4 Slim users. However, there are several effective solutions available to fix this problem and enjoy uninterrupted gaming sessions. By troubleshooting the analog stick drift, you can regain control of your gameplay without the frustration.
One of the first steps to address controller drift is resetting your PS4 controller. This can often resolve various issues, including analog stick drift. If a reset doesn’t work, you can try cleaning the controller. Regular cleaning can prevent dirt and grime buildup that may cause drift.
If these initial troubleshooting steps don’t fix the problem, you have the option to seek professional assistance. Sony offers repair services for PS4 controllers that are still under warranty. Alternatively, for those with technical expertise, disassembling the controller for a deeper cleaning or replacing the analog sticks and potentiometer can be a viable solution.
Overall, whether you choose to troubleshoot the issue on your own or seek professional help, addressing controller drift on your PS4 Slim is crucial for a seamless gaming experience. By following these simple steps and exploring your options, you can be back to enjoying your favorite games in no time.
