Xbox Controller Button Replacement Guide
Welcome to our comprehensive Xbox Controller button replacement guide. In this article, we will provide you with step-by-step instructions on how to replace the buttons on your Xbox Controller. Whether you’re dealing with sticky or unresponsive buttons, we’ve got you covered. By following our guide, you’ll have your controller working like new in no time.
We understand the frustration of dealing with faulty buttons on your Xbox Controller. That’s why we’ve created this guide to help you fix the problem quickly and effectively. With just a few simple steps, you’ll be able to replace the buttons and enjoy a smooth gaming experience again.
Before we dive into the button replacement process, it’s essential to have a basic understanding of how to disassemble the Xbox Controller. Disassembling the controller is the first step in accessing the buttons for replacement. In the next section, we’ll guide you through the process of disassembling your controller.
Stay tuned for Section 2: Disassembling the Xbox Controller, where we’ll walk you through the step-by-step process of taking apart your controller to access the buttons for replacement.
Disassembling the Xbox Controller
If you’re looking to replace the buttons on your Xbox Controller, the first step is to disassemble it. Follow these step-by-step instructions to safely and effectively disassemble your controller.
- Remove the battery pack cover and take out the batteries.
- Next, detach the side handles by carefully pulling them away from the controller.
- Use a spudger or a small, flat tool to gently pry off the side plates of the controller.
- Locate the hidden screw behind the label on the back of the controller and remove it.
- Set aside the screws from the back of the controller.
- Carefully separate the front and back plates of the controller, ensuring not to damage any internal components.
- Detach the rumble motors from the back plate of the controller.
- Remove the bottom motherboard by gently lifting it away from the controller.
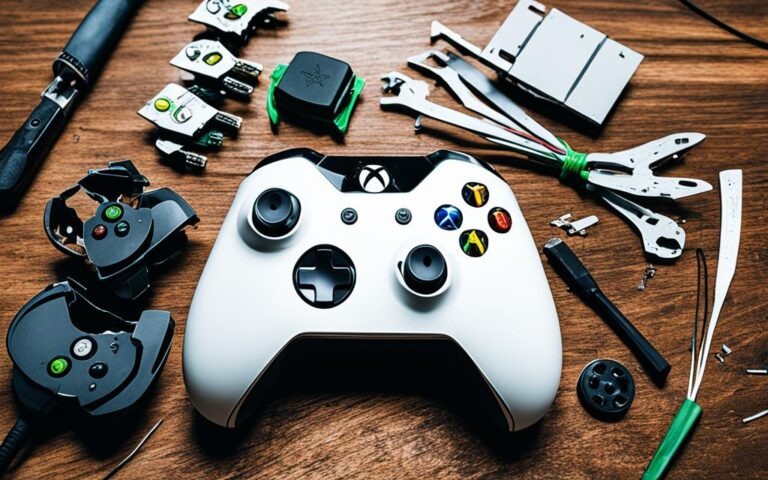
- Finally, remove the rubber backing and push out the buttons, making sure to keep them organized for easy reassembly.
This image shows the different stages of disassembling an Xbox Controller. Refer to it as a visual guide while following the disassembly steps.
Related:


Cleaning the Controller
While you have the controller disassembled, it’s a good idea to clean it. Keeping the Xbox Controller clean is essential for optimal performance and longevity. Follow these steps to effectively clean your controller and ensure a pristine gaming experience.
Gather Your Cleaning Supplies
Before you begin cleaning, gather the necessary supplies:
- Warm water
- Dish soap
- Isopropyl alcohol
- Clean, soft cloth or sponge
Cleaning the Plastic Pieces
Start by cleaning the plastic components of the controller. These include the front and back plates, buttons, and other removable parts. Here’s how to do it:
- Fill a bowl with warm water.
- Add a small amount of dish soap to create a mild cleaning solution.
- Submerge the plastic pieces in the soapy water and let them soak for a few minutes to loosen any dirt or grime.
- Using a soft cloth or sponge, gently scrub each piece to remove any remaining dirt or residue.
- Rinse the plastic pieces thoroughly with clean water to remove any soap residue.
- Pat dry each piece with a clean cloth or let them air dry completely.
Cleaning the Electronic Components
Next, it’s important to clean the electronic components of the controller to remove any dust or debris that may affect its functionality. Follow these steps:
- Dampen a clean cloth or sponge with isopropyl alcohol.
- Gently wipe the circuit board, buttons, and other electronic parts to remove any dust or grime buildup.
- Ensure that no liquid seeps into the electronic components.
- Allow the controller to air dry for a few minutes or use a clean, dry cloth to wipe away any excess moisture.
By following these cleaning steps, you’ll maintain a clean and functional Xbox Controller. Regularly cleaning your controller will help prevent sticky buttons, unresponsive controls, and buildup of dirt and grime. Remember to assemble the controller only after all the components are completely dry.
Replacing the Bumper Button Switches
To replace the bumper buttons on your Xbox Controller, you will need a soldering iron, desoldering wick, solder, and replacement bumper switches. Follow these step-by-step instructions to ensure a successful replacement:
- Begin by heating up the desoldering wick using the soldering iron. Place the hot desoldering wick on top of the old bumper switches to remove them. This will help to melt the solder, allowing you to easily take out the old switches.
- Once the old switches are removed, carefully insert the new bumper switches into their designated slots on the controller board. Make sure they are positioned correctly and aligned with the other buttons.
- Next, use the soldering iron to solder the new switches onto the board. Apply a small amount of solder to the contact points and ensure the connections are secure.
- After soldering, visually inspect the switches to ensure they are flat and close to the board. This will prevent any interference or malfunction during gameplay.
Note: When using a soldering iron, follow all safety precautions to avoid injuries or damage to the controller. Take breaks if necessary and work in a well-ventilated area.
Once you have successfully replaced the bumper button switches, you can move on to the next step of reassembling the Xbox Controller. Refer to the following section for detailed instructions on how to complete this process.
| Required Tools | Description |
|---|---|
| Soldering Iron | A tool used for melting solder to create electrical connections. |
| Desoldering Wick | A braided copper wire used to remove solder from electronic components. |
| Solder | A metal alloy used to create a permanent bond between electrical components. |
| Replacement Bumper Switches | New buttons specifically designed for Xbox Controllers. |
Reassembling the Xbox Controller
Now that you have successfully replaced the bumper buttons on your Xbox Controller, it’s time to reassemble the controller. Follow the reverse steps of the disassembly process to ensure a smooth reassembly. Taking your time and being careful with each step will help ensure that all the parts are properly aligned and connected, resulting in a fully functional controller.
Here is a step-by-step guide to help you reassemble the Xbox Controller:
- Gather all the components: Before reassembling the controller, make sure you have all the components in front of you. This includes the front and back plates, battery pack cover, batteries, side handles, rumble motors, rubber backing, and the buttons you previously removed.
- Attach the rubber backing: Begin the reassembly process by placing the rubber backing onto the back plate of the controller. Ensure that it is aligned properly and covers all the necessary areas.
- Reattach the buttons: Carefully push the buttons back into their respective slots on the front plate of the controller. Make sure they fit snugly and stay in place.
- Connect the rumble motors: Next, reconnect the rumble motors to the bottom motherboard of the controller. Ensure they are securely attached and aligned with their respective connectors.
- Put the controller back together: Align the front and back plates of the controller and carefully snap them back together. Ensure that all the clips on both plates are securely fastened.
- Reattach the side handles: Place the side handles back onto the controller, ensuring they are aligned with the corresponding slots. Press them firmly to secure them in place.
- Insert the batteries and battery pack cover: Finally, insert the batteries into the battery compartment and attach the battery pack cover. Ensure that the cover is securely fastened to prevent any accidental openings while using the controller.
Once you have completed these steps, you have successfully reassembled your Xbox Controller after replacing the bumper buttons. Take a moment to inspect the controller to ensure that all the components are properly aligned and connected. You can now enjoy using your fully functional controller for your gaming sessions.
Potential Problems with the Bumper Button
When using an Xbox Controller, you may encounter several common issues with the bumper button. These problems can include:
- Dust or gunk buildup around the button
- A broken plastic bumper piece
- A faulty button
- A faulty controller board
To address these problems, different solutions may be required based on the specific issue:
If you notice dust or gunk buildup around the bumper button, it’s essential to clean the area. Dust accumulation can interfere with the button’s functionality. Use a soft cloth or a cotton swab dipped in isopropyl alcohol to gently clean the affected area. Be careful not to use excessive force or damage the button in the process.
If cleaning doesn’t resolve the problem, the issue may lie with a broken plastic bumper piece. A cracked or damaged bumper can cause the button to malfunction. In this case, replacement is necessary. Ensure you purchase a compatible bumper piece and follow the correct replacement procedure.
However, if the issue persists even after cleaning and replacing the plastic piece, it’s possible that the button itself is faulty. To determine if this is the case, you can use a continuity tester. This tool helps identify whether the electric current passes through the button when pressed. If there is no continuity, the button may need to be replaced.
If none of the above solutions work, the problem might stem from a faulty controller board. In such cases, it may be necessary to troubleshoot or seek professional assistance for further diagnosis and repair.
Addressing these potential problems with the bumper button ensures optimal performance and responsiveness from your Xbox Controller.
Example Continuity Tester:
| Continuity Tester | Description | Price |
|---|---|---|
| A handheld electronic device used to determine if the electric current passes through the bumper button when pressed. | £19.99 |
Conclusion
Replacing the buttons on your Xbox Controller can be a straightforward process if you follow the right steps. By disassembling the controller, cleaning it, replacing the bumper button switches, and reassembling it, you can fix any issues with sticky or unresponsive buttons.
When disassembling the controller, be sure to take your time and follow the instructions carefully. This will help you avoid damaging any components or losing small parts. Additionally, cleaning the controller is an important step to remove any dirt or grime that may be causing button malfunctions.
Replacing the bumper button switches may require soldering, so be cautious and use a soldering iron safely. If you’re not comfortable with soldering, it’s best to seek assistance from a professional. Once the new switches are in place, make sure they are properly aligned and soldered securely.
After reassembling the Xbox Controller, test all the buttons to ensure they are functioning correctly. Now, you can enjoy your fully functional Xbox Controller and continue gaming without any problems. Remember to take care of your controller to prevent further button issues in the future.